


Components:
- A. Back casing with camera cover – injection mold plastic
- B. Slider mechanism plate – metal and plastic
- C. Back casing/battery cover – injection molded plastic
- D. Screws – metal
- E. 3.7 volt Lithium ion battery
- F. Front Speaker and flex cable
- G. Front side buttons – injection molded plastic
- H. Front cover and LCD protector
- I. LCD connector and flex cable
- J. Front number keyboard circuit board
- K. Front number keyboard buttons – plastic
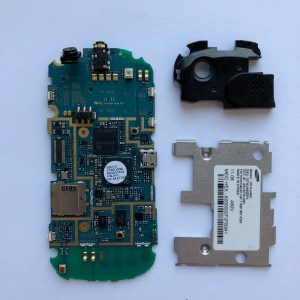
- L. Back speaker and camera module, also housing audio jack – IMP for module case
- M. Slider mechanism base plate – metal
- N. Screws – metal
- O. Screws – metal
- P. Screws – metal
- Q. EMI Shield – metal
- R. Screws – metal
- S. Back Plate of front half – IMP
- T. QWERTY keyboard circuit
- U. QWERTY keyboard buttons – plastic
- V. “Front” casing for back half housing QWERTY keyboard
- W. LCD display
- X. Rear camera
- Y. Sim card space?
How to breakdown:
Tools Used: screw driver, tweezers, x-acto knife, hair dryer, phillips head, my nails 😛
Techniques: unscrewing, heating up, and prying, lots of prying
Step 1:Remove back casing and detach logic board


Step 2: Open up the front half of the phone, starting with the sliding mechanism side, and remove LCD panel and front keyboard circuit from front casing.


Step 3: Detach LCD connector and remove EMI shield and speaker module with camera/audio jack from logic board.


Two design elements I found interesting:
- The slider, the sliding mechanism, and the holes in parts of the casing are positioned in such a way to accommodate the LCD connection. Prior to taking it apart, I had no idea how that worked, so it was exciting to discover during the teardown!
- I like the difference in texture between the back plate covering the battery and the rest of the phone. While the rest of the purple plastic in the case is smooth, the back has a more raised texture. I think this was done for better grip when the user is holding the phone and to distinguish the part that can be removed to access the battery.