For my first-ever teardown, I disassembled, (and mildly destroyed) a Nintendo Wii remote. I only needed access to a few tools, which include a tri-winged screwdriver, a metal file (to level some of the plastic pieces), and an Olfa blade to help pry the device open.
What you’ll need:
- tri-winged screwdriver
- Olfa blade
- File*
*Dependent on screwdriver
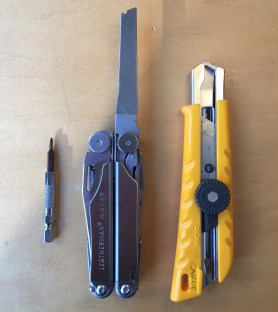

(Left to Right: Tri-winged Screwdriver, File (Letterman Knife), Olfa blade)
First, examine the backside of the remote, and remove the battery cover, there are two small screws you will need to remove, with the tri-winged screwdriver located where each battery sits.

Next, you’ll want to pry the two main pieces apart. Don’t do that just yet — you still have two screws to find. They can be found at the bottom of the remote, on the backside, under the two screws you have already removed.
*Pro Tip* make sure you have a narrow and long screwdriver to complete this task. The screws are encompassed by tall walls of plastic and are tough to get to.
I did not have the means to reach the screws initially and needed to take a detour. The photos below showcase the brilliant use of a metal file. The file was able to eat through the plastic fairly quickly and leveled the plastic, allowing me to reach the screws with my screwdriver.
Now, you can pry the remote into two pieces easily, like this:

Look at those muscles!

And here are all their names…


In this particular device, all components on the circuit board are soldered.
In breaking down the components of the Wii remote, I particularly enjoyed the small rubber/ plastic bits that are placed between the external buttons (which we press) and the circut board. These pieces are a smart design decision because their flexible and soft qualities prevent any contact between buttons and the circuit board. Also, the experience of pressing a button, and the slight resistance that the soft pieces provide, is a feeling that gamers and non-gamers alike can joyfully relate to!
Similarly, the hinged plastic embedded in the back portion of the remote, used for pressing “B” with your index finger, is a smart design choice. The button is modeled after a trigger, which evokes a certain reaction during fictional play for gamers. Rather than insert a typical button, the hinge calls for a particular action from its user.