


Tools used: precision screwdriver, precision pliers.
My approach to this teardown was to keep everything as intact as I could. I removed the screws and gently pried the plastic pieces away one by one. I also had to thread the PCB through the parts as I removed it. My biggest takeaway and disappointment was how this camera (like other electronic point and shoots) is manufactured to not be repairable. the way the pieces are stacked, and the PCB is layered, it’s not possible to access certain pieces without destroying others. That being said, the PCB was most impressive to me because it was a single piece woven throughout the different sections and mechanisms of the camera.
I began the teardown by removing the plastic frame pieces.
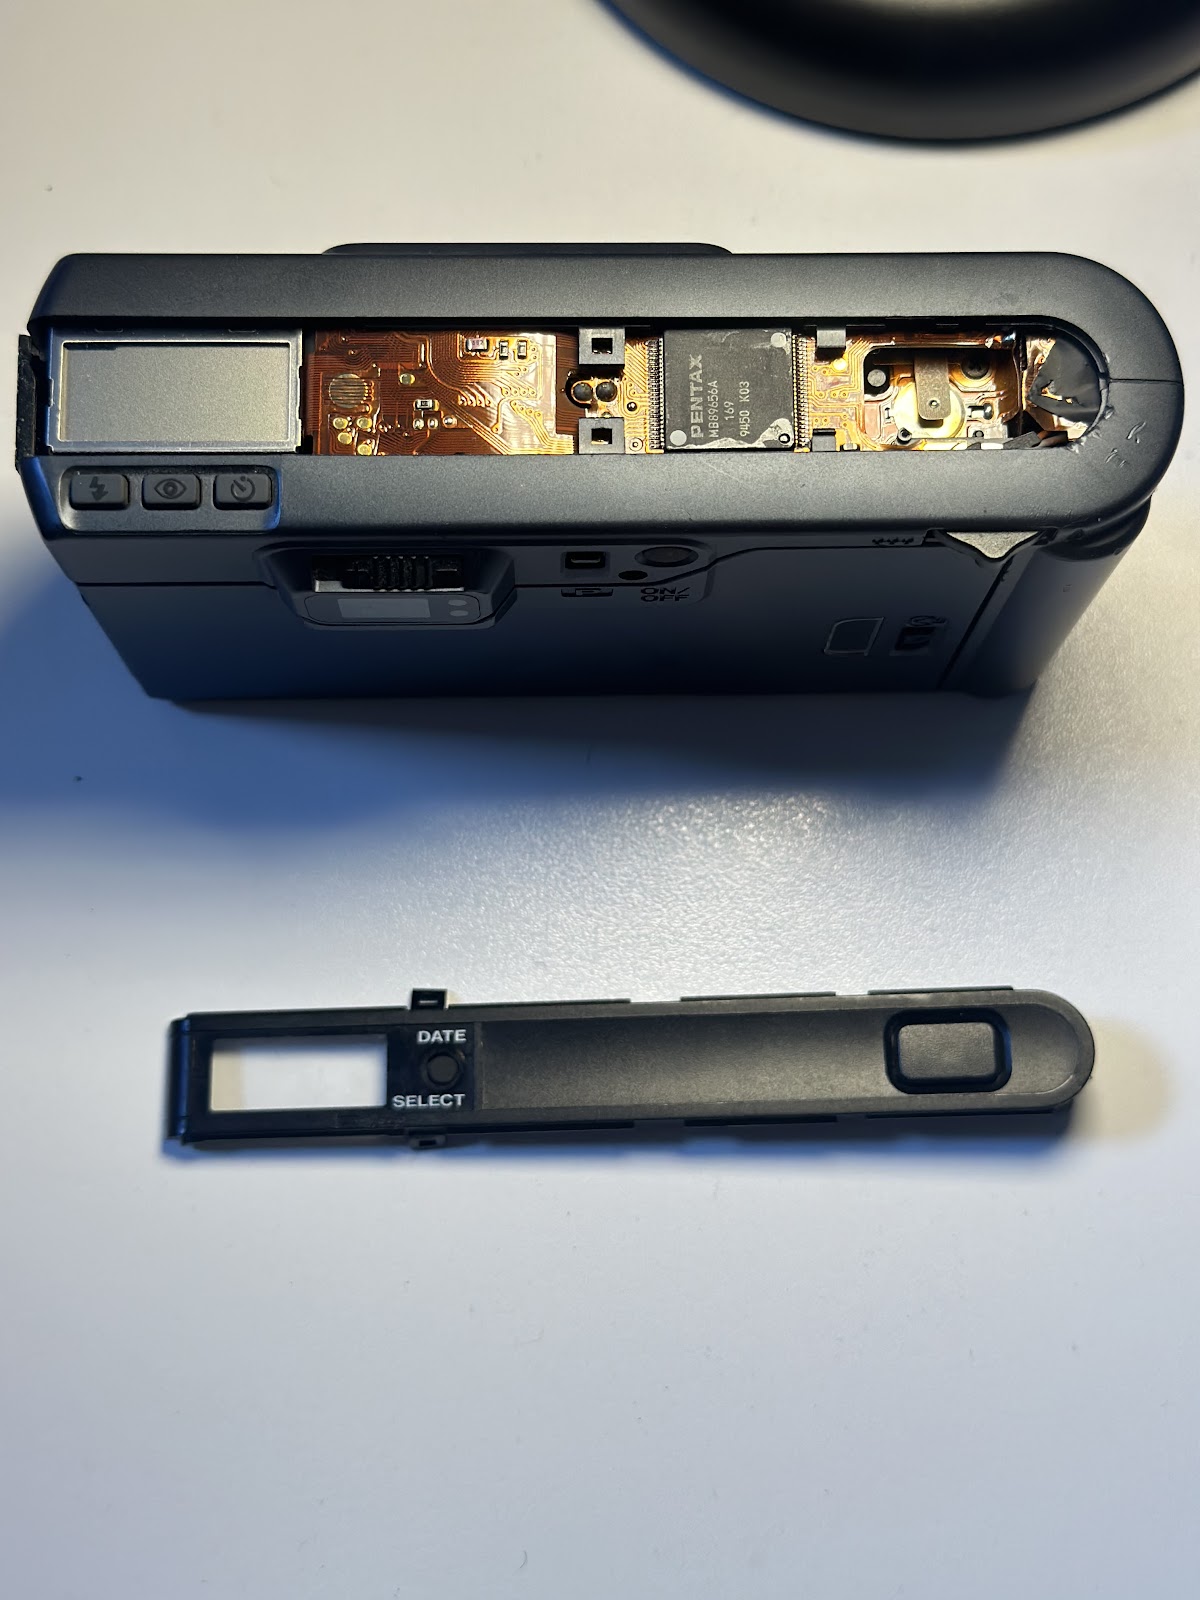


I then proceeded to loosen the pieces inside the camera that were blocking access to the circuitry.
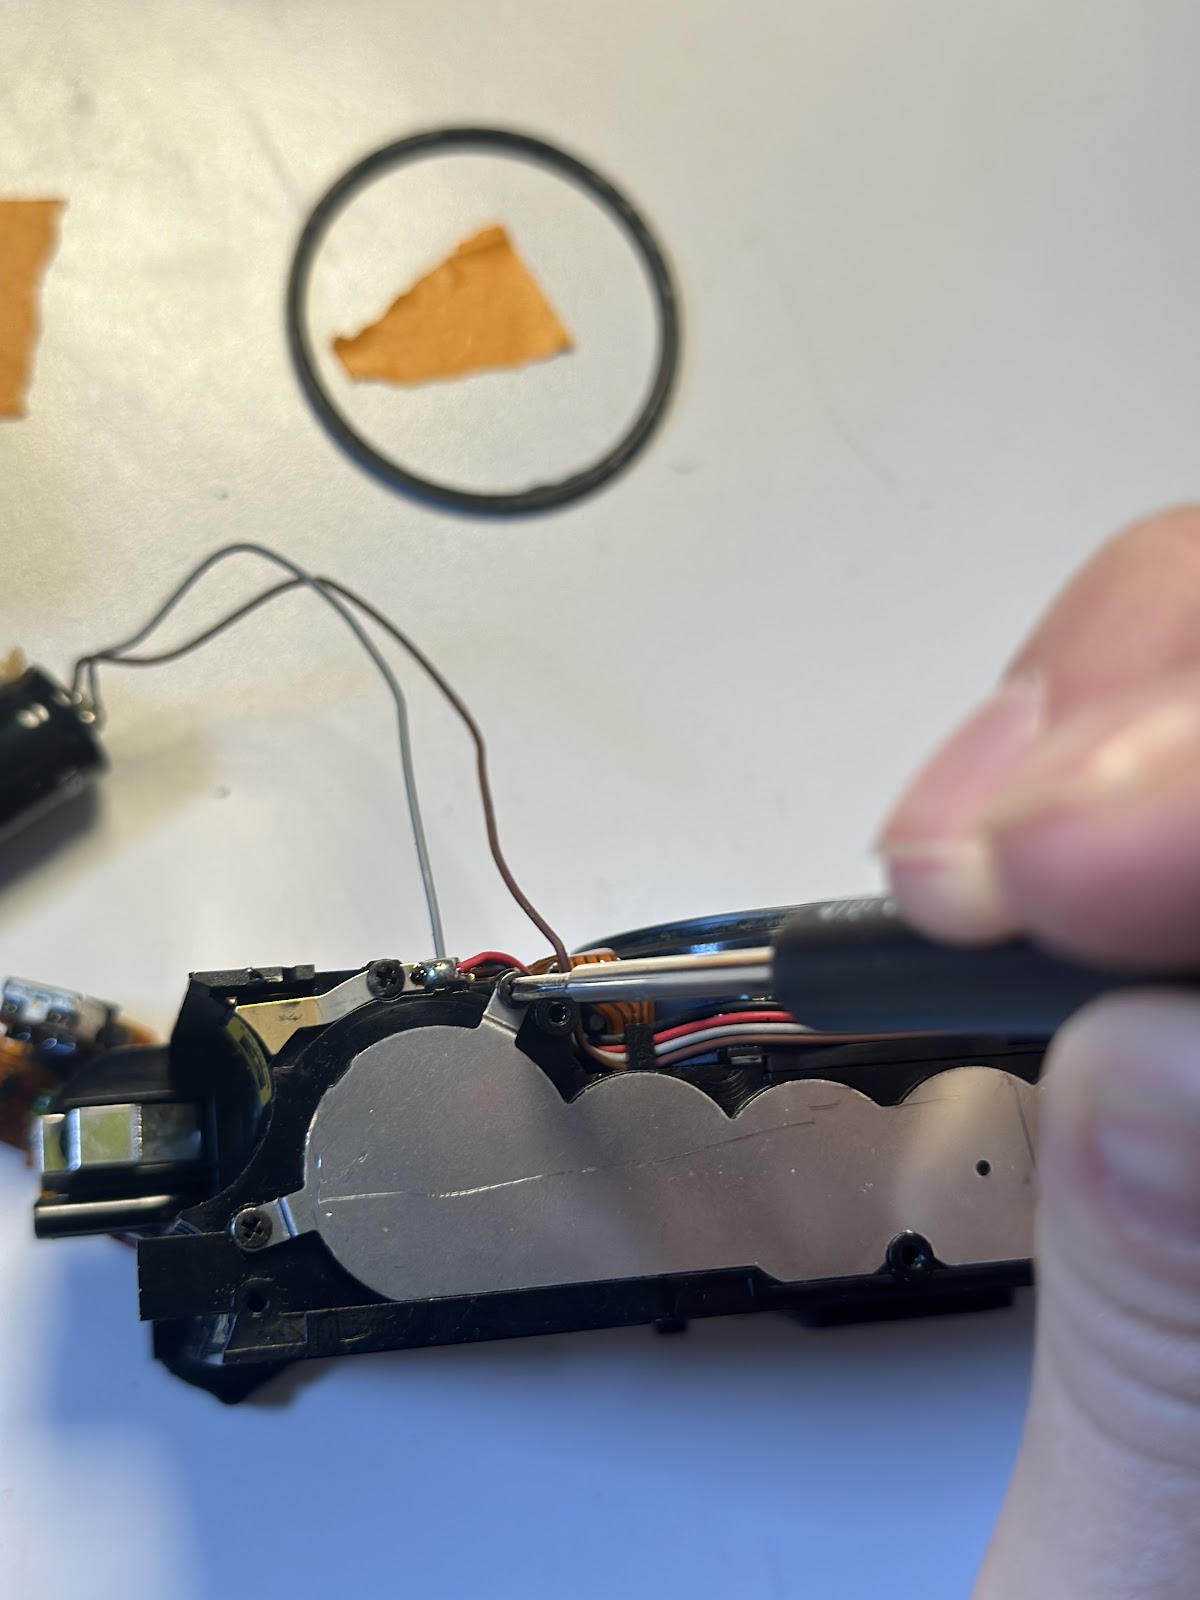

Including removing the gear cover plate

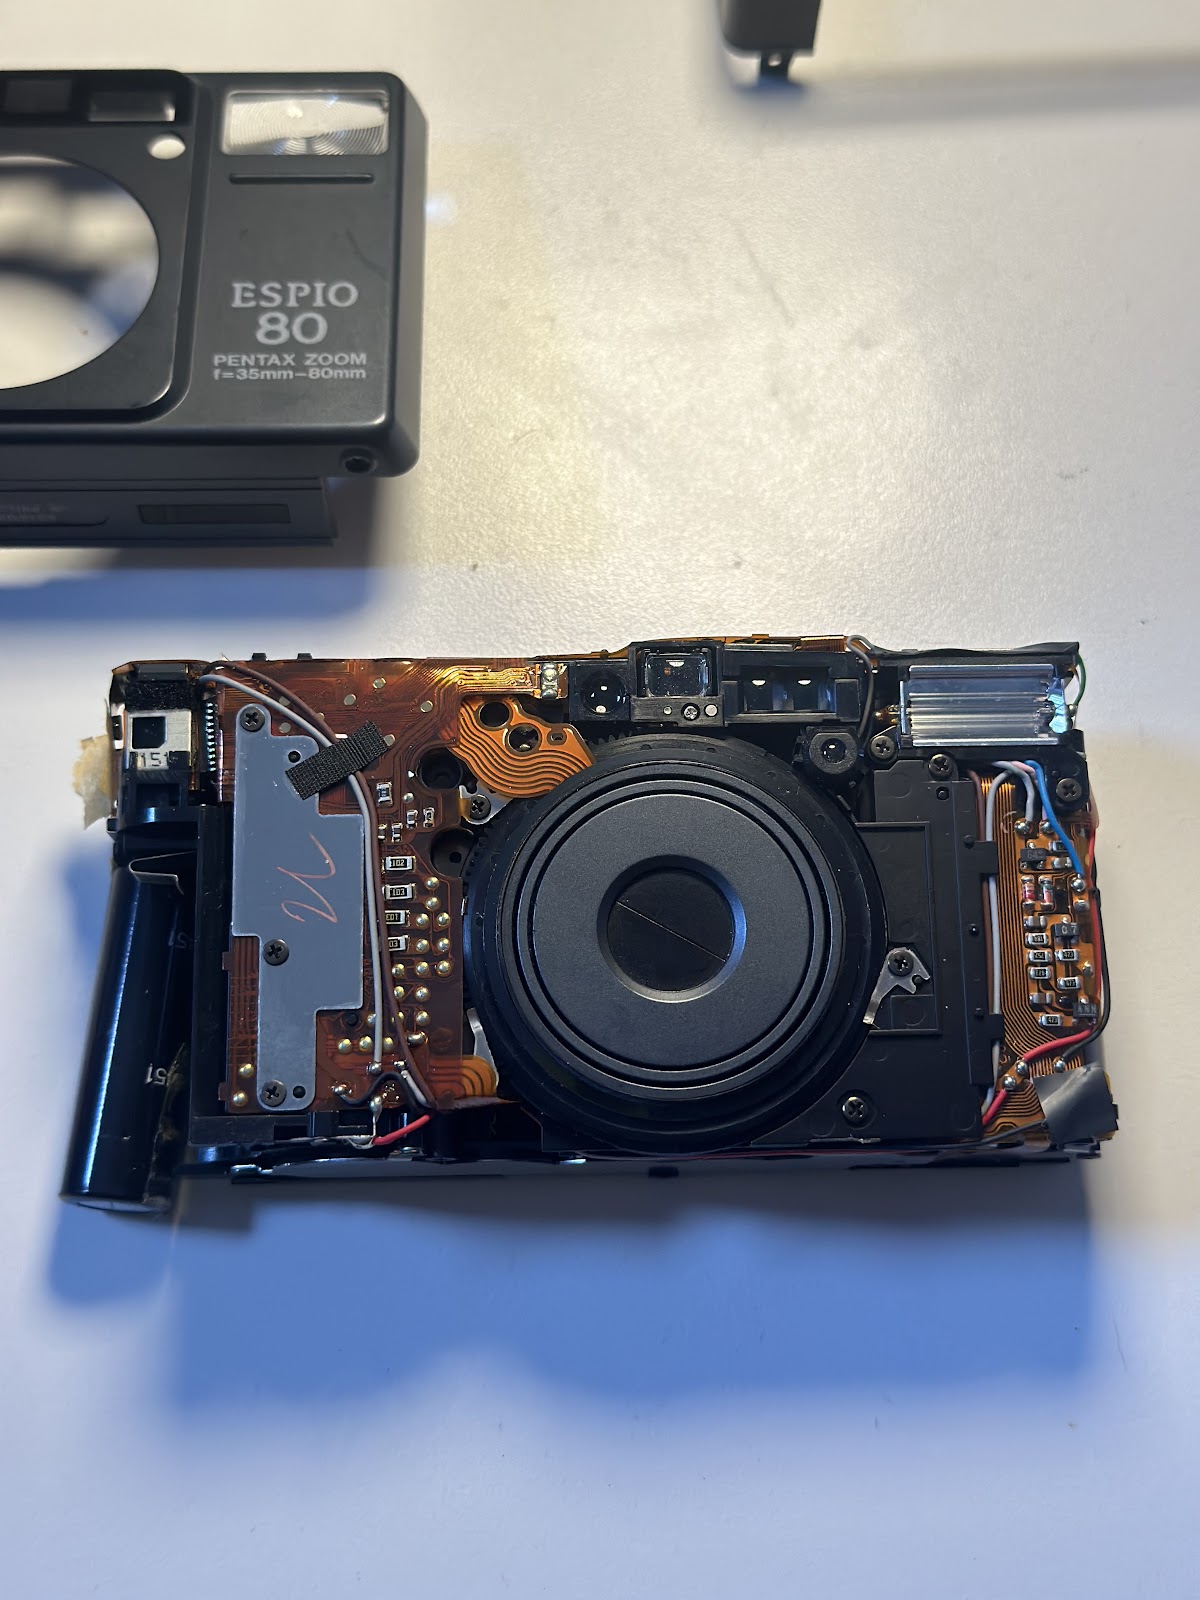
Then I removed the circuitry for the flash

And the rest of the internet circuitry

After I removed the PCB, I could access the rest of the internal mechanics of the camera. So I then separated out the film winding mechanism:

The shutter/zoom lens:

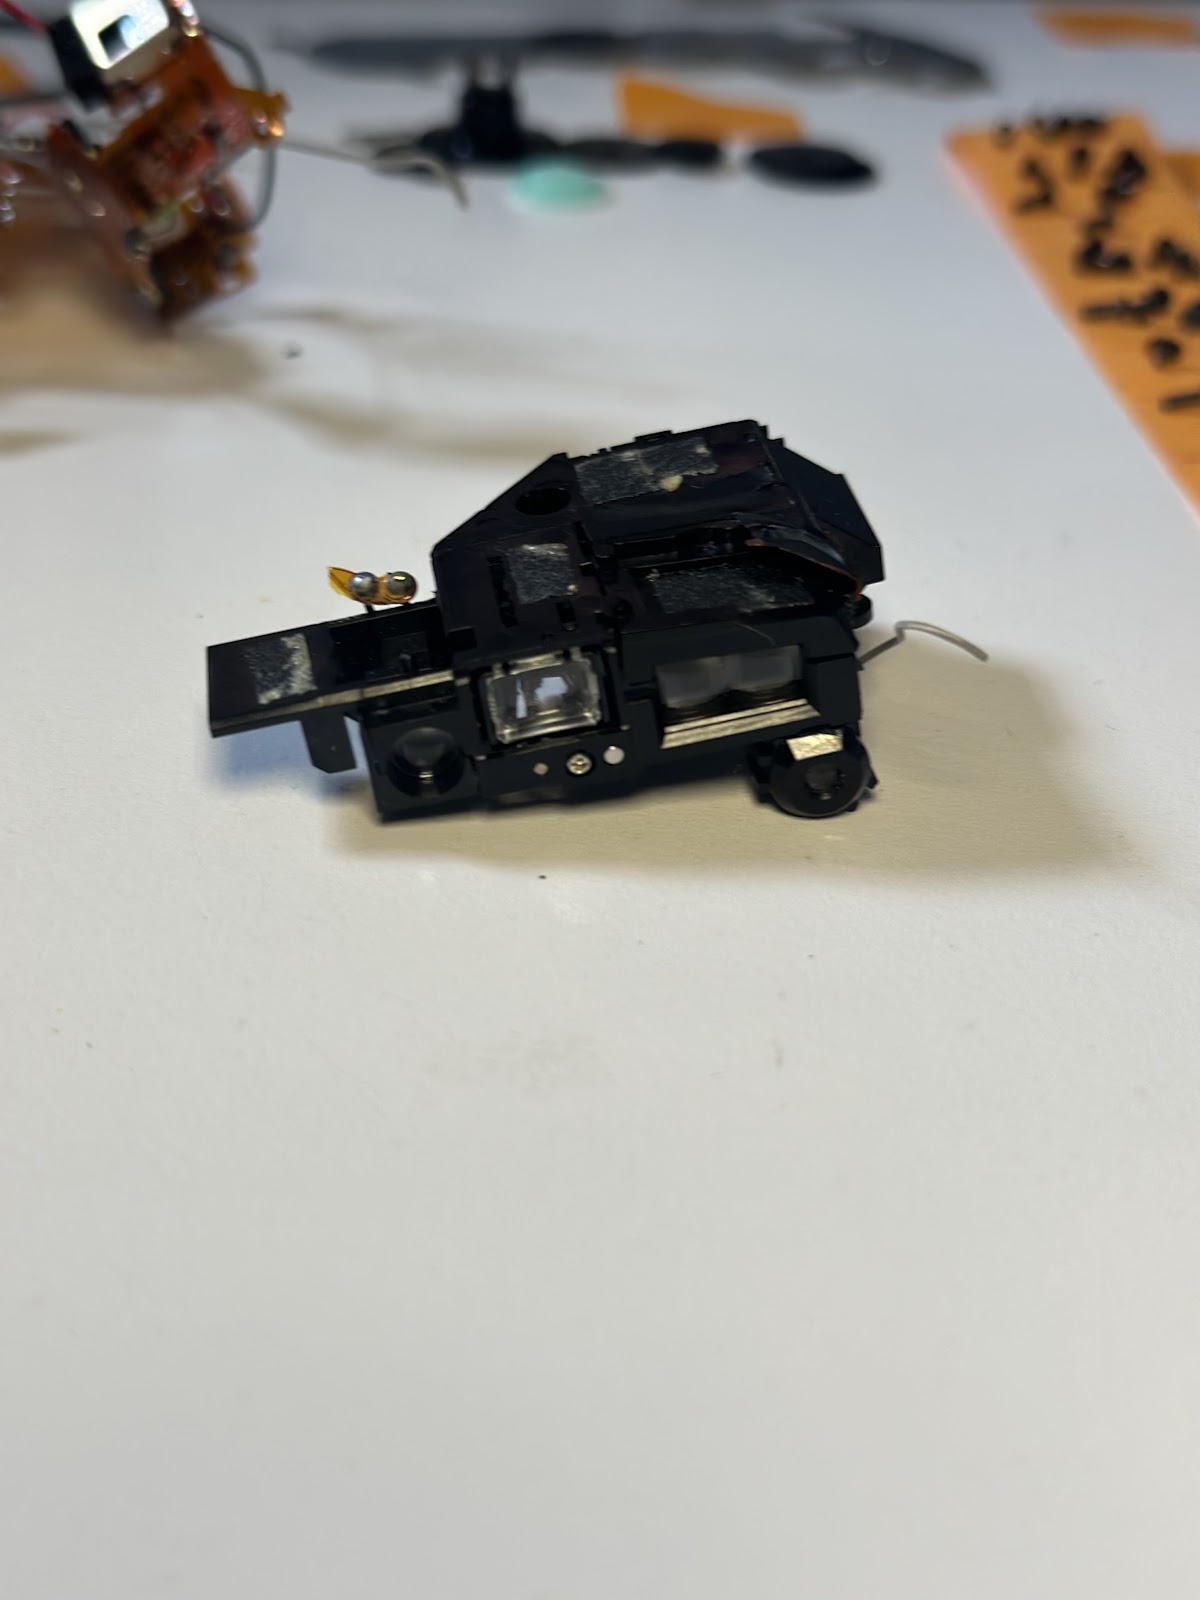
And the viewfinder, which completed the tear down:
| PART | MATERIAL | MANUFACTURING PROCESS |
| Top plate | plastic | Injection molding |
| Exterior body bracket | plastic | Injection molding |
| Backdoor | plastic | Injection molding |
| Front plate | plastic | Injection molding |
| Gear cover plate | Aluminum | Die casting |
| gears | plastic | Injection molding |
| Internal shutter trigger | plastic/metal | Injection moulding/die casting |
| Flex circuit (PCB) | copper/acrylic | plating/boding/baking |
| LCD screen | glass/aluminum | molding/bonding |
| Microcontroller | ||
| Lithium-ion battery (for flash) | ||
| Semiconductor | ||
| Motor (for shutter) | ||