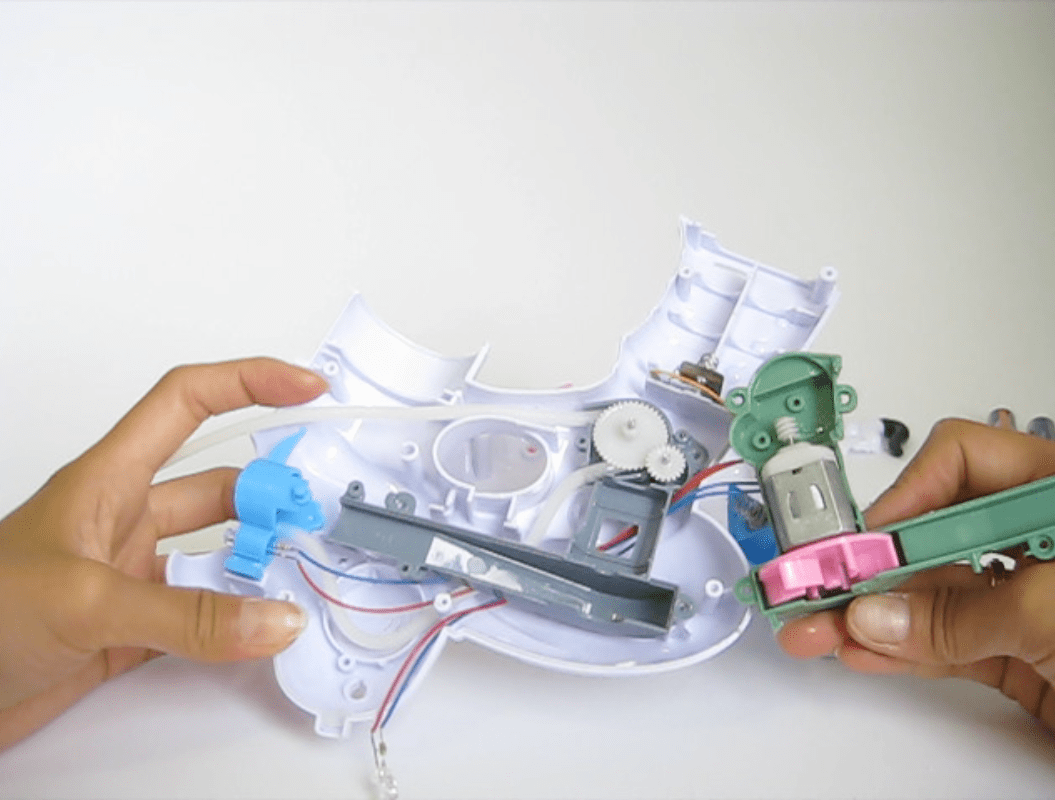
This plastic electronic keyboard toy was manufactured in China. It creates distinct sounds corresponding the pressed keys. Simple construction made it easier to dissemble. The toy also has very few components and I have indicated each ones in the video above.
As I investigate each elements, I found that one of the most interesting part is the keyboards. Eight individual pieces are made of injection moulded plastic (?) and have build-in conductors underneath. When pressing these conductors, they touch the circuit board and complete the electrical circuit which create individual sounds. I believe that the designer has to truly understand the electric circuit operation to be able to come up with this solution to sound making.
This is Tim & his Truck. He deliveries packages and makes friends along the way. He also romanticizes what it’s like to be a truck driver, brainwashing little kids with adorable rhymes & melodies until they beg their parents to enter his profession.
The teardown was done using one tool: a Philips screwdriver (I couldn’t identify what size it was but it’s pretty small).
It was rather easy to take apart and had a very simple construction. All the parts were made of plastic and were kept together by metal screws. I imagine that the parts were made by injection molding.
I had some trouble identifying the different chips and what they did. I tried to look them up but didn’t have much luck with my searches (someone help?). I can tell you that they operate by switch (by pushing a button) and when turned on, make a sound and also light up.
The 2 design elements that interested me were the choice to give the toy a boy dominant gender and the decision to fuse the larger chip board to the base of the toy which holds the wheels and batteries. I think the designer decided to give the toy a boy gender to appeal to wider societal beliefs of who a truck driver is and what the role represents (gender roles is a bit of a black hole so I won’t get too far into it here, but happy to talk more if you like!). For the decision to fuse the larger chip board to the base of the toy, I think this may have to do with safety and also providing a stable base for the “brain” of the toy.
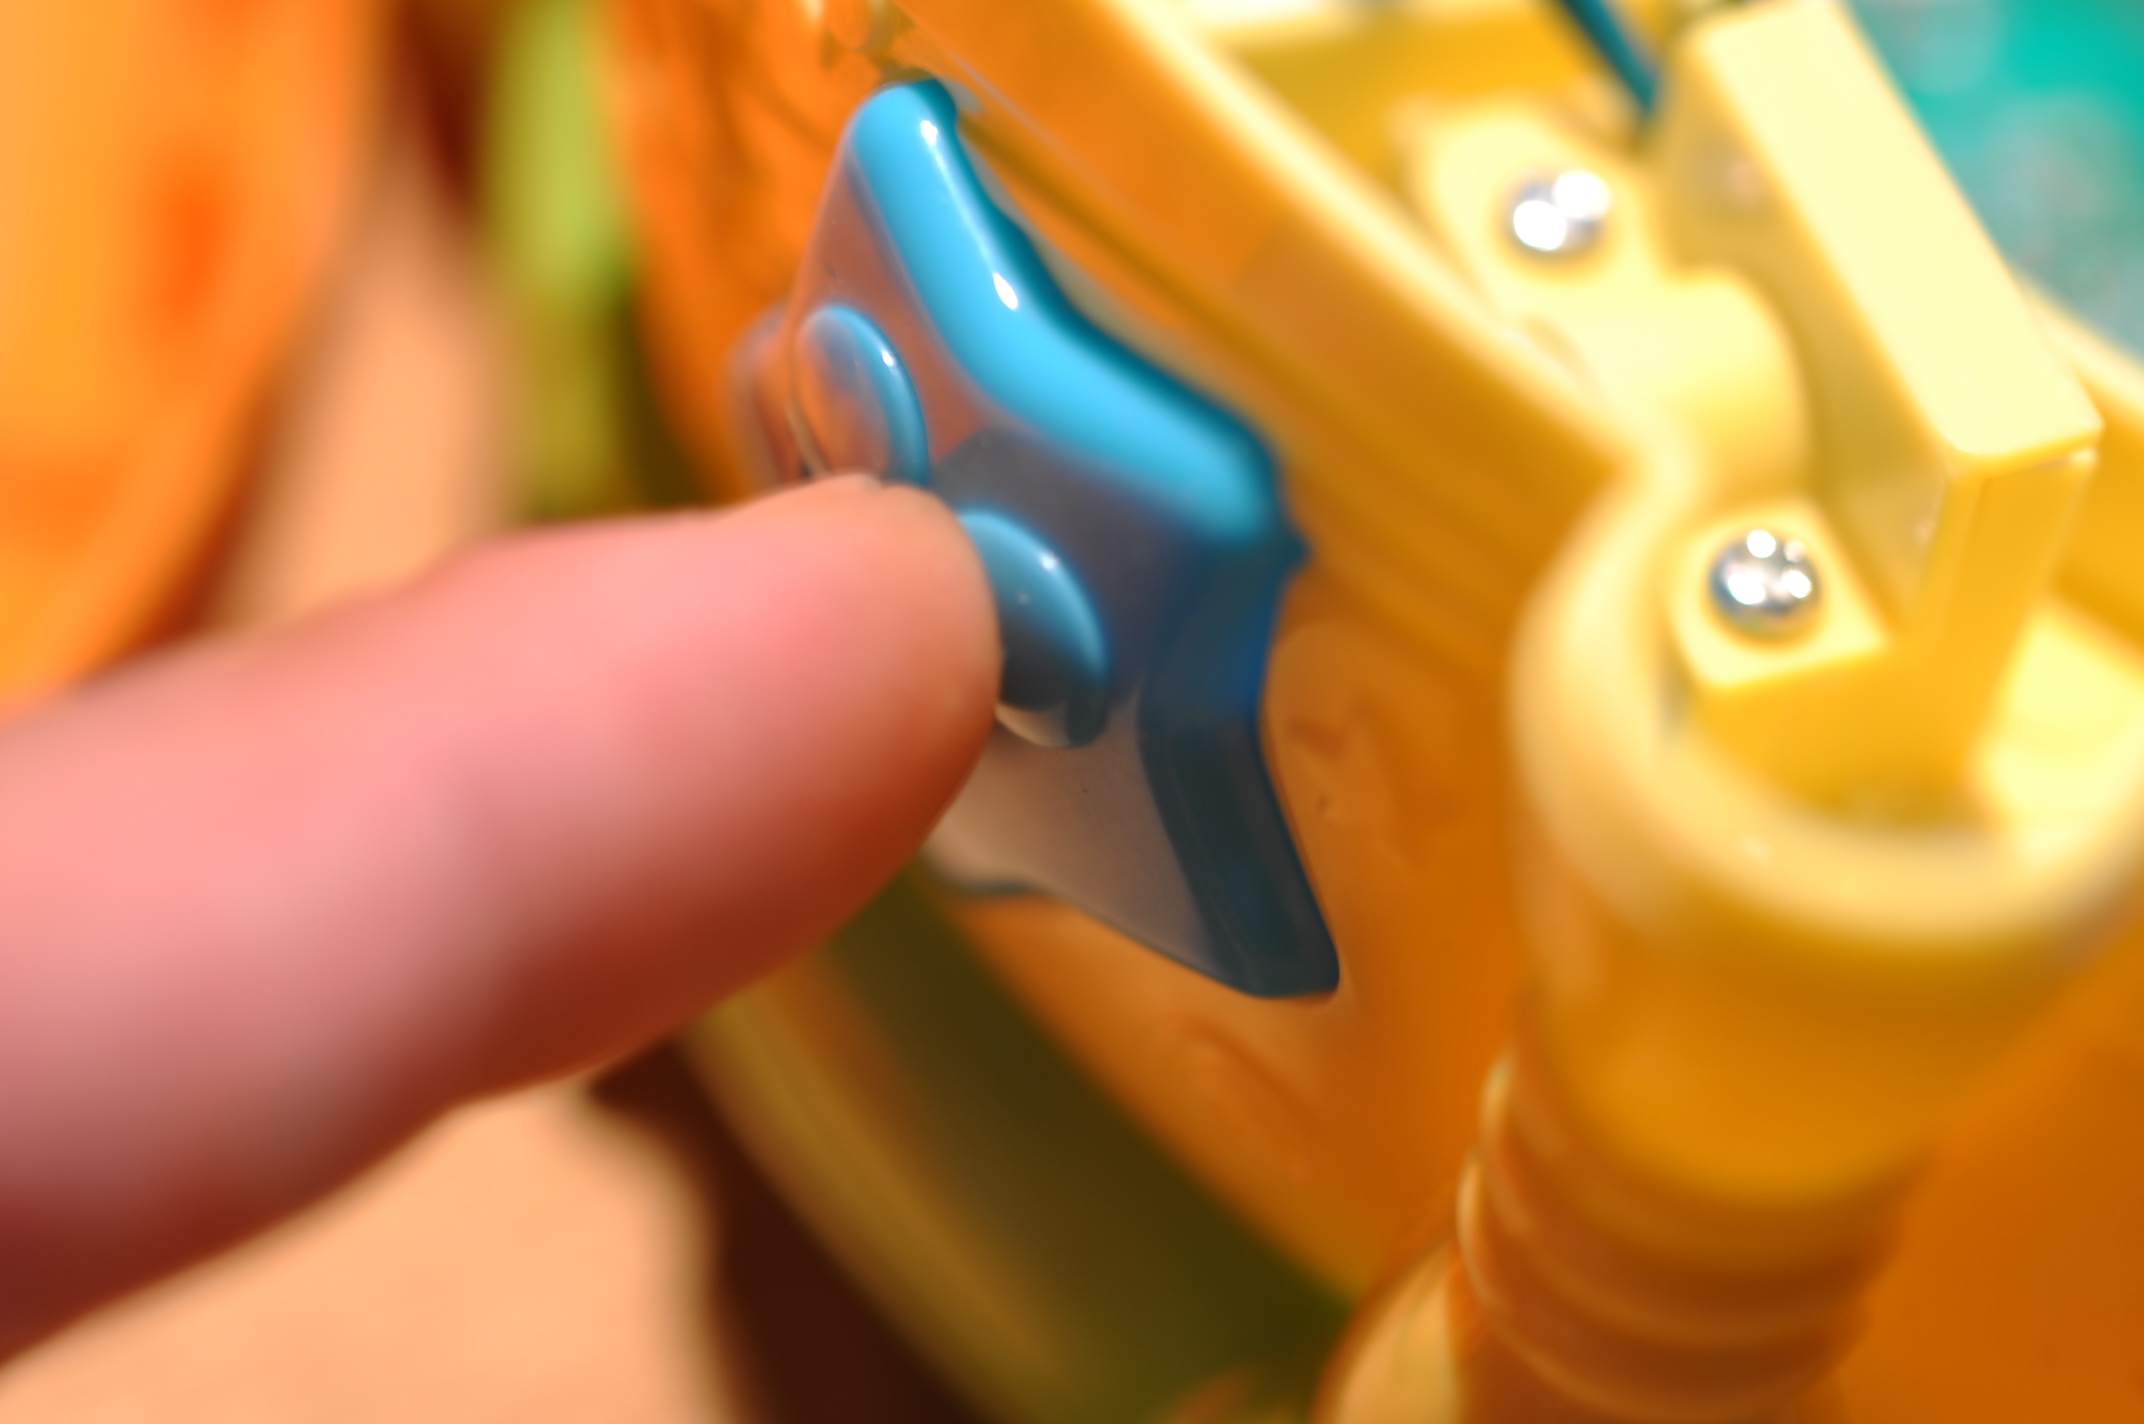
$5 bubble gun sold on the street corners comes with two bottles of bubble solution and three AA batteries (inside the gun). Only thing you need to do is to open the bubble solution cap and twist on the gun. Two blue LED lights will light up and the pooch will blow bubbles out his mouth when you full the trigger.
I used a eye glass screw driver and a precision screw driver to remove screws, and a surgical forceps to somehow hold one part and remove other parts near the motor. And of course paper towel. I thought the inside design will be water proof, but the bubble solution was leaking everywhere and making some parts of the wire were rusted. (Cheap toys!)
As soon as I unscrewed the bottom cover, the batteries just popped out and revealed the cords inside. The red one is connecting the batteries to the motor, the yellow one is connecting the batteries to the trigger and then to the motor and the blue one is attached to a resistor to the LED light and then circle back to the motor through the red cable.
I found the pink funnel with a small metal attached to the end pretty clever. It catches the extra solution dripped from the frame and channels the solution back to the bottle, and that keeps the motor and other parts from the liquid.
The motor is a CHAOLI brand (a chinese motor manufacture company based in Guangdong), and it has a 104 resister (should be 100kΩ) attached to it. The welding wasn’t nicely done, so the wires were all half broken and rusted.
The whole system was simple yet quite complicated… the rubber hose has to suck up the bubble solution from the bottle to the frame, and a piece of blue plastic has to go up and down to make sure there is always a layer of solution on the frame. And then the pink plastic fan attached to the bottom of the motor has to rotate to blow the bubble out. Most of the parts are plastic most likely through the injection molding.
Some parts were very loosely attached that when I removed a piece off, other pieces fell a part all together… But I found the color coding different plastic and wire parts useful, especially in assembly. There is no need to make the inside parts different color, but the designer clearly made the decision to do it for people who assemble them. Also, there was almost no glue involved in assemble the gun. Everything comes a part and designed to fit back together, so it was easy to separate the plastic and metal.
I just felt like I need to share this part with everyone. The battery cover is “Made in PRC” (meaning made in People’s Republic of China), on the cover, it says “Make In Shantou, China” and on the bottle, it says “MADE IN CHINA.” Which tells me that they probably came from different factories in China. The funny thing is… “Make in Shantou, China” supposed to be “Made in Shantou, China”… and “THIS NO FOR DRINKING” on the bottle is grammatically wrong yet gets the meaning across.
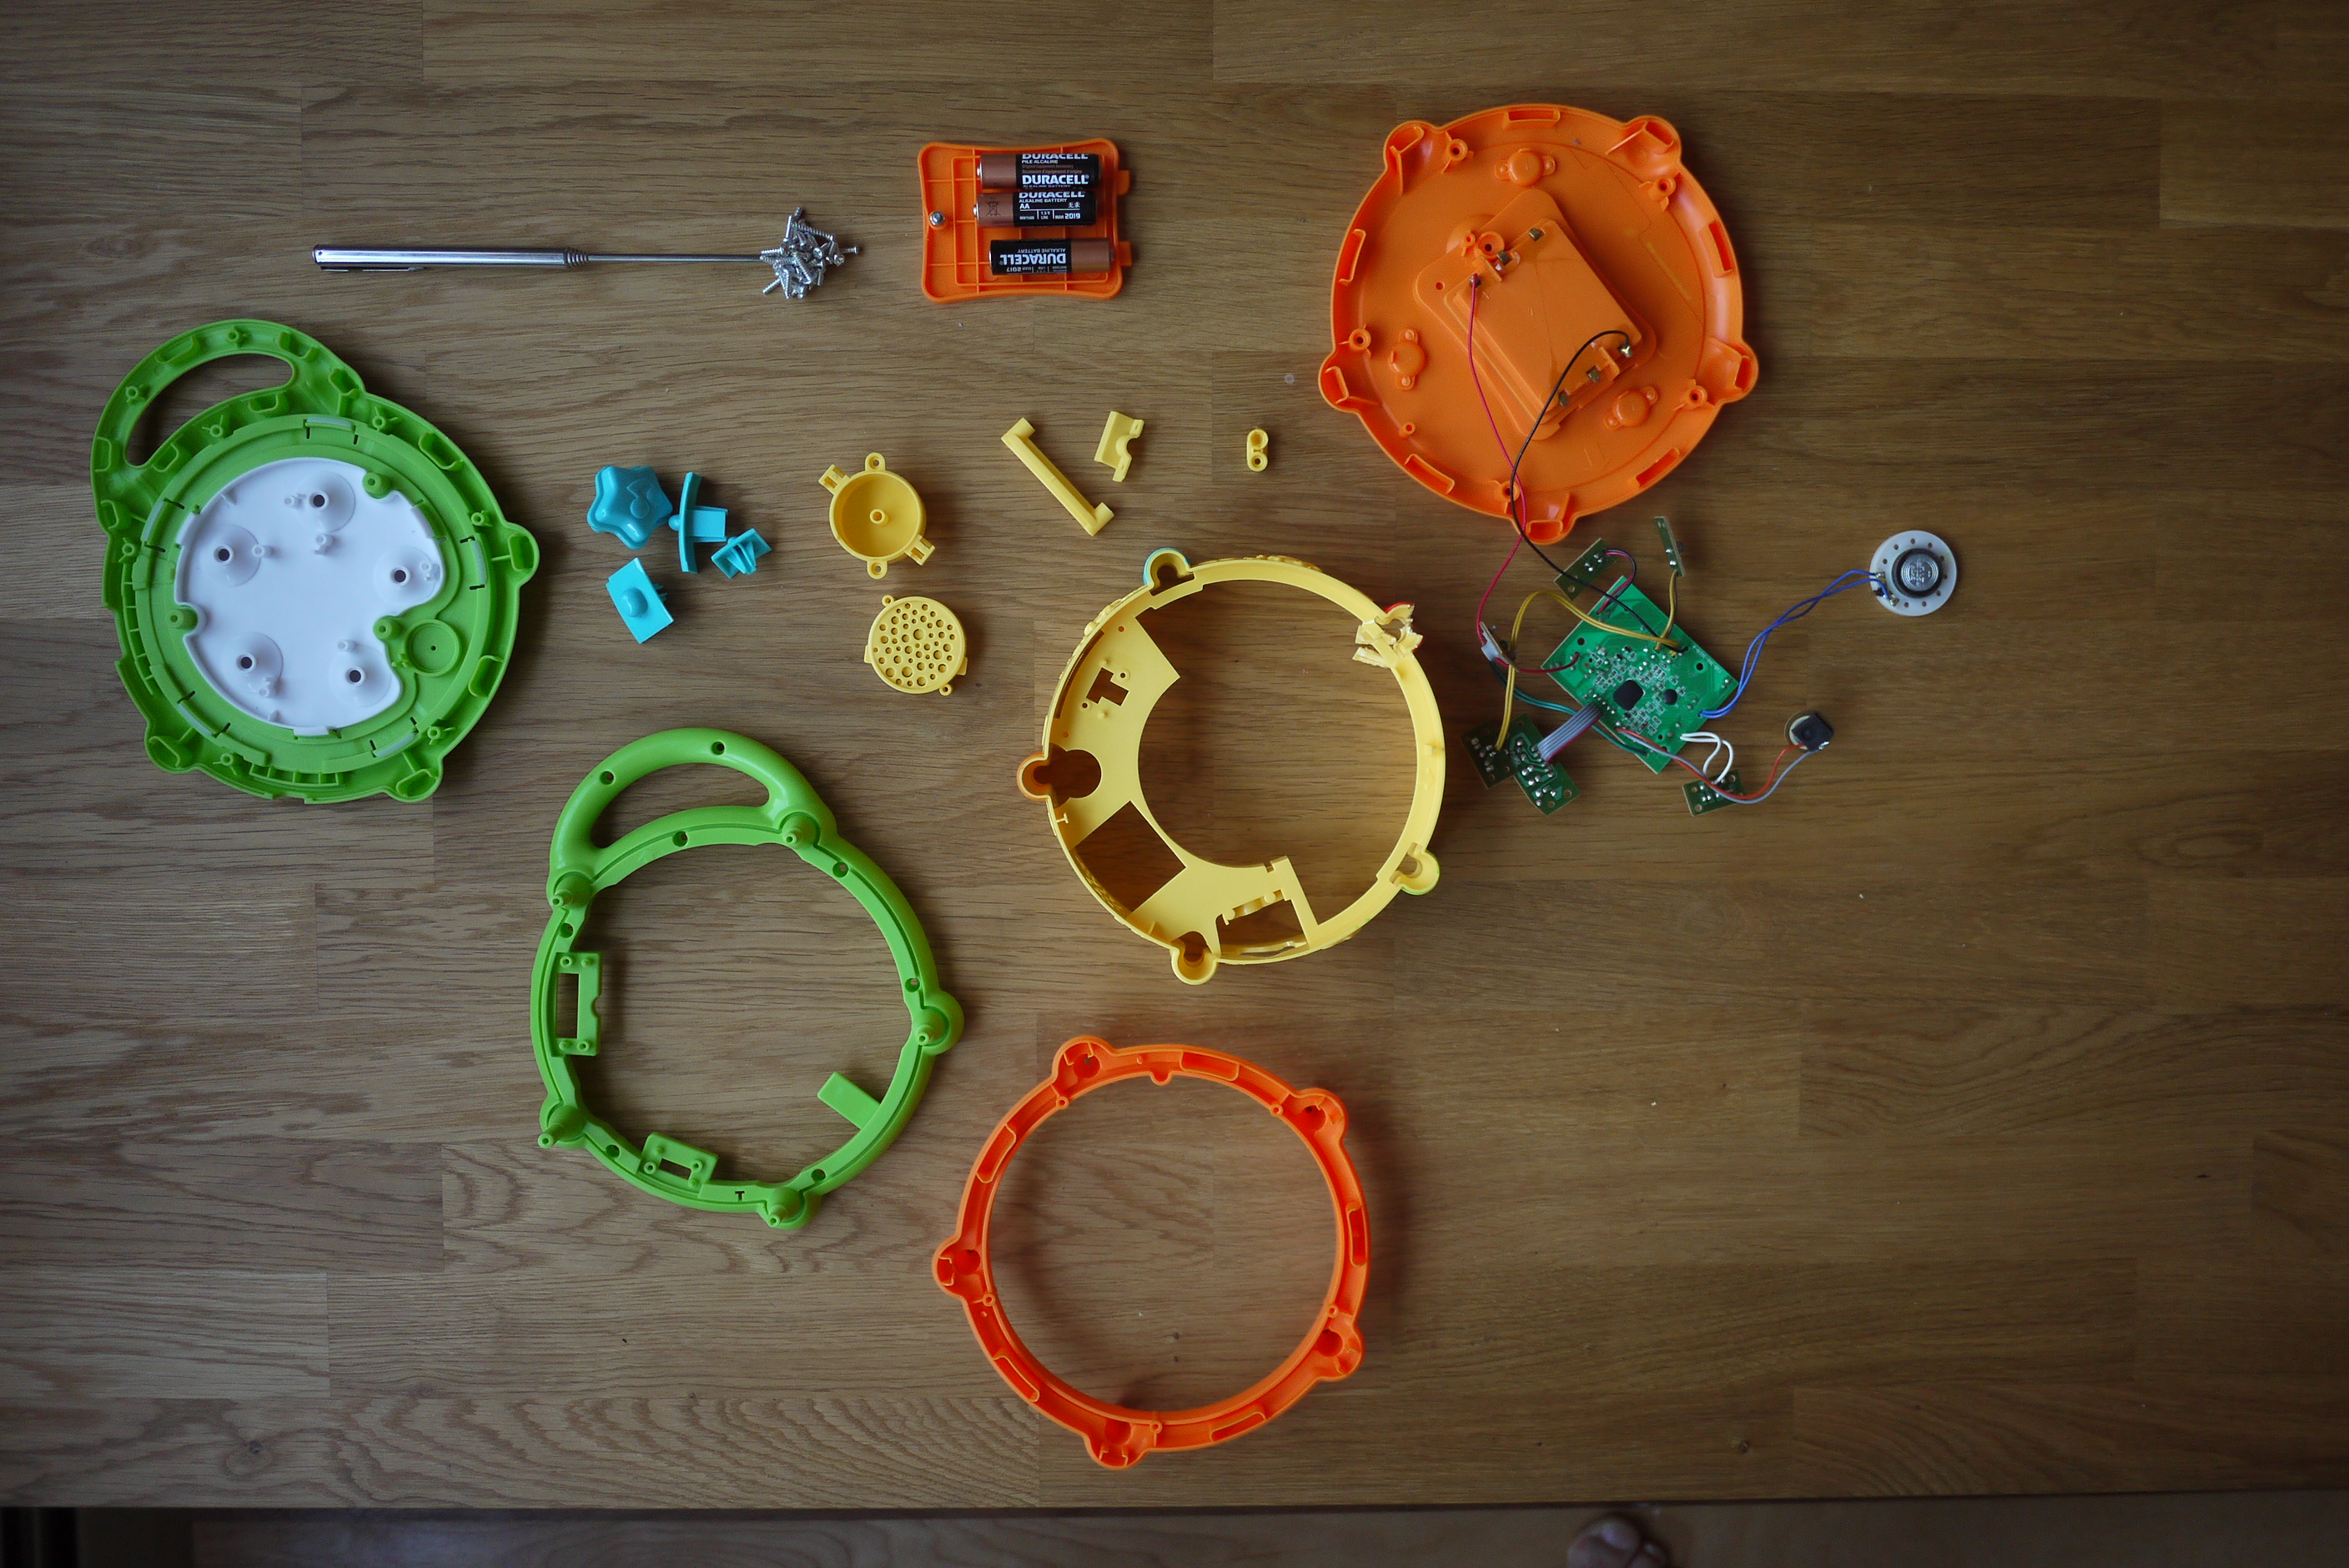
Small but AMAZING drum made by Learning Path and Leap Frog. This drum plays 3 different songs, you can change from English to Spanish and has multiple LED’s thats light and alternate with the music. There is also a touch sensor that has a drum sound integrated into it! Amazing little device.I pulled this info on the product from the Interwebs!! Product Description Tap into learning fun with the Color Play Drum! As children play along to classical, marching or salsa beats, they’ll learn about colors, counting and opposites in both English and Spanish. Parents can connect to the online LeapFrog Learning Path for customized learning insights and ideas to expand the learning. The LeapFrog Learn and Groove Color Play Drum features: Tap into learning fun with the Color Play Drum Children can hear three different musical styles: classical, marching and salsa. As they play on the drum, children learn-in both English and Spanish about colors, opposites and counting numbers. Parents can connect to the online LeapFrog Learning Path for customized learning ideas and insights from LeapFrog. Additional Info “R”Web#:449267 SKU:5FEA7C66 UPC/EAN/ISBN:708431100633 Manufacturer #: 10063 Batteries: batteries are required (not included) Product Weight:1.5 pounds Product Dimensions (in inches):8.1 x 8.1 x 8.1First opening of the drum was a real delight!!! So much going on!!View of the outside of the Song Button…View of the song button removed from the drum.View of the volume adjuster.View of the volume adjuster remover. You can see the high and low setting.This is a shot of the touch sensor. Its pretty sensitive and it had the ability when attached to a larger object like the top of the drum to be activated when it was touched or vibrated.LED board and lots of other doo-hickies. I googled ASY 310-30219 and couldnt find too much info. Or ant info at all.Back of speakerFront of speaker. By itself its not very loud but when housed in the yellow speaker box it seemed to be amplified at least 5 times. HUGE increase in sound due to resonance.Most of the LED were on the main board but this blue led was by itself..The tools I used to remove the hardware. Simple small screwdriver, magnet and a awl. I mostly used the screw driver to remove screws and then used the magnet to help extract all the screws. saved me lots of time. I needed the awl to snap some little plastic tabs that were getting in the way. In another photo I used my dremmel to cut out the battery pack to keep the whole internal system in tact without the large orange bottom ring of the drum.To keep the whole system intact I use my Dremmel to remove the battery pack. Im keeping all these parts!All the parts or internals of this device were manufactured by a company called CHARM. I see that through my research on the nets that they are from China but I couldn’t find much info on this company.Exploded viewMOre information on the boards that I googled and researched and couldnt find the info for them…Orient brand. A name you can trust!From all the research I could do it would appear that the lowest cost techniques to produce toys like this is through the process of Injection Molding. Link below from LEGO. https://www.youtube.com/watch?v=y1Zhpdx-XtALate night teardown-ing…Some design details that interested me where the obvious superfluous layers of plastic rings. It was very obvious to me that the green sections and the orange sections in this image could have just been one ring of each. Instead of two. There is no reason to have built it this way. Structurally the separate rings didnt do anything. Purely overbuilt. BUT WHY?????? My most favorite design detail is the english and spanish capabilities. I would have loved that as a kid and being bilingual is a strong advantage no matter what the two languages are.