Specifications:
Before diving into the teardown, lets look at the specifications of the phone first.
Network Technology: GSM: HSPA
Body:
Dimensions: 119.9 x 64 x 9.9 mm , weight: 124 g, Build: Plastic body
Display: IPS LCD Capacitive touchscreen
Chipset: Qualcom: MSM8277 , GPU: Dual Core: 1.0 Ghz, GPU Adreno 305
Memory: Cardslot + 8GB Internal + 512MB RAM
COMMS: WLAN- 802.11/b/g/n, Bluetooth- 4.0 A2DP , GPS- Yes with GLONASS , Radio: FM Radio
Sensors: Accelerometer , proxomity
Battery: 1430 mAh BL-5J
Teardown


Step 1: We star off by simply removing the back cover – no tools needed. The back cover is made from Injection Moulding.

Step 2: Removing the battery is also easy as it lifts out using the notch at the bottom.

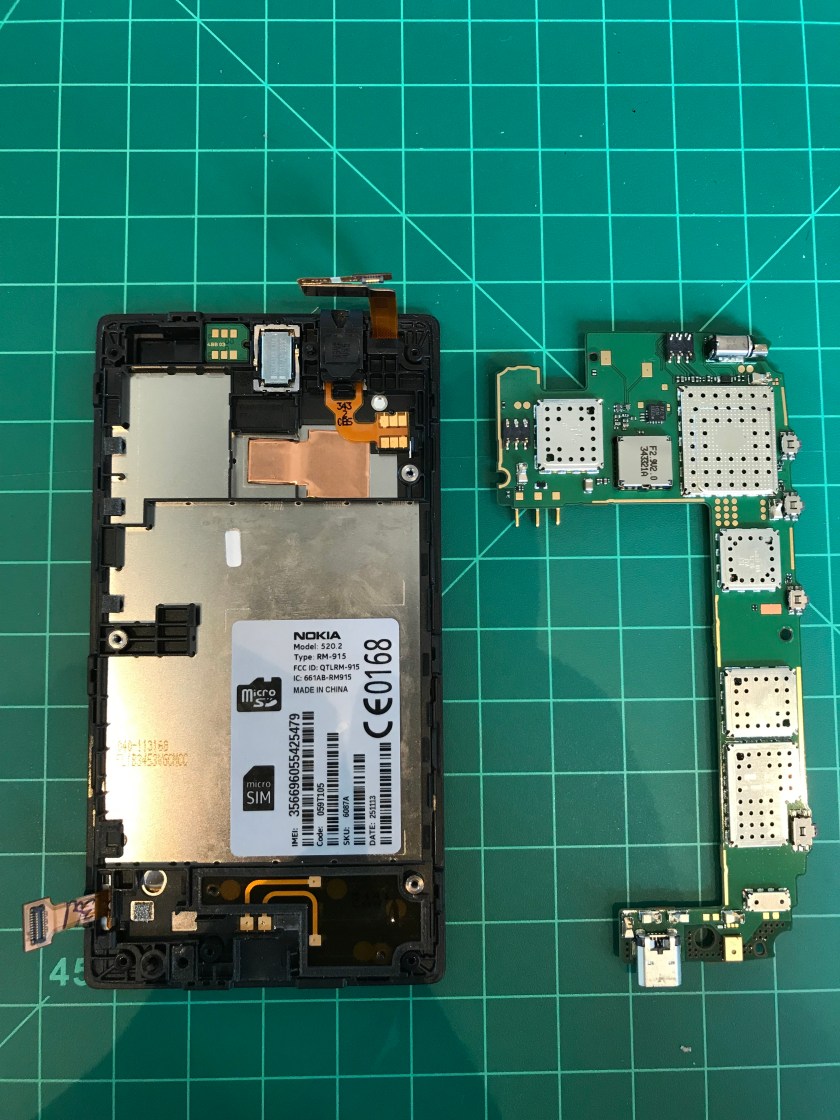
Step 3: Removing the back frame held by 8 Philips#00 screws. With the screws removed, we unsnap the back cover from the main body uncovering the back of the circuitry on this phone.


Step 4: In order to access the front of the ICs, we need to remove the two orange strips strapped on to the board by simply pulling them up, and then gently lift the IC board upwards from its seat.

Step 5: Separating the Touch screen from the main body. We need to pull the crickets behind the main frame in order to separate the touch screen panel from the LCD.


Final Words
What I really like about the Lumia 520 is that it sports a very modular and repairable design. Changing either of the screen or the touch panel or the battery or speaker will not entail us to change the other components, and provided a good documentation, the user should be able to repair it himself, since it does not require custom tools or special techniques.
This teardown was great! I thought it was interesting to see how similar the layout was to the iphone internal parts.
Totally agree on that. I think its because nowadays the battery dictates a lot of layout, since it consumes the most amount of space.
The steps and labels are very detailed! I like it!
Your teardown is so professional and has detailed instructions, great!