Tao Tao’s Halloween Vanity Mirror – Description, Materials & Progress

For my Halloween costume, I’ll be making a vanity mirror, as pictured above!

Update // October 25, 2023

Purchased/Acquired:

Costume Intention:
(1) Delight!
(2) Surprise!

The costume is meant to be instantly recognizable—bright, fun, lively, with the glowing ping-pong-ball-lights. The secondary element of UV lights and UV makeup adds a fun, unexpected additional twist.

Remaining To-Do List:
– Solder Gemma to battery pack (look at last year’s costumes/circuits)
– Set up code & make sure lights are working; test code
– Attach both sets of lights to mirror frame
– Add items to “counter”
– Choose make-up lewk

Tinkercad Code:
Fade in / fade out
Steeplechase

***

Materials:
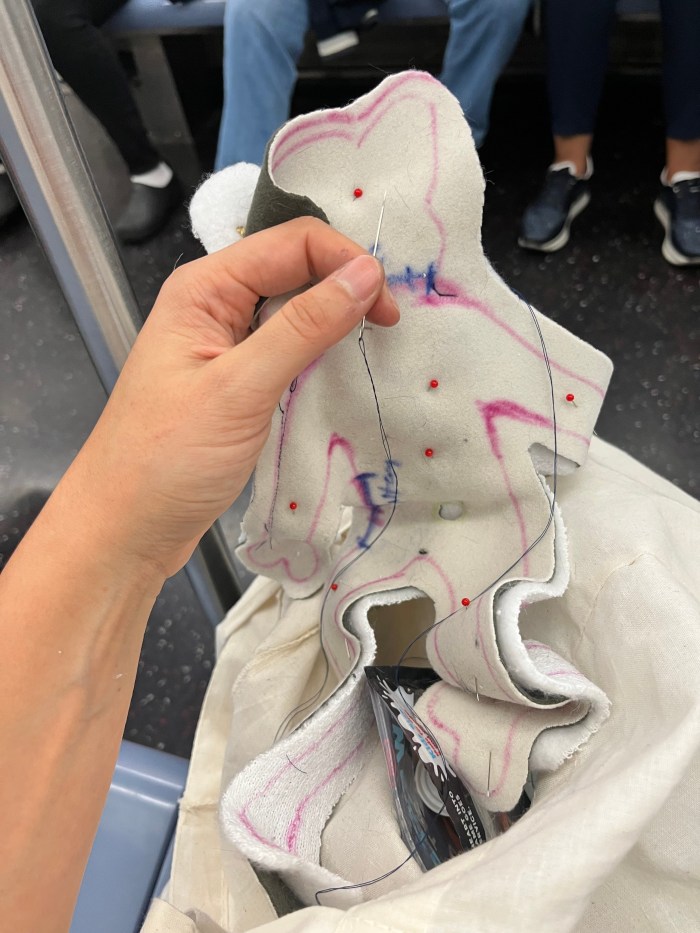
– The countertop and mirror frame will be made from thick foam board (with the frame potentially being painted). I will cut the “countertop” in a U-shape to fit around my midriff and attach to a belt + suspenders mechanism, made using thick, sturdy cloth. For attaching, I’ll need glue and some needle & thread.
– To cover the LEDs, I will use ping pong balls. I’ll cut holes from the back for the LEDs to come up through. To cover the UV LEDs, I might try some type of clear resin, or leave uncovered?
– For the items on the counter, I will either purchase from the drugstore or make by hand with paper, clay, and plastic. (I’ll include the UV makeup on the counter so that others can try using it.)
– For an added element, I will get UV (blacklight) makeup that will glow when I turn a set of UV LEDs on the back of the mirror on.
– I will wear black pants on the bottom and a something more glamorous on top (maybe a feather boa, big earrings, and hair clips)

LEDs:
UV/UVA 400nm Purple LED 5mm Clear Lens – 10 pack
Adafruit NeoPixel LED Dots Strand – 20 LEDs at 2″ Pitch

I’ll wire together 2-3 UV LEDs for each side of the back of the mirror frame, that can be activated with a switch, whenever I want to turn them on and off to show off the glowing lewk.

Arduino Technique:
For the vanity mirror lighting, I’ll be using either fade in / fade out or running lights effect. Leaning towards running lights! This will look as though they’re chasing each other around the mirror in a circle.

Circuit diagram

The neopixels represent the dots that I’ll be using. My one question here is whether I can program the dots so that only every other dot lights up (4″ apart rather than 2″ apart).

I’ll need longer wires for the UV LEDs than pictured above, allowing me to send them to both the right and left back sides of the frame.

Tao Tao’s Neopixels Arduino & Halloween Ideas

Edited Neopixel Circuit

Link to Tinkercad: https://www.tinkercad.com/things/lordXM5II0h-copy-of-rgbw-strand-test/editel?sharecode=o4KlNiT9zOYaccOZBCXYyOceIZkJhiGB-visSHzbC6Y

The original Neopixel circuit

Now for Halloween costume ideas…!

I picked three ideas from a larger brainstorm that also included:
– Space debris (space trash??)
– Household electronics (eg rice cooker, water boiler, microwave…)

I think I could use more thinking in terms of how to program the LEDs in an interesting way for the costume, but this is a starting point. Aaand I brought the anglerfish back!

I’m very excited to see what ideas others come up with—I’d love to be part of a collaborative costume in some way.

Toys by Tao Presents: Leo the Lemur Plush Night Light

Do you ever wake up in the middle of the night, needing to pee?

Or maybe you’re sleepless in bed, and want to sit up and read for a little while.

Or maybe, you’re staying somewhere unfamiliar, and you’re worried that if you *do* wake up in the middle of the night, you won’t remember where the light switch is, and then you’ll bonk your knee into a table or bang your head into a wall. Yowza! That’ll be one big bruise.

Leo the Lemur lighting the lamp’s light switch

Leo the Lemur is a plushie night light for kids of all ages who either (A) love lemurs (B) need a little help turning on the lamp in the middle of the night or (C) all of the above.

Last week, when looking through some of the other plushie designs, I was really impressed by lights that served a clear purpose. It popped in my head that one of the most frustrating things I experience in the darkness is the inability to find the light switch. And thus, Leo.

Leo the Lemur reading a book by tail-light

This project was a major challenge, in a very satisfying way—I definitely learned a lot in the process. I’ve never made a stuffed animal before (unless you count my original prototype, which was a very simple anglerfish), and I’ve never made any sort of lighting or electronics.

The experience tapped into my doggedness and obsessiveness: once I had the idea of the lemur, I had to pursue it, and I was going to do whatever I needed to make it work. And I knew the outcome wasn’t going to perfect—I just wanted. to execute as well as I could.

Key supplies!

In terms of materials, I used four types of cloth (oops, I accidentally overspent at Mood Fabrics—learned that lesson the hard way), and two colors of thread. Additionally, I used clay (plus paint and gloss) for the eyeballs and nose, as well as armature wire, yarn, and stuffing for the plush’s innards. The sewing was a combination of sewing machine and hand sewing.

The final putting-together of the plush was much more time-consuming than I anticipated—order of operations was important, and I didn’t have an optimal way to cover the wire such that it didn’t get bunched up when I tried to push it into the arms and legs. That was definitely the most challenging part, and something I’d approach differently the next time around. However, when there’s a will (and a chopstick), there’s a way.

Initial sketch
Lemur body pattern

If I had more time to work on this project, and create additional iterations, I would be interested in trying out a few things, including:

  • A larger lemur: This would be to fit the battery pack better, as well as test out on larger lamps and light fixtures
  • Maybe making the head more three-dimensional: Potentially adding the ears and snout as separate items attached via ladder stitch. I think it could be nice if the snout didn’t blend directly into the black nose area, too.
  • Proportions: While the tail is definitely the pièce de resistance, it is totally out of proportion with the lemur’s body. I’d like to try something more consistent. I also think that a striped tail just made of the same fabric as the body (that fuzzy white and black), could be just as effective in its own way.
  • Foot pads: Little black pads to go on the palms of the hands and feet
  • Tighter wire/grip: Currently, the lemur slides down the neck of a lamp unless it’s angled somewhat horizontally. Would tighter wire or some kind of grippy material prevent this?
The outer fabric
Hand-sewing the curvier parts on the subway
Tail with electric wires and armature
Sewing the tail onto the body
The LED circuit
Reversal in progress
The internal wire armature before insertion
There’s nothing like a good book

My hope is for Leo to make people feel safe and secure at night, knowing that if they need to get up when it’s pitch black outside, they won’t have to fumble to turn on a light. And hopefully they’re comforted by his derpy cuteness!

Tao Tao’s Arduino Exercises

Arduino, ahoy!

I loved Massimo Banzi’s TED Talk about the global Arduino community, and seeing 13 year olds building all kinds of cool contraptions forced me to believe that I, too, can figure this out. (Despite a deep insecurity that my brain simply does not process anything involving science and circuits.)

Set-up for the blinking lights

Turns out, replicating these circuits is not rocket science. That being said, I realize I’m still a ways from building my own circuits—and need to understand the underlying logic of what’s happening.

I switched computers for the last two exercises, and wasn’t able to set up the Arduino software properly. As a result, I took still photos of the setups, which—were they properly synced with the software—should have resulted in the right outputs.

Breadboard arrangement for pushbutton
Breadboard arrangement for potentiometer

Tao Tao’s Plush Night Light Proposal

Initial ideation

My best friend Cecily has a two-year-old named Zoe, and when I design for kids, I’m designing for Zoe. Ultimately, with my night light concepts, I was primarily thinking about Zoe.

While I tried to mine the depths of my cranium for any unique ideas, I kept coming back to the usual suspects: sources of light, and perhaps the emanation of music. I pushed myself to brainstorm within more conceptual realms, but just kept hitting blank walls. While I think a vintage-style camping lantern or flashlight could’ve been a neat decorative pillow or vintage-y collectible, all roads eventually led to the anglerfish. I mean, what creature on this earth has a cooler source of light?  

Focusing in on the anglerfish

Story & Target User

Thanks in part to Finding Nemo, the anglerfish is now a notorious deep-sea beast. And you know who loves beastly beasties? That’s right—kiddos.

This plush anglerfish is a bona fide predator—if your other stuffies aren’t careful, Zeeborgle might lure them in and gobble them up! In simpler terms, Zeeborgle is the ultimate ugly doll.

Anglerfish plushie pattern

The target user is a child aged 3-6, who is still excited about stuffed animals and creating stories (and rivalries and scandals and dramas, oh my!), that may or may not involve one stuffie gobbling up another. They hopefully will not tug the light-up lure, as that would break the circuit and potentially put them at risk. More there to consider, I’m sure.

Anglerfish plushie prototype

Planned Materials & Components
For the main body of the fish, including the dangly light lure, I plan to use a soft, fuzzy plush-style fabric. In addition to the fluff-stuffing, I’d like to put wire within the lure, so that it can be bent in different directions. The same fabric will be used for the teeth, which will be sewn and then attached separately. The fins will be a thinner, possibly shiny or metallic cloth, sewn onto the main body (note: I found it very tough to create wavy shapes at such small sizes). For the eye, I’d like to sew a mini plush oval, potentially with a small Velcro or magnetic component so that the eyeball can be moved to look in different directions.

Another neat feature would be Velcro on the teeth plus a pair of little fish that can then be “lured” into the mouth and caught in the teeth. I’m thinking this could be a fun interactive element, to extend the toy’s lifespan, before it gets relegated to the back of the closet.

Thoughts & Next Steps
Lots of anglerfish plushies exist on the internet (some of which light up, like this one, which is also a puppet). I was initially discouraged by this, but it was ultimately still the idea I was most excited about. To differentiate it from existing toys, I thought about the adjustable wire lure and the Velcro within the teeth. Even better would be if the little fish got gobbled up all the way into the stomach—maybe something to explore in my next iteration. Also, I feel like my current prototype leans in the “ugly doll” direction, which is different from the other versions I’ve seen in circulation.

Very excited for the next stage and keen for any suggestions!

Electric Toothbrush Teardown

Behold as the electric toothbrush self-assembles!

Welcome to the Taodown! Otherwise known as the Tao Tao Teardown—brought to you by Becky Stern & PoD.

Today, we took apart a Philips Sonicare kids’ electric toothbrush. The short story? It’s made of metal and plastic. The long story—well, keep reading (and watching) below. Also, click here if you need your own—no commissions, sadly.

Tools & Techniques
To deconstruct the toothbrush, I used (1) my hands (2) a tiny screwdriver (3) a less tiny screwdriver (4) a wire cutter and (5) brute strength. The larger screwdriver was required as a lever to remove the plastic outer base of the brush, as well as dislodge both the control board and Li-Ion battery from the plastic skeleton. The tiny screwdriver was used to separate the oscillating brush head, cam, and gears from the shaft (which also held the motor).

Toothbrush teardown timelapse

Notable Design Elements
(1) It’s probably no surprise that Philips has made the Li-Ion battery next-to-impossible to remove. While electric toothbrushes are rechargeable, the battery will eventually run out, and if it does, you’ll need to buy a whole new unit. There’s no feasible way to replace that battery yourself. That being said, lithium batteries can be dangerous to handle, which means that until they are safe to handle, they should be kept as far out of reach (and replacement) as possible. In which case, a job very well done.

(2) I found myself contemplating the size of the removable toothbrush head. This, of course, is the “consumable” element of the product; the Philips website states that it is “recommended to replace your Philips Sonicare Brush Head every three months of normal use.” Looking at the inner underpinnings of the brush head, I wondered if the replaceable component could be reduced to just the very tip of the brush (just the brush, and no upper shaft), thereby reducing the amount of plastic. However, even if technically possible, Philips would almost certainly ignore this efficiency, because it would imply charging less for their brush replacement packs (a set of three currently retails at $31.96$42.96).

Electric Toothbrush: Parts

Electric Toothbrush Components & Materials:
1 – Toothbrush head (plastic + nylon for bristles—most likely Nylon 6-12)
2 – Outer case (plastic)
3 – Charging coil (copper)
4 – Induction charger coil (copper)
5 – Oscillating brush head + cam/gears (steel + plastic)
6 – Screws (steel)
7 – Motor (aluminum + copper)
8 – Torsion bar (steel)
9 -Magnet (iron, nickel, cobalt, +/or steel)
10 – Shaft, cam + gears (steel + plastic)
11 – Circuit board (copper, fiberglass, resin)
12 – Power button cover (plastic)
13 – Button cover / thumb grip (plastic)
14 – Lithium (Li-Ion) battery (lithium, nickel, cobalt, possibly manganese)

Electric Toothbrush: Circuit Board

Circuit Board Components:
1 – Power button
2 – Programming pads
3 – Coil connections
4 – Chip (#CY8C4247LQI-BL483)
5 – Diode bridge

Chip details
– Type: ARM Microcontrollers – MCU PSoC 4 BLE Integrated Chip; see data sheet
– Manufacturer: Infineon Technologies
– Price: $7.75 (for 1 unit)

Manufacturing techniques & equipment

  • Outer casing: These plastic elements are made from plastic granules, shaped while hot in molds along an mechanical assembly line. A computer scans the casing to ensure there are no flaws, and rays of UV light are blasted to make sure the plastic is completely sterile.
  • Head and bristles: Bristle color determines thickness (influencing the location on the center or perimeter of brush head). A machine inserts the bristles into holes in the plastic head by folding them around tiny pieces of wire. A blade cuts the tips of the bristles to ensure they’re all the same length, then blunts any sharpe edges. The necks are then attached the the brush heads.
  • A machine clamps the gearbox (cam + gears) and motor together. A worker then manually melds them together with the lithium battery, then plugs them into a charging unit to ensure the circuit is connected.
  • The inner components are then fitted into the casings via machine assembly.
  • A machine then seals the plastic bottom of the casing with a twist.
  • A quality controller gives them a final human review, while a subset of the batch are sent off for quality testing (performed by a machine). If that goes smoothly, they’re off to consumers!

TIL:
Maybe we should all just be brushing our teeth with our fingers?