Meditation Mandala

Since our last blog post, we have made changes to our meditation device concept.  We have transitioned from a meditation blanket to headphones to a mandala.  A mandala is a spiritual symbol that is used to facilitate meditation.  It is a beautiful circular artifact that is contemplated.  We want to enhance people’s meditation experience by creating an alluring mandala lamp that changes color to the rhythm of the meditator’s breath.

progress-8295

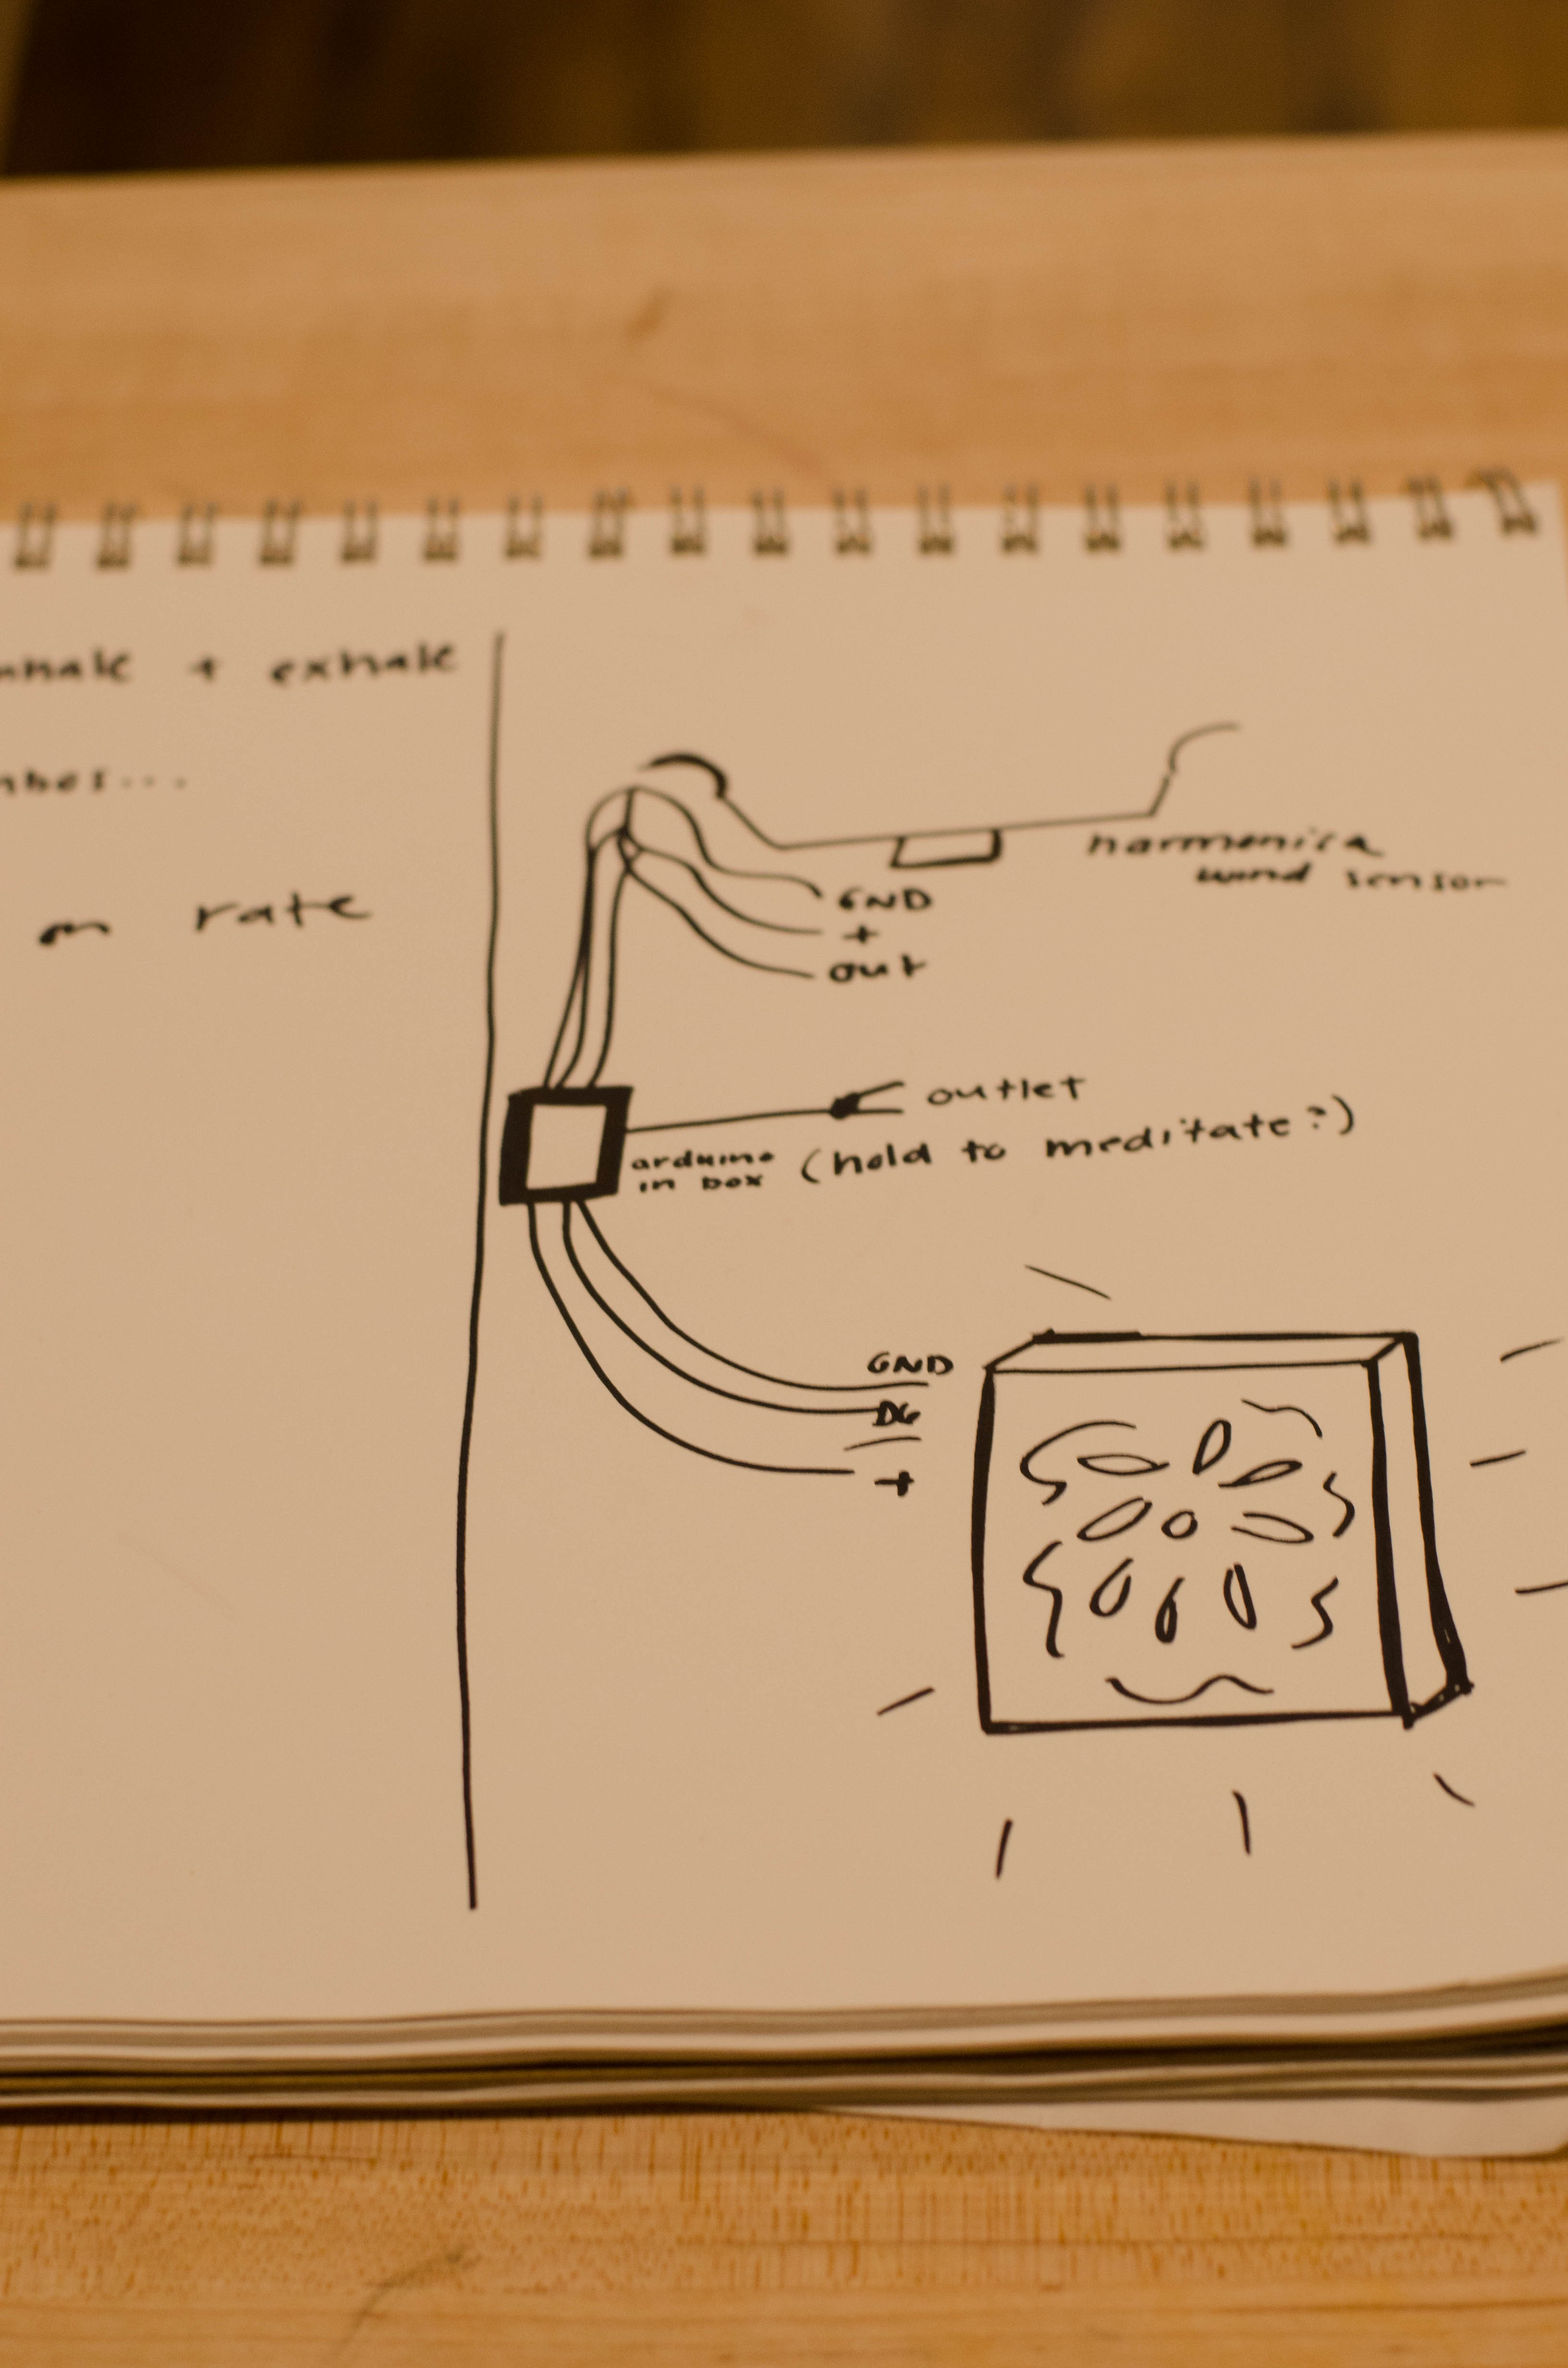
Up to this point, we have spent most of our time working on programming the wind sensor and LED strip.  Our first step was programming the LEDs to react to button presses as a supplement for wind sensor values.  Eventually, we were able to light the strip different colors depending on the amount of button presses within 6 seconds.  We created four different ranges that correspond to four different colors.  For instance, when the button is pressed 1-5 times within 6 seconds, the LEDs turn red, and when the button is pressed 6-10 times within 6 seconds, the LEDs turn blue.

IMG_4578

Next, we calibrated the wind sensor.  Through trial and error, we determined the threshold value that the sensor detects an exhale.  When the sensor value passes the threshold, the LED lights up and changes color.

IMG_4584

Our initial plan was to create four different ranges of wind sensor values that correspond with the number of breaths (threshold passes) per minute.  This would show the user their breathing progress since fewer breaths corresponds with deeper meditation. However, we decided to use inhales and exhales rather than rate of breath to change the color of the mandala.  Our final step for the arduino is to solder and wire the wind sensor and LED strip.

Currently, we are working on putting together the actual mandala.  We  will attach the wind sensor to a harmonica holder that will be worn around the users neck.  Once we wire the sensor, we will cover the harmonica with fabric to make it look nice.

$T2eC16RHJHkFFlob+K-RBS!6ITZyl!~~60_12

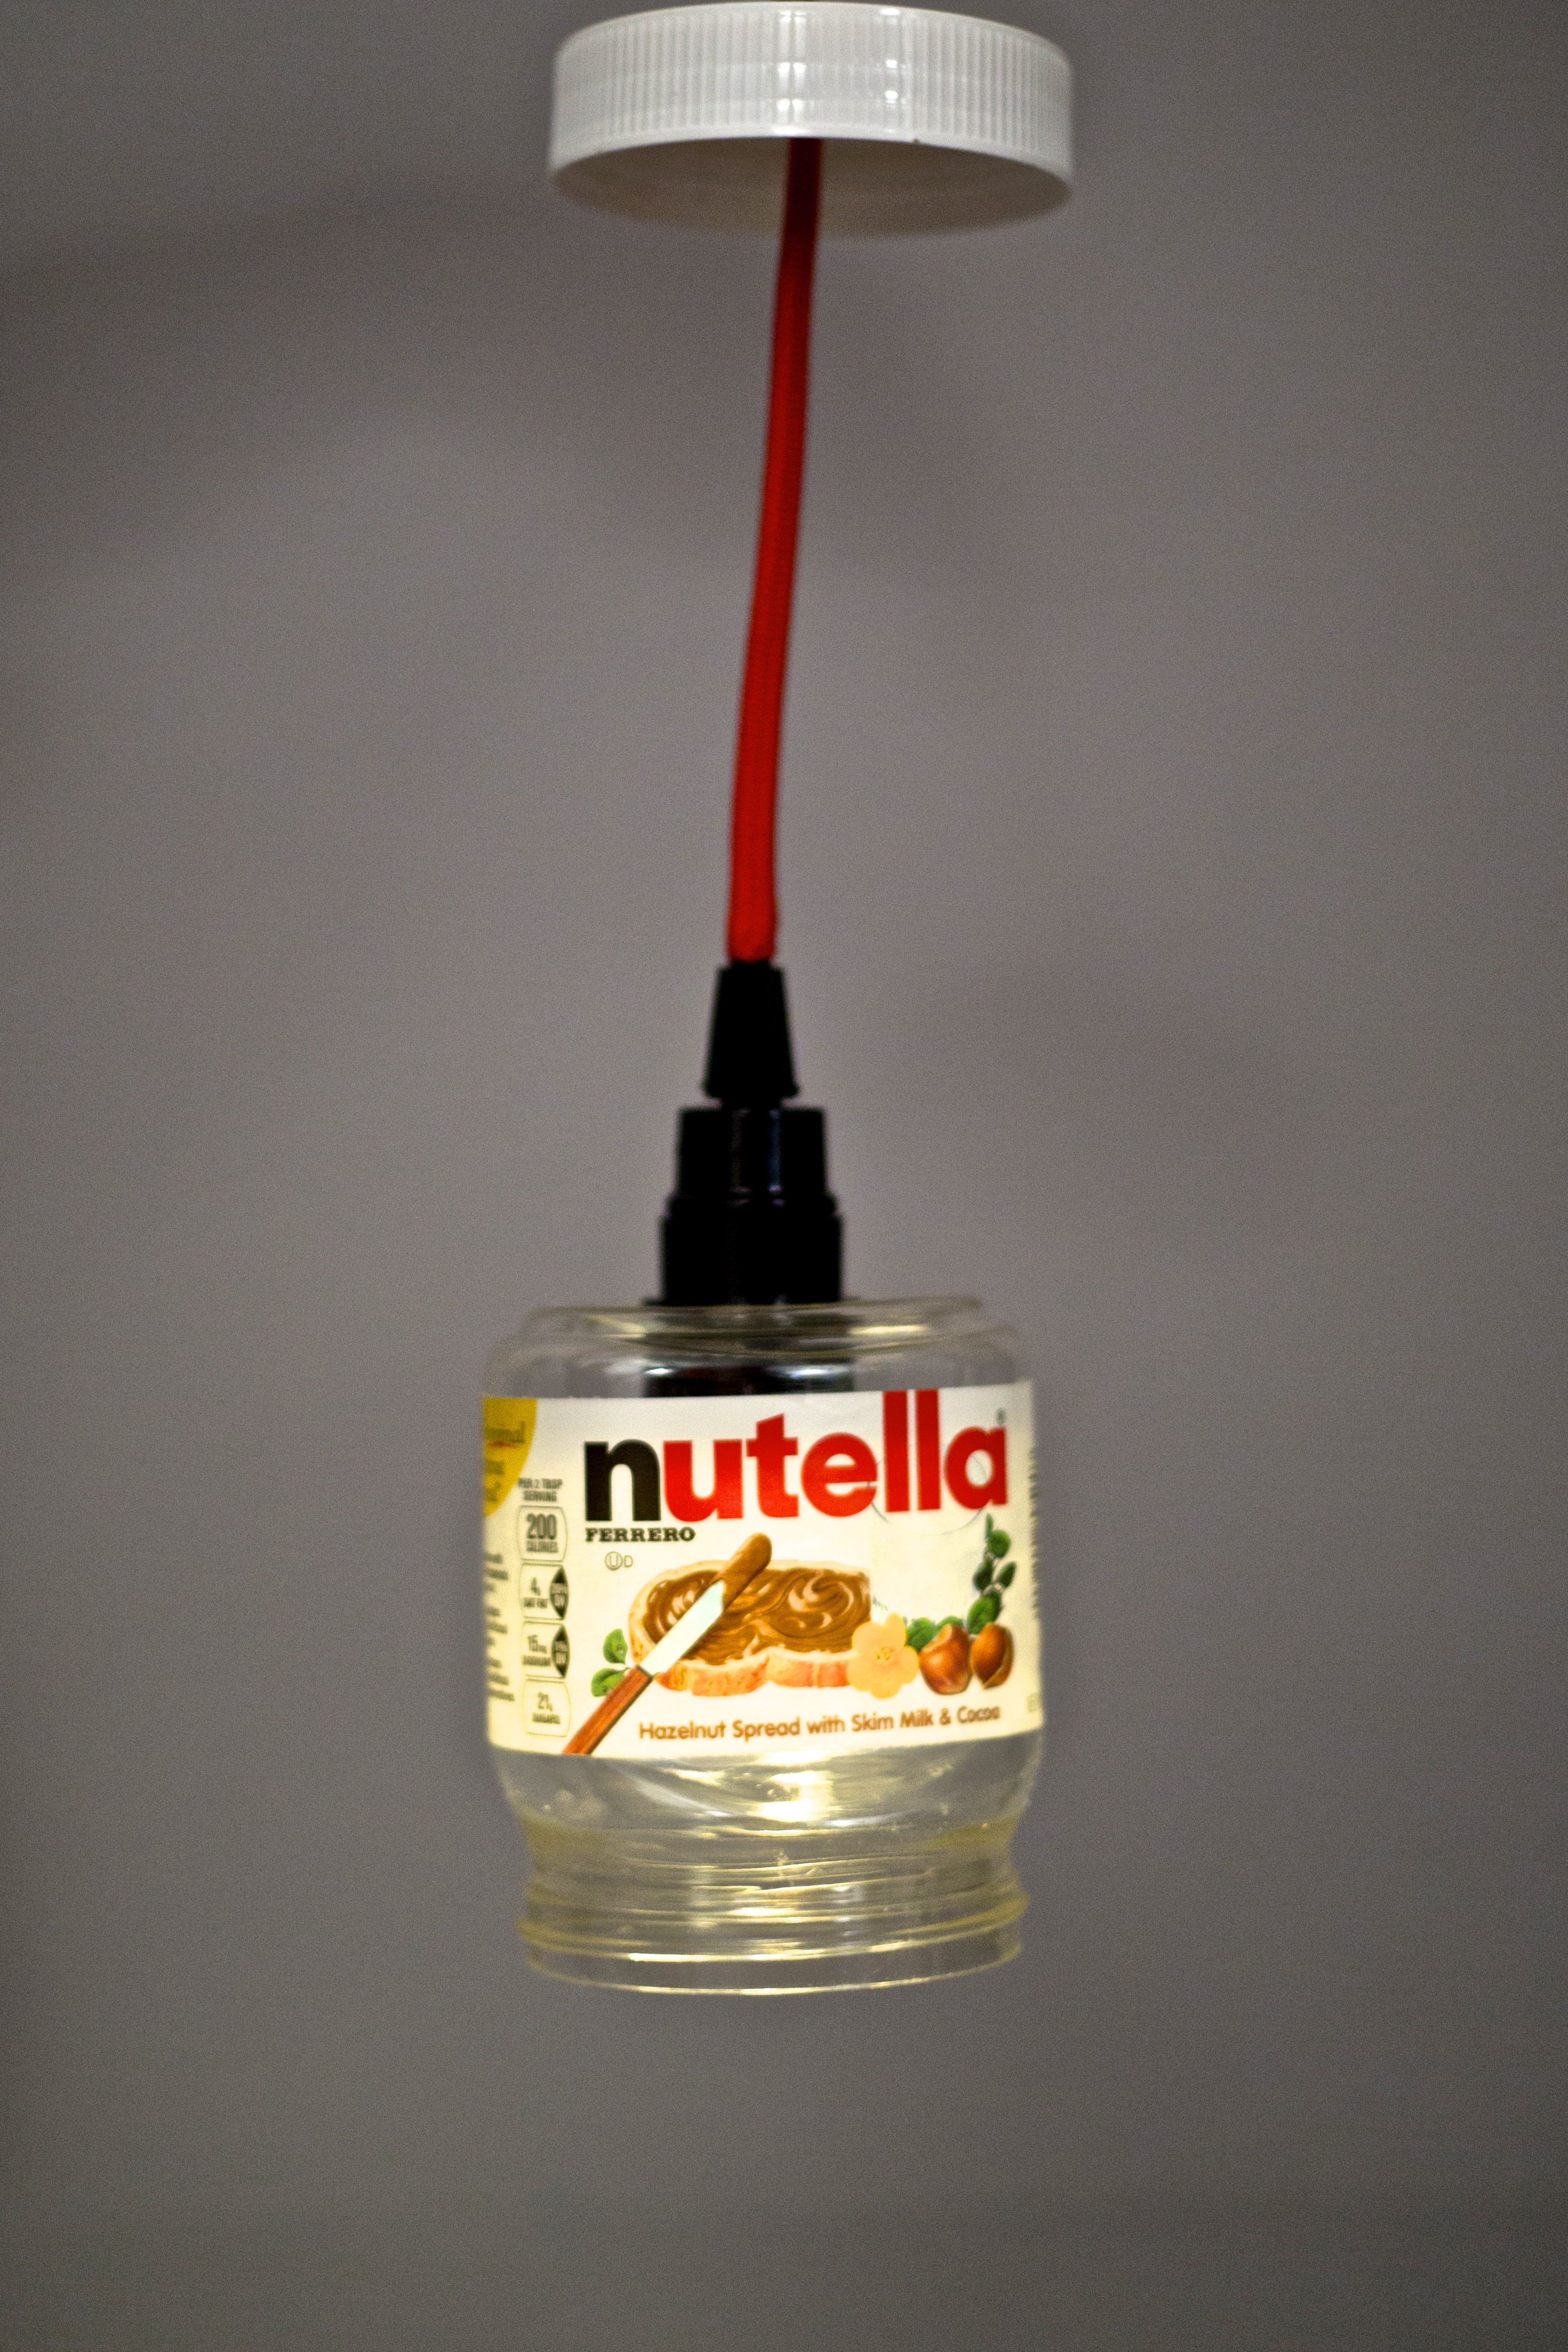
For our mandala, we are making a 3D wall hanging similar to the one below:

full26974223_a

We plan to laser cut a beautiful shape out of wood.  We are currently trying to figure out an easy and economical method of attaching the front and back piece while also allowing light to shine through the sides. Once we have all the pieces, we will place the LED’s inside the mandala.  One challenge is figuring out a way to cover the wiring that will run from the mandala to the harmonica holder.  We plan to conceal it as best as possible so that it does not detract from the beauty of the object.

Eliz & Julia

Lock & Key Video

New York is a big city where anything can happen… and as a women, it can get dangerous. This lock and key allows you to keep your belongings safe while also being able to see it in dark environments where young women are most likely to be haphazardly digging through their bags.

Here is a video that I filmed and produced to reflect an example of a situation where a woman needs a light up lock and key to prevent anxiety in her life:

http://www.youtube.com/watch?v=ZLMOshA7a2k


Here is my storyboard that guided storyline of my video:

IMG_4294

Lock and Key Switch + Switch Tests

For my creative switch, I made a key going into a lock activate an LED.  I hooked up the LED to an arduino board and connected wires to both the lock and the key. The open circuit closes when the key goes into the lock. This would be great to use as an extra security measure to guarantee that your lock is locked. It’s perfect for people who are paranoid about keeping their stuff safe. Watch the video below:

Below are the videos for the 4 switch tests:

Button test:

Debounce:

DigitalInputPullup:

StateChangeDetection:

Midnight Candelabra Chandelier

For my plush night light, I used my previous word “chandelier” to come up with a night light that can both act as a hanging light and a portable light source for trips to the bathroom during the night. When I wake up at night, it is too dark to traverse the hallways safely to the bathroom without a light source.  As a result, I often bring my phone with me to use as a guiding light.  Interestingly, I found that I am not alone, and many people experience this inconvenience too. I decided to solve this problem with my plush candelabra chandelier. When you wake up in the middle of the night, you can pull down on the hanging candelabra, detach it, and use it as a light source while walking around in your home at night.  I named it the “Midnight Candelabra” since it is used in the late hours of the evening.

chandelier candelabra

Although it was not a smooth ride to the finish line, I was able to get my candelabra to light up in a different way than I initially set out to.  My initial plan was to be able to squeeze the handle to activate the LEDs using a conductive steel fiber.  I felted the fiber to create a conductive sensor that is activated by squeezing it.  However, I could not get the piece to consistently activate the code so I had to brainstorm other solutions to light my LEDs.

IMG_4051

In the meantime, I hooked up my board and wires to a potentiometer to help determine that my code was working properly. I decided another good option would be to use a button switch which could be activated by squeezing the handle of the candelabra.  Once I soldered all my wires and LED’s together, the push button would not activate.  Although all my connections, code, and soldering were correct, the button still would not budge.  I tried 2 different types of buttons which still would not activate the LEDs.  As a result, I had to let go of my idea of activating it by squeezing the handle and use the battery pack as a switch instead.  If I were to move forward with this project, I would explore other sensor options that would allow me to keep the electronic guts inside the plush candelabra.

IMG_4053  IMG_4050

Here is my final code:

const int button = 10; // Analog input pin that the potentiometer is attached to
int sensorValue; // value read from the sensor

const int ledPin = 6;
void setup() {
Serial.begin(9600);
pinMode(button, INPUT);
//pinMode(9, INPUT_PULLUP);
pinMode(ledPin, OUTPUT);

}

void loop() {

sensorValue = digitalRead(button);
Serial.print(“sensor = “);
Serial.println(sensorValue);
digitalWrite(ledPin, LOW);

if (sensorValue == 1)
{ //change the value depending on the sensor’s read in serial monitor
Serial.println(“leds triggered”);
digitalWrite(ledPin, HIGH);
delay(5000);

}
delay(100);
}

Twinkle Twinkle

To make the motion sensor code work, I began by figuring out how to get one Neopixel to light up while shaking the Flora board. While my Strand Test lit up the Neopixel, I was unable to get the motion sensor to work using the Sparkle Skirt Code. However, when I opened my Serial Monitor, it indicated that there was “Twinkle!” when I shook the Flora board. The Neopixel just stayed lit.

IMG_3877

In order to fix the problem, I checked the resistance with a multimeter.  I found that my D6 connection did not work and changed alligator clips.  After that, I was able to successfully make the motion sensor to work.  Here is a video demonstrating the motion sensor working.

IMG_3878 2

I played around with the different frequencies and made it so that the colors would consistently flash rather than sporadically.

Screen Shot 2013-09-23 at 3.10.30 PM


For my plush night light, I would like to use the word “chandelier” and make a night light that hangs from the ceiling. I want the user to be able to squeeze the object and either bring it to the bathroom with them or leave it hanging to light up the area around the bed. It is intended to make going to the bathroom in the middle of the night easier. I am not sure what shape I want the object to take form but I do want the user to be able to turn on the light by squeezing it.

Nutella Chandelier

   WL1A4505 - Version 2   WL1A4511 - Version 2

For the mash up project, one of my words is a perishable food while the other is a timeless object.  This combination allowed me to explore how a chandelier, a decorative hanging light, can be created out of Nutella, a much loved chocolate hazelnut spread that people across the world enjoy.  In fact, it is so addictive and fantastic that one jar is sold every 2.5 seconds.  Nutella has quite some fame which I enjoyed learning about here.  With further research, I found that nutella has been an inspiration for other products on the market.  Check out this Nutella phone case.  I guess having a chandelier in your dining room that constantly reminds you of chocolate spread isn’t too bad of a thing, right?

Although Nutella is great in any shape or form, I had to keep in mind that a chandelier is a sustainable light fixture.  I started thinking about how I could change the composition of this gooey spread in order to better preserve it through time.  Although it is possible to liquify it or harden it, I decided that using the packaging rather than the spread itself would be not only more durable, but also much more maintainable.

IMG_2827

While learning about what types of chandeliers are on the market today, I felt inspired by contemporary hanging light styles.  One recent trend in particular has been glass jars that expose the light bulb.  I love this raw and simple look and decided to use the Nutella jar as a light pendant for my project.

IMG_2784  IMG_2787

After taking a shopping trip to Canal Lighting and Parts, I began the handy work.  First, I drilled a hole through the bottom of the jar in order to fit the socket.  Since the drill was not large enough, I expanded the hole by filing down the edges.

IMG_2797

After that, I began the wirework.  I stripped both ends of the fabric cord and attached one end to the socket.  Next, I drilled a hole into the lid of the Nutella jar and slid it onto the cord.  I chose to use the lid as the top piece of the chandelier, which will be installed flush to the ceiling and serve as the platform where the jar hangs down from.

IMG_2798

Next, I stripped the power cord wires and used a soldering iron to bind them to the light pendant wire.  Then I covered the soldered wires with heat shrink tubing.  Although a minor electrical explosion occurred along the way, I finally was able to successfully bind the two cords together and light the bulb.

IMG_2802

My last touch to the lamp was putting the label back onto the jar right-side up.  I used a spray adhesive to bind the label to the plastic.  Although a simple procedure, it is the most important since it adds the mmm delicious touch.

WL1A4506 - Version 3

And here it is: a nutella chandelier.  This is intended to hang in the homes of avid nutella lovers that can never get enough of it.  With this chandelier, they can get an eyeful anytime.

Eliz Ayaydin Class Introduction

IMG_8219

Hi! I’m Eliz and I was born and raised in Chicago.  I moved to Nashville for undergraduate studies and recently moved to New York in order to begin my graduate studies at SVA.  After experiencing life in the Midwest and the South, I am thrilled to explore a new lifestyle here on the East Coast.

As for my hobbies, I enjoy traveling and being active.  In the wintertime I love to ski and in the summertime I love to swim and boat.  In addition, I played classical piano for 12 years and identify with the amount of time and dedication I put into my music studies.

IMG_1121

I’m looking forward to Making Studio! I have a little bit of experience with making and am eager to learn about all the different types of fabrication tools.  I am especially excited to integrate programming into making things.  This past summer, I took an interest in coding and took part of a computer science class through Udacity, an online service which offers free classes. After this experience, I’m eager to see how different codes can be applied to product design.