
JIN’s Cloth Ferris Vision 2.0


The reason that I came up with this idea is that before I came to the US, I lived in the south side of China which is pretty warm, and my mom or my roommate would always remind me to wear more or fewer clothes and bring an umbrella if there raining outside, so after I came to us, I often forgot to check the weather forecast so that I often find out after I go out that I forgot to bring an umbrella or have worn too few clothes. So I desire to design a device that can remind me of the current weather and suggest what should i wear before I head out.
https://www.instructables.com/-Ferris-Clock-a-Clock-That-Makes-You-Dont-Have-to-/
Acrylic board
wood board
glue gun
3D print material
360 degree servo
Adafruit ESP wifi board
Usb cable
Neopixel_led light stript
Acrylic board
wood board
Glue gun
Super glue
Knife
Scissors
Wire cutter
3D print machine
Laser cutter
The whole process was a bit rough, from wanting to implement three functions at the beginning, to wanting to use a button to control it, and using two feeds to control the different functions, to finally simplifying it down to two functions, no button, and only one feed, I learned that you can never success at the first time, you always need prototype. Also i built the device in the wrong order, because I was unfamiliar with the coding, so I resisted to test the circuits and the code, and made the model first, but this made me realize that the model didn’t make sense. The modeling was not in the right order because I was not familiar with coding, so I resisted testing the circuits and codes, and made the model first, but then I realized that the modeling made a lot of sense, for example, I wanted to add a clock function to my device, but it turned out that I could only have one function on the same axis at a time. At the same time, the 360 degree servo doesn’t control the angle very well, so it’s not reasonable to design a clock that can turn all angles.
But I also learned a lot in the process, I learned to use a 3D printer, I learned to use a wifi component, and how to tell a story with a video.
Inspired by elaine’s device, I hope to make a device that can help little people wear different clothes, and at the same time use more colorful colors to represent different weather.
Suppilers&Tools
To make this project, I used:
Existing Clock
360 Servo SG90
Several wires for connection
Adafruit Huzzah ESP8266
LED Light Strips
Adafruit Perma-Proto 1/2
solder pen
Recuit Connection
https://www.tinkercad.com/things/k9g8BOdS1ys-sizzling-allis-vihelmo/editel
Referrance

Function Summary
Weather in NYC changed randomly. I’d like to have a CLOTH SUGGESTION BOARD to give me advise that what i should wear everyday so that i won’t wear the wrong clothes.
Time: Using existing clock’s motor
Weather: Using servo motor —four different weather method:
Cloth suggestion: LED Light—four different clothes suggetions: T-shirt, Sweatshirts,Windbreak , Down
When i push a a buttom on my clock, i can getthe current weather and temperature the info will stay 5 minues.
Moodboard
Final sketch & Model


Lesson Progress
1 Log in the Adafruit IO and FTTT.
2 Trying to finish the circuit

3 Type in the Username, Active Key and the wifi name of my apartment.

4 Trying to create a new Applet, but i can’t authorize the adafruit service. And i end up here.

List Of Components And Parts:


All of my ideas are come from my life.
IDEA 1: Voice Control Lamp
I have two lamps in my bedroom. One is a ground lamp another is a table lamp. The switches of both of them are far away from my bed. Everytime i wanna turn down the light, i have to get up which is annoying. So i wish i can have a Voice control lamp just like the Amazon Echo and Siri that i can talk to. This idea is quiet normal, but it can save me money to buy a new lamp :).(lol)

IDEA 2: Clothing Suggestion Board
Weather in NYC changed randomly. I’d like to have a CLOTH SYGGESTION BOARD to give me advise that what i should wear everyday so that i won’t wear the wrong clothes.

Why I made it:My Halloween costume named evil ratatouille, which is a character from the movie ratatouille named Colette Tatou(I’m sure you’ve all seen the movie before!) The reason for cos this character is because I really like the philosophy of this movie-everyone can cook.what is a coincidence that Zai and I came up with this idea at the same time(Her haircut is just like the Linguini, and mine is like Colette), so we decided to Cos them together.

How to Hold it: Two parts of my costume: Ratatouille and the chef jacket. You can just put on a chef’s outfit and hold a Ratatouille in your hand.(which is very easy to put on them)

Shopping list
| Shopping list | shopping link |
| blue foam | |
| Aluminum tray | |
| RGB light striptDigital RGB LED Strip – Black 30 LED 1m | https://www.adafruit.com/product/2552 |
| KNG 3/4 Sleeve White Chef Coat for Women – Ladies Fitted Chefs Jacket | https://www.amazon.com/KNG-Womens-White-Classic-Sleeve/dp/B014R15W1Y/ref=sr_1_107_sspa?crid=2O1CW028RPQQL&keywords=chef+outfit&qid=1698430637&sprefix=chef+outfit%2Caps%2C115&sr=8-107-spons&sp_csd=d2lkZ2V0TmFtZT1zcF9tdGY&psc=1 |
| red acrylic painting | |
| Gamme Board | https://www.adafruit.com/product/3501 |
| 42pcs Felt Fabric Sheet 4″x4″ Assorted Color DIY Craft Squares Nonwoven 1mm Thick | https://www.amazon.com/42pcs-Fabric-Assorted-Squares-Nonwoven/dp/B01GCLS32M/ref=asc_df_B01GCLS32M/?tag=hyprod-20&linkCode=df0&hvadid=167145987075&hvpos=&hvnetw=g&hvrand=4100555452256584761&hvpone=&hvptwo=&hvqmt=&hvdev=c&hvdvcmdl=&hvlocint=&hvlocphy=9003565&hvtargid=pla-314779399608&psc=1 |
Making process step:
1 test the Arduino code

2 Copy the code to the gemma board

2 making the ratatouille,cut the felt fibric by hand.(Huiyi said it can’t be cut by laser cut mechine )


3 repaint the chef outfit: use the red paint paint my palm, and paint some palms and blood stains on my clothes.(forgot record the process)

Adafruit_NeoPixel strip(PIXEL_COUNT, PIXEL_PIN, NEO_GRB + NEO_KHZ800);
boolean oldState = HIGH;
int mode = 0; // Currently-active animation mode, 0-9
void setup() {
pinMode(BUTTON_PIN, INPUT_PULLUP);
strip.begin(); // Initialize NeoPixel strip object (REQUIRED)
strip.show(); // Initialize all pixels to ‘off’
}
void loop() {
boolean newState = digitalRead(BUTTON_PIN);
if((newState == LOW) && (oldState == HIGH)) {
delay(20);
newState = digitalRead(BUTTON_PIN);
if(newState == LOW) { // Yes, still low
if(++mode > 8) mode = 0; // Advance to next mode, wrap around after #8
switch(mode) { case 0:
colorWipe(strip.Color( 0, 0, 0), 50); // Black/off
break;
case 1:
colorWipe(strip.Color(255, 0, 0), 50); // Red
break;
case 2:
colorWipe(strip.Color( 0, 255, 0), 50); // Green
break;
case 3:
colorWipe(strip.Color( 0, 0, 255), 50); // Blue
break;
case 4:
theaterChase(strip.Color(127, 127, 127), 50); // White
break;
case 5:
theaterChase(strip.Color(127, 0, 0), 50); // Red
break;
case 6:
theaterChase(strip.Color( 0, 0, 127), 50); // Blue
break;
case 7:
rainbow(10);
break;
case 8:
theaterChaseRainbow(50);
break;
}
}
}
// Set the last-read button state to the old state.
oldState = newState;
}
/
void colorWipe(uint32_t color, int wait) {
for(int i=0; i<strip.numPixels(); i++) { // For each pixel in strip…
strip.setPixelColor(i, color); // Set pixel’s color (in RAM)
strip.show(); // Update strip to match
delay(wait); // Pause for a moment
}
}
void theaterChase(uint32_t color, int wait) {
for(int a=0; a<10; a++) { // Repeat 10 times…
for(int b=0; b<3; b++) { // ‘b’ counts from 0 to 2…
strip.clear(); // Set all pixels in RAM to 0 (off)
for(int c=b; c<strip.numPixels(); c += 3) {
strip.setPixelColor(c, color);
}
strip.show();
delay(wait); }
}
void rainbow(int wait) {
for(long firstPixelHue = 0; firstPixelHue < 3*65536; firstPixelHue += 256) {
for(int i=0; i<strip.numPixels(); i++) { // For each pixel in strip…int pixelHue = firstPixelHue + (i * 65536L / strip.numPixels());
strip.setPixelColor(i, strip.gamma32(strip.ColorHSV(pixelHue)));
}
strip.show(); // Update strip with new contents
delay(wait); // Pause for a moment
}
}
// Rainbow-enhanced theater marquee. Pass delay time (in ms) between frames.
void theaterChaseRainbow(int wait) {
int firstPixelHue = 0; // First pixel starts at red (hue 0)
for(int a=0; a<30; a++) { // Repeat 30 times…
for(int b=0; b<3; b++) { // ‘b’ counts from 0 to 2…
strip.clear(); // Set all pixels in RAM to 0 (off)
for(int c=b; c<strip.numPixels(); c += 3) {int hue = firstPixelHue + c * 65536L / strip.numPixels();
uint32_t color = strip.gamma32(strip.ColorHSV(hue)); // hue -> RGB
strip.setPixelColor(c, color); // Set pixel ‘c’ to value ‘color’
}
strip.show(); delay(wait);
firstPixelHue += 65536 / 90;
}
}
}
Circuit diagram:

what you would do differently if you had to do it over again:
1 Replace the felt fabric with acrylic. (Preform better on Translucency )
2 Use wood or corrugated board to make the pan so I can dig a slot in the bottom of the pan and hide the buttons underneath!
3 Use stronger battery
final picture~


👻🎃👻🎃👻🎃
Happy
Halloween!
👻🎃👻🎃👻🎃
Finellly choose the ratatouille as my final costume, and i decided to cos Colette Tatoec—the only female chef in the restaurant.


And i will buy chef outfit from amazon, and make a fibric luminous ratatouille.
Meterial:
1 chef outfit
2 felt fibric of different colors
3 led ligh stripe
4 arduino metro board
5 bottom


circuit connection


Soldering

CODE ADRESS:
Halloween custom brainstroming:
The first idea—Alfredo in <ratatouille>
<ratatouille> is one of my favourite cartoon movies, i want to cos the hero-Alfredo Linguini in that movie with rhmy in his hat which comes from a scenario of the movie when Alfredo pass by an light, the Silhouette of rhmy come out.

The second idea-Mathilda in <leon the professional>
<leon- the professional >is one of my favorite movies which also happend in newyork. Due to cutting my hair recently, i come up with an idea that maybe i can act Mathilda who has same haircut with me. And i decided put the arduino in the plant taht leon hold.

The third idea-B&B UP chair—The first Italian product “with a political meaning”
UP chair was designed by Gaetano Pesce in 1969 and is one of my favorite armchairs. It combines Social philosophy, physical aesthetics, and modern technology into one. The footrest represents prejudice against women which means a lot in modern society. And I’m going to put the light in the ball footrest.
The chair and ottoman are attached by a chain, in a deliberate reference to “a female-shaped body with the prisoner’s ball chained to its foot”


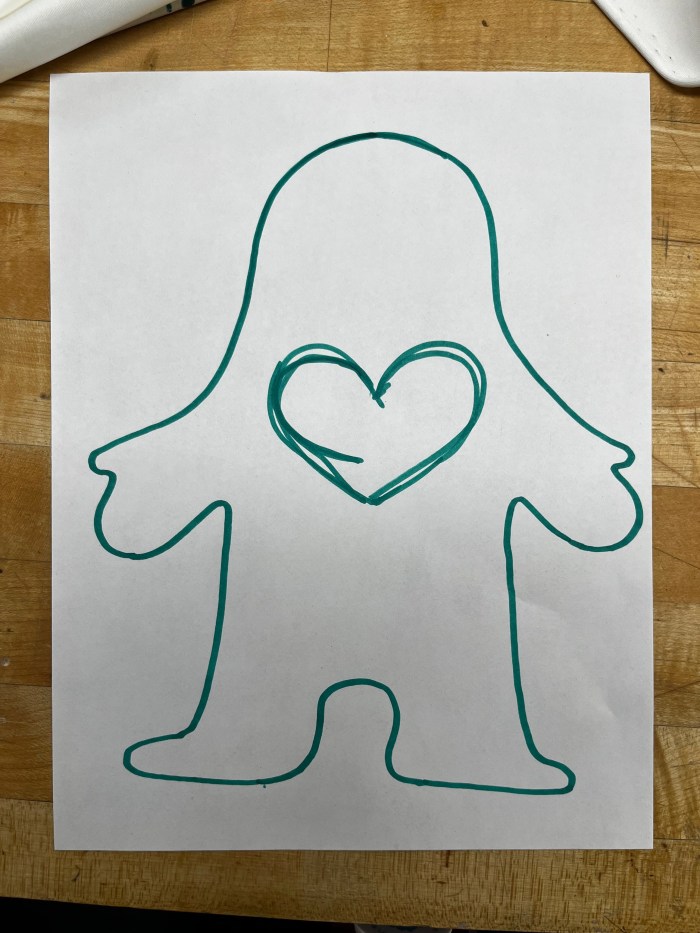
This flash light is inspired by my philosophy of life, which is that everyone is born equal, but it’s the people we meet, the environment we grow up in, and the cultures we come in contact with that make us unique individuals, and it’s the love in our hearts that makes us who we are.
But when I made this doll into a piece of clothing, I realized that it is not only a way to express oneself, but also a medium to convey warmth to the people around me.

Imagining on a cold night on the streets of New York, a stranger walking towards you wearing such a cute shirt, which emits warm light, would it not make you feel warm and sweet? So I wanted to make a shirt that lights up, that would allow people to transmit warmth and love to those around them even on a cold dark night.

Making processes:


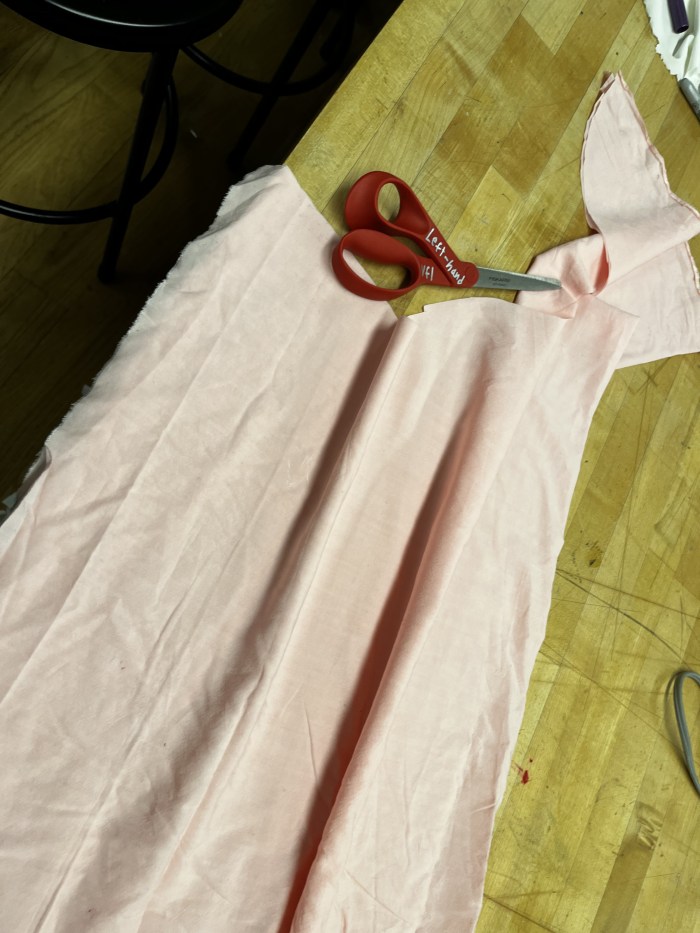


9 put the heart shape fibric on the LEDs.


10 Test whether it can be lighten up


12 Final~~~~