Felix and I built the brain of an aquaponics system. It is an outlet box with four outlets each of which is controlled by google calendar. It turns out that this Google calendar controlled outlet box has plenty of other applications beyond aquaponics.
Felix and I have planned our aquaponic system. We are using a steel wire rack as the base. We will have a 20 gallon fish tank with two 10 gallon (36″x18″x6″) grow beds for a 1:1 fish tank to plant bed ratio. We will use a Four outlet power relay module to control the pump, grow light and fish food. This relay module will the control center of the operation. With this we can control remotely when the plants are watered, receive light and when the fish are fed. We are currently in the process of procuring everything we need for the project.
Felix, Helen Marko and I are going to work on it the aquaponic farm.
BOM from the tutorial:
Full BOM
Principal Components
Pump
Grow bed
Fish tank
Sump tank
Stand
Bell Siphon
25mm polypropolene tank fitting
1 off. 25mm female threaded fitting
1 off. short length* ~100mm length of pvc pipe. note that this length is critical in determining the top level of the water during the flood cycle.
1 length off 50mm PvC pipe
1 off. 50mm Pvc endcap
Media Filter
90mm PVC pipe
90mm end cap
Outlet Pipe
1 off. 25mm male threaded fitting
1 off. 25mm 90 deg elbows
2 off. short lengths of 25mm pvc pipe to join fittings
2 off. 25mm 90 deg elbows
1 off. 25mm ‘T’ fitting
1 off. 25mm female threaded adapter
2 off. 25mm threaded male to 19mm barbed hose fitting (poly propylene)
2 off. 25mm end caps
2 off. 25mm pvc pipe cut to 200mm (depends on width of your grow bed)
various short lengths of 25mm pvc pipe to join fittings
My three Halloween proposals are as such. I was initially leaning towards the piano neck tie. It would light up each key as if it were playing Clair de Lune by Debussy. Unfortunately, I do not know that song and I cannot play the piano. The fire hydrant is entertaining to think about, but I think it will attract the wrong kind of attention. Instead, I will be making the center one. It incorporates an infinity mirror apparatus that gives an impression that there is a hole going through the wearer’s chest.
This dipped plush light hangs on the wall and gives users a fun off-kilter light that evokes candy or cake.
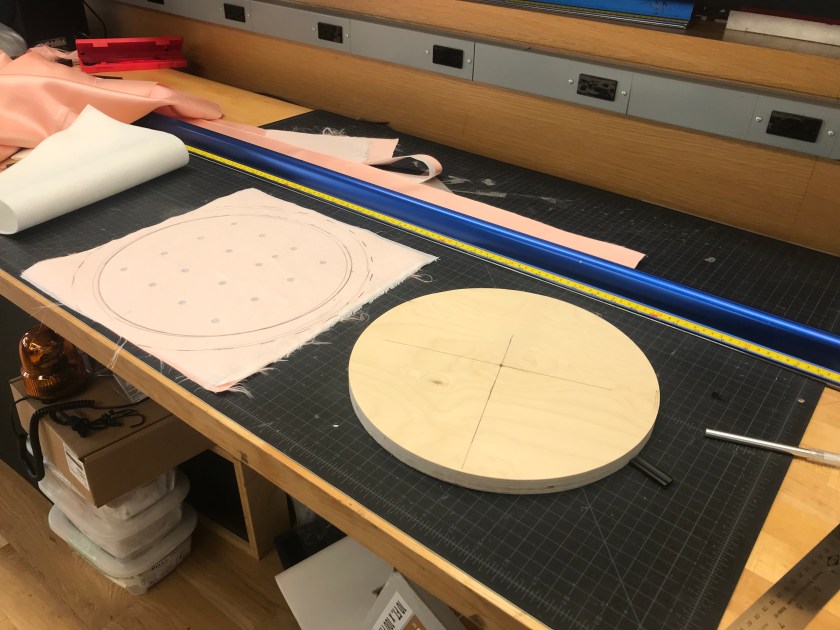
The process began with laser cutting the holes in the top sheet then applying the fusible interfacing.
Cutting fabricLaser cut light holes
After applying the fusible interfacing I cut the fabric to size. I sewing with the piping and sewing it into place.
Piping sewn
Following this I hand stitched the side piece into position to prepare it for the sewing machine.
Hand sewn into position and ready for the machinePlushifying feltEmpty insideClean top
The light box was made from an container for a pie. I used the lid from it and then spray painted it leaving holes that aligned with the holes on in the fabric.
Light holes masked ready for spray
The light box is elevated off of the base board with corrugated plastic sheeting and hot glued into place. The space between the outer fabric and the light box was taken up with batting.
Assembly
I decided that this design required four LED’s. Here is the circuit diagram:
Circuit diagram
To achieve the candy coated appearance it was dipped into acrylic paint.