Fall Lamp

I struggled with this project from the beginning because the prompt allowed to make “anything.” Too many possibilities? I decided I wanted to make a lamp because the lights in my bedroom can only be controlled from the living room…oh, how I longed to have a light that I could switch on and off while lying in bed.

Inspiration, then success, then failure…
IMG_20121205_130101

I wanted to create a lamp that responded to motion. The design of my lamp would allow the lights to fade in and out if it sensed motion. I used a tilt switch for motion sensing, a 4-pin switch for on/off capability and Tip 120 for using the Voltage In. After much “circuiting”, I got the lights to work exactly like I wanted, yay!

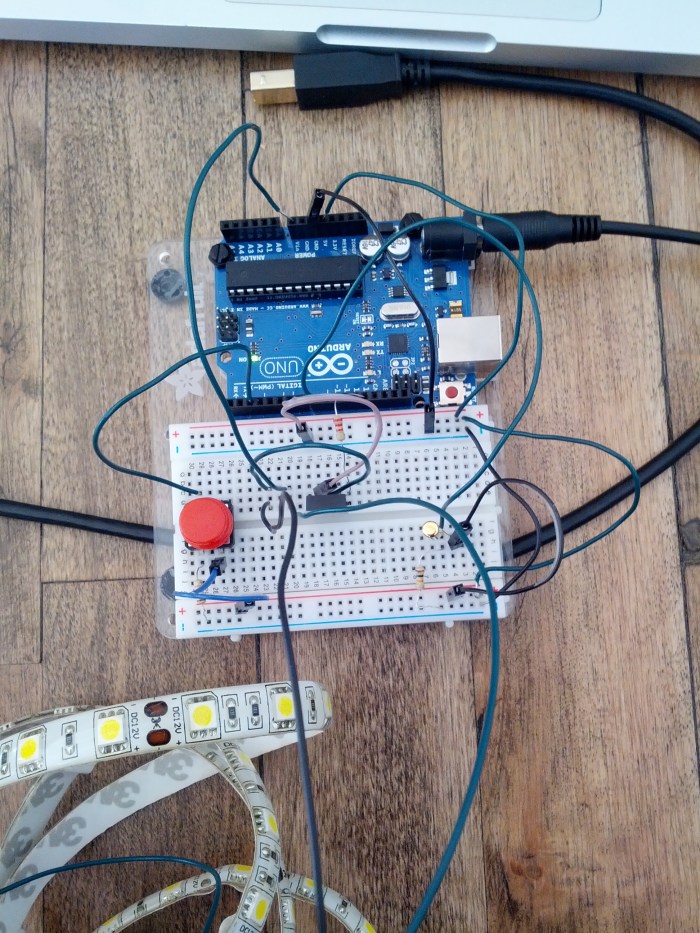
I was going to use a Leonardo Ardunio that would attach to my lamp and I soldered the many wires together. The tilt switch was to be connected to the one of the brass rods that would hang from the lamp. So, I proceed to create the mess you see below:

IMG_20121207_090350

…but then a lamp!

I realized later that I created a short circuit and managed to kill my Arduino, but I decided to make my lamp anyway, and it does work like other lamps, so it won’t fade, but it will give you light when you want. Here it is:

dark IMG_4779 IMG_4795


unfocused

It’s inspired by fall and each of the big maple leaves are personalized with elements of my life. I used the CNC to cut out the shelf piece which plays the “tree branch” and I used the laser cutter to make the leaves.

Here it is, in action:


The Chameleon Bag

In developing this project, I wanted to combine RFID tag technology and RGB LEDs into a fun and delightful experience. When I decided on creating a messenger bag with a reactive front panel, I knew that it would have a very functional aspect too.

Some of my inspiration came from ET (Everything is a Toy) and the Reading Glove. Both show unique ways of using RFID tags in electronics, one for fun and one for education.

2

I worked with two strips of RGB LEDs to create a 7 by 7 LED matrix. After getting them up and running, I added in the RFID reader. Although I did not find a specific precedence combining these two elements, I did use this tutorial for the RGB LED set-up and this tutorial for the RFID code.

14

After the code was up and running, I soldered together a Boarduino for the brains of my final bag, and attached my RFID reader to it. 2405_001-1

I designed a messenger bag with extra space in the front flap and back panel to accommodate one inch-thick foam to diffuse the light and protect the electronics, respectively. I put a zipper on the back panel to allow access to the electronics and to the battery pack.

17

I also created useful pockets, an adjustable strap, and magnetic snaps to hold the LED panel in place.

20

I laser cut a front panel out of wood to hold the LEDs in place. Above is the final set up for the front flap and back panel. And below is my final bag!

IMG_5585 IMG_5592

These pictures show the final, fully functional bag. This video shows my process and end result!

See my Arduino code below the jump!

Continue reading “The Chameleon Bag”

RestPhones

wowshotThese are the RestPhones. They are essentially two pillows that sit on your head like headphones and allow you to comfortably listen to earbuds while resting your head. They’re great for watching movies in bed when you want to use earbuds, or for falling asleep to music on the bus.

workshop materials

process

The construction is simple. Some (imitation) leather and velvet for the body, foam for the cushion, and some bent aluminium for the band. I initially had some difficulty getting them to sit right, but by the third construction I was happy with the look and feel.

modelshot

Good Chuck, Bad Chuck, Nunchucks.

For my final project, I experimented with Persistence of Vision (POV) using the Adafruit MiniPOV3 kit. Here are a few photos of me soldering the boards.

010203My original idea was to embed these LEDs into sleeves of clothing so when one waves their arms, words would appear in air. After coding the PCBs & furiously waving my arms, I realized this may not be the best application. I attached the PCB to a stick & waved it for a photo. It displayed a word, but it was forward & backward. I also attached them to the inside of an umbrella, which was mildly successful.

04

05

Eventually I concluded that nunchucks would be a great application for the POV boards. I created a quick prototype before creating the final nunchucks.

06

07

When a ninja encounters a confrontation, he/she can choose to display a good or bad message depending on their mood & situation. One nunchuck is light toned (good message) & one nunchuck is dark toned (bad message). This is an epic tale of a hero & his external as well as internal struggles of what is good & what is bad.

Light-Up Hand Warmer (for cycling)

The light-up hand warmer for cycling is my first project using EL wires. I took particular interest in how this light technology could be applied to an activity that I do almost everyday. I was not at all familiar with EL wires, so I chose a medium — a woven hand warmer — that would allow me to easily and quickly get more comfortable with it.

Continue reading “Light-Up Hand Warmer (for cycling)”

CACTUS HUG

For my plush night light I have inspired from a photo of myself, where l had a cactus on top of my head.

I have used felt as a material and laser cut it for the precise dimensions and sharp edges.

I have used a soft switch where the conductive materials the buttons are in between. So that when there is a pressure on one of the buttons, it closes the circuit and the LED’s light up!

The idea behind my plush light is that you hug “pillow Rona” the cactus on top of her head would light up!

Svala – modular night light

Image

This is Svala.

It is a modular plush light with leds that shine but that you can’t see. It is therefore only a light that shines as if it was night – ergo, not at all.

My process started by sewing the moduls out of dense black fabric.

Image

I combined the moduls and hung them up.

Image

I soldered 11 LED lights in parallel.

Image

Discovered that they worked on my first try.

Image

And was this happy about it.

Image

I then mounted the LED string into the moduls.

Image

Image

and Voila!