Homework: Plush toy

Hello! This my final plush toy – Smile.

1

When turning on the switch, it looks in this way:

2

How I make this plush toy

  • Finish the sketch of the toy and the circuit
  • Choose the fabrics
  • (1) The fabric for the hair and eyes: black and very thick fabric to block the light
  • (2) The fabric for the face: flesh and thin fabric to let the light get through it
  • (3) The fabric for the mouth: Two different red fabrics
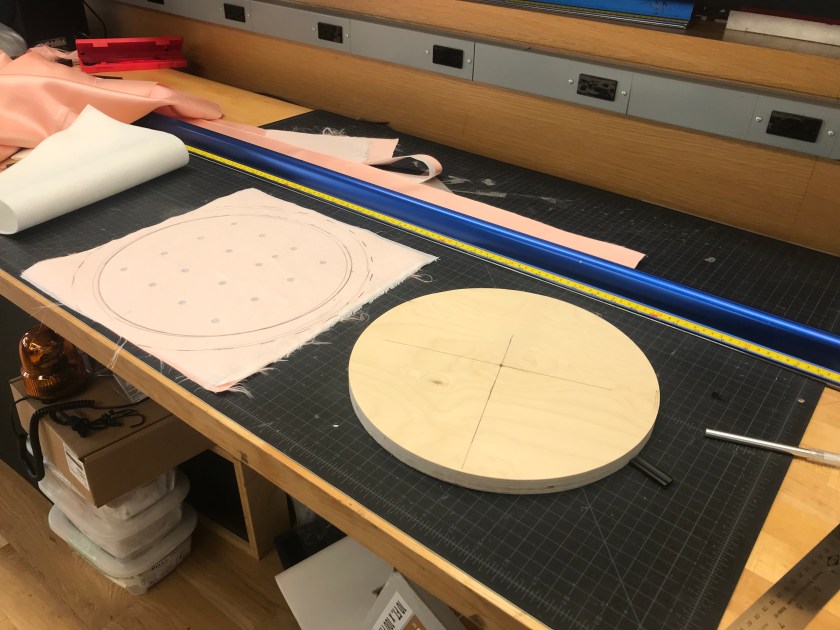
  • Cut the outline of the hair, face, eyes, and mouth
  • Add a thickness to both the hair and the face
  • Sew all the parts together! Hair-face-details
  • Finish the circuit
  • (1) Buy the electric materials: two red LEDs, one AA2 battery case
  • (2) Choose the resistors
  • Two 100 ohm – the light can get through the fabric and are not too dazzling
  • (3) Solder them together!
  • Place the circuit inside the face of the plush toy and adjust the position of the LEDs
  • Fill the face with cotton and close the face part
  • Finish!

Difficulty

hair

The most difficult part I met is to sew the hair together. The black fabric is too thick so I cannot use the sewing machine. At first, I sew the thickness part to the front piece and then to the back piece. When sewing it to the back together, I use two steps: at first start in the middle of it and sew one half side, and then the other side. And it becomes more and more difficult when getting close the side.


Circuit diagram

circuit


The circuit has two LEDs, two 100 ohm resistors and a battery case with a switch. I use paralleling to connect the two LEDs so they won’t be affected by each other.

circuit2

The name and the story

His name is Smile. This is a simple name and he has a simple hope to bring happiness to others.

Smile comes from a comic book and travel to the world where we live. During his travel, he found that smile is contagious, which means when he smiles to other people, they often smile back even they don’t know each other really. It always makes him feel happy, and he hopes others to feel happy too.

Plush night brain

My plush is a brain! This brain lamp is for anyone who likes to use their brain, but also for those who want to take a break and keep calm. The switch allows you to turn on and off the light. It diffuses the light to help you relax or keel calm, carry on thinking about your next big idea! You can also pat it like your teddy bear when you need a break from thinking too much.

If your brain is constantly thinking, it is a reminder to stop working on your brain muscle but move your body muscle. Also, it is a reminder to think smart whenever you are working at your desk. It can be either put on your desk, your coffee table or hang from your ceiling of your front door.


IMG_7871IMG_7832IMG_7838IMG_7849IMG_7852IMG_7860IMG_7869IMG_7863


I failed a lot in soldering but I learned so much about the best practices. I’m still learning about the circuit diagram and working with the resistors to make the light brighter. It also turned out blue or yellow LEDs are better than the white ones, which I thought would be good. Failing served good for me to learn!

Macaroon

This dipped plush light hangs on the wall and gives users a fun off-kilter light that evokes candy or cake.


The process began with laser cutting the holes in the top sheet then applying the fusible interfacing.


IMG_5528
Cutting fabric
IMG_5532
Laser cut light holes


After applying the fusible interfacing I cut the fabric to size. I sewing with the piping and sewing it into place.


IMG_5531
Piping sewn


Following this I hand stitched the side piece into position to prepare it for the sewing machine.


IMG_5533
Hand sewn into position and ready for the machine
IMG_5535
Plushifying felt
IMG_5536
Empty inside
IMG_5538
Clean top


The light box was made from an container for a pie. I used the lid from it and then spray painted it leaving holes that aligned with the holes on in the fabric.


IMG_5539
Light holes masked ready for spray


The light box is elevated off of the base board with corrugated plastic sheeting and hot glued into place. The space between the outer fabric and the light box was taken up with batting.


IMG_5537
Assembly


I decided that this design required four LED’s. Here is the circuit diagram:


IMG_5545
Circuit diagram


To achieve the candy coated appearance it was dipped into acrylic paint.


IMG_5541
Dripped and dipped
IMG_5542
Dipped and dripped

CLOUD CAGE

DSC00572

When I was a kid, I always love to see the cloud in the sky. I wanted to keep it in my room so I can touch it and play with it. I imagined the cloud is a child, loves to hover around the cage with its glowing body.

Process:

Screen Shot 2018-10-02 at 8.04.58 PM
Circuit diagram
IMG_1718
Idea Sketching
IMG_1717
Drawing frame with Illustrator
56019200995__2C21775E-F68F-4220-9922-CF3E746122DC
Lasser cutting with acrylic
IMG_1714
Gluing the acrylic board
IMG_1715
Sewing cotton to make it more compressed

And then I bought the circuit for the coin battery from tinkersphere.

IMG_1705
Finally get all the lights on

Sorry that I forgot we gotta record all the process, so I only took a few pictures.

DSC00560
Bedside Light

Overall, I enjoyed the assignment a lot, and I love my little cloud cage!


Delicious Nightlight!

KakaoTalk_2018-10-02-20-42-28_Photo_42

KakaoTalk_2018-10-02-20-17-35_Photo_41

Hello, for our nightlight assignment, I made a donut nightlight! This is for the children who are scared of darkness. Children can use it whenever they have to move in the dark (going to restroom, etc) I chose the object that most children like to make them relate darkness to more positive feeling(sweet taste of donut).

The donut shape makes it easy for children to store the product. Children can hang it anywhere thanks to its hole. They can also carry it by their fingers and play with it by rotating it.

At first, I wanted to hang the donut on wrist, but in order to achieve that, size had to be too big. So I decided to make the real size donut.

KakaoTalk_2018-10-02-20-37-28_Photo_72

Sewing the donut wasn’t the hard part. I bought thin fabrics for the led lights to be seen and attached the frosting and the donut.


Screen Shot 2018-10-02 at 8.39.12 PM

I used tinkercad to figure out the circuit for my product. It was fun and also useful when finding the right resistor to use. In the tinkercad I used 3V battery but later I changed to 3XAAA battery. I used 4.5V battery and 100Ω resistor for this product. I decided to connect my leds in parallel because in that way, I can make sure other leds light up even one led has a problem.

KakaoTalk_2018-10-02-20-17-28_Photo_69

The hard part was soldering and distributing the light. It was hard for me to solder three lines together since it kept falling off as I tried to solder the last one. Distributing the leds inside the donut was really hard. The donut was so small so it was hard to put 3 leds and all the lines inside.

I noticed that the donut has too many wrinkles on it after putting stuffings in it, so I had to detach it and made sprinkles instead.

There are several things I want to improve about this donut. If I have a chance, I would like to make it much bigger so that I can experiment more about distributing the leds and also want to use a little bit thicker fabric so that it has less wrinkles.

KakaoTalk_2018-10-02-20-17-31_Photo_85

Finally, this is the picture of my happiest moment!


Yellow Patrick Star

微信图片_20181002194509


This is a Patrick star. It is lively and cheerful and likes to talk to children. What it is best at is to bring light to the dark girl in the dark. This way the girl will no longer be afraid of the night or walk alone on the night.

images527c595f5f09a

This idea comes from my childhood. I have seen too many movies when I was young. I always feel that there are bad things in a dark corner at night. So I will be very scared. Especially when I walked alone on the night, I sometimes stopped to relax.

When I was young, my favorite cartoon characters were Patrick Star and Minions. Because I think Patrick Star’s fat and soft will give me a sense of security. Minions color is my favorite color.So I combined them and designed my Yellow Patrick Star.

微信图片_20181002200905

maxresdefault\
This is the process of making my toys. I am thinking about the circuit arrangement after making the toy. In the process of making toys, I used a sewing machine.I am not very good at using sewing machines. Because I am afraid of needles. But in the end I still finished with the machine. This is a big challenge and a big step forward for me.


微信图片_20181002201729

Initial concept sketch of Yellow Patrick Star.


微信图片_20181002201014微信图片_20181002201022微信图片_20181002201029

Process photos of circuitry and sewing:

微信图片_20181002203314

welding:

微信图片_20181002203432微信图片_20181002203422微信图片_20181002203407


Booli: The Adorable Plush Robot and Flashlight

04.jpg


05.jpg

01.jpg

02.jpg


03

Like any kid, I was terrified of the dark.  Any reason for me to leave my room or even my bed in the middle of the night was a cause for much consternation whether it was a trip to the bathroom or running to my parents’ room after nightmare.  Of course we had flashlights around, but they were usually misplaced and even still the thought of a trip from my bed to my desk to retrieve one was terrifying. The flashlight needed to be where I was—in bed.

Additionally, I was big on reading in bed.  I would stay up well after midnight reading all sorts of science fiction and fantasy until either I couldn’t keep my eyes open or my parents caught me.  I would use all sorts of things to see the pages in the dark.  Book lights and some toys like a light up bracelet I had worked, but they were designed to be small and compact and thus were easily lost by a child.  Some bigger toys with lights were harder to misplace, but didn’t produce the light necessary and weren’t very comfortable to have in bed with me anyway.

These two needs are why I created Booli.  His shape is meant to be reminiscent of EVE, the futuristic, but friendly flying robot from the movie Wall-E.  Booli is short for boolean which is a binary variable used in computing.  Booli is comfortable to hang out with in bed, and big enough that he won’t be easily lost in a messy room.  His eye lights up with a cool pattern that illuminates the pages of your favorite book or lights the way as you navigate the dark hallway.


Process

Circuitry

IMG_9949

DSC00479

DSC00507

Sewing

DSC00497

DSC00498

DSC00517

DSC00502

DSC00520

DSC00528DSC00522


Circuit diagram

shiny-amur-kasi.png

Moody Raindrop

Sometimes it feels good to be a little blue when it’s raining. Sometimes you want to feel blue, but there just isn’t any real rain in sight. The Moody Raindrop provides you with the ability to get a little emotional any time you wish.

The white felt plushy resembles a single drop of rain that reveals its melancholy mood when inner-lit with blue light.

IMG_6689.jpg

Concept Sketch

Drop Sketch.jpg

WORKSPACE

Prepping the workspace

IMG_6671.jpg

PATTERN

Layout and cutting the pattern

IMG_6672.jpgIMG_6673.jpgIMG_6675.jpgIMG_6677.jpg

I ended up stitching by hand. Thought I could use the experience/training of stitching by hand.. Hindsight says I should have used the machines for better cleaner edges.

IMG_6678.jpgIMG_6679.jpgIMG_6680.jpg

(not pictured : gluing the blue felt eyes and quivering mouth to the inside of the felt before turning inside out.)

IMG_6684.jpg

ELECTRONICS

The LED cluster was essentially the same as last week with the blue LEDs glued into the styrofoam spheres, but I added a 5th light and heat-shrined+hot-glued the cluster of 5 lights together for a more even dispersal inside the final model.

IMG_6681.jpgIMG_6682.jpgIMG_6683.jpg

Plush wiring diagram.png

ASSEMBLY

The sewn felt skin and the electronics cluster come together with a hint of fiberfill to fill out the edges of the plush and to help diffuse the light another level.

The diffusion ended up OK, but not amazing. Still have hot spots in the center and a little dark around the edges. That said, my intended reveal of the eyes and mouth work like a charm.

Off – under light

IMG_6686.jpg

ON-under light

IMG_6692.jpgIMG_6690.jpg

ON – under little ambient light

IMG_6689.jpg


Week 4 Homework: Littlear

Story:

Littlear is a little accompany monster who has its feelings on its face. People who are quiet and do not easily speak out their feelings can have them. Because this group of people is always afraid of socializing with others.

When they are upset and tired, they don’t want to speak with others; or when they want to refuse others but do not know how to say it. Littlear can help them to avoid these embarrassing situations. When they put this on his table and turn it on, it means “ Sorry I am not ‘online’ now”.

Sketches:

IMG_8137

Process photos:

IMG_8131

Circuit diagram:

屏幕快照 2018-10-02 下午4.37.10

Photos in context:

IMG_8146IMG_8144

The Monster Catcher

Hello Everyone!

This week’s assignment was challenging but I really enjoyed it.

I was inspired by dream catchers but wanted to make it more fun so I made a toy called “Monster Catcher” which is for kids who are afraid to sleep in their own room. The Monster Catcher hangs on the was and lights the room up.

Processed with VSCO with a6 preset

I used 6 yellow 5mm LEDs. I initially wanted to put lights in the arms and legs but decided to make it more simple. Here is a sketch for my circuit:

img_4607.jpg

Here is the process of soldering:

Process of making pom poms:

putting everything together:

And finally here is the result:)

IMG_4671