My project’s purpose is to help users to focus and not procrastinate. The form was to make sure that the phone would be out of reach and the construction’s hardest part was the circuit and connecting it to the internet. My future projections are to making it to actually send the text and taking it further to connect a soundboard and making an alarm go off if the sensor detects the phone being taken out.
The learnings I learned through this process is that there are so many different technical difficulties you can run into with various factors that comes from it. This means that you would have to test different factors and must find the right problem to fix. If I were to take this further next time, I hope to make sure I can concisely be able to pin point the problems and be able to fix it on my own and be able to successfully get to my goal.
Final Project: a container that will lock your phone if you want to take a break from screen time or when you are studying to not get distracted. A text will be sent if the glass lock is open.
This is the first idea that I thought of inspired from the interactive drake pillow I saw from past students. Since I love music, I thought it would be a fun and lasting project. I am not 100% about if I can obtain all the parts I need in Korea but i would need to research how long it will take to come.
Idea 2:
Communication Clock
Due to the time differences in class, sometimes there is a tension between family members because they may not know what time I have slept the night before. Therefore, to communicate if I have slept early, normal, or late time would be placed outside on my door so that my family members will know not to wake me up.
Idea 3:
Diet Process Lamp
From inspiration from the half marathon training lamp, I thought if I plan on going on a diet for my health a diet process lamp would motivate me. If i saw a lamp slowly being filled with my goals, I would feel motivated to reach my goal!
This is the moods of the cloak that will detect on vampires.
The Story:
This is going to be a mood cloak for vampires only. This cloak will be able to detect vampire’s mood. Just like a mood ring, it is going to change colors according to the mood of the vampire who wears it. The colors will be:
Red = Happy, I’ll conversate
Blue = Angry.
Green = Thirsty, Don’t Bother Me
Purple = Feeling Nice Today
All sorts of colors = Sleepy, bye
This cape is for vampires and vampire’s friends who cannot tell their expression in their faces. The mood will be able to help friends and also help the vampire understand their emotions. We all know vampires are emotionless and maybe sometimes as vampires’ friends, we need to understand their mood so we will not get eaten.
Process:
What I learned through this process is that the story of the product matters. When you put in the meaning of the product, it brings the product to life. A struggle I came across was working through Arduino Code but it was my first time but I think after experimenting it has worked out! I also think my soldering skills are improving day by day.
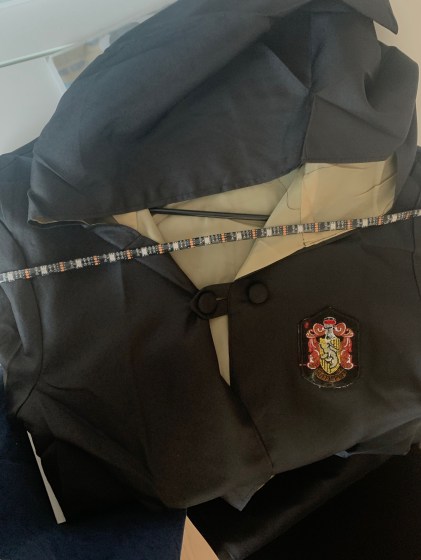
I tried to make my own cape for the costume but I realized it was going to not look the way I wanted too so I decided to modify a costume. Here is the cape that came in the mail. I also got a long strand of RGB LEDs to connect with the cape.
The Story:
This vampire cape is going to be able to be a mood cape just like a mood ring its going to change colors according to the mood of the person who wears it. The colors will be:
Red = Happy Blue = Angry Yellow = Thirsty All sorts of colors = Sleepy
This cape is for vampires and vampire’s friends who cannot tell their expression in their faces. The mood will be able to help friends and also help the vampire understand their emotions.
I have decided to make a vampire costume so I want to boldly use the colors red and black. The black cape costume will be made and the red colors will be covered with RGB LED lights. In order to do this, I would need:
The black cape will have the ends of the sleeves to be lit up and the hood of the cape will be lit up. If possible, I will try to use LED strips to be a possible belt.
Circuitboard:
I am not 100% sure about the circuitboard and not sure how to connect multiple strips. But with the most recent lesson from LED strip soldering lessons I will use the technique to lit up the RGB LED lights. I would need a specific code as well to make sure my LEDS are red.
I knew that I really wanted to make a vampire costume this year so I was researching and theres a lot of designs with cape. The LED lights will be either on the bow of red LED lights or necklace that will have LED lights. The strands of the bow will have the LED lights or the necklace will be made out of the lights.
After prototyping, I have decided to change the design of my plush night light from bear to rabbit shaped. I wanted to use the paisley design to be part of the clothes rather than the entire fabric. I felt like this would have completed the doll and brought balance. Therefore, I strategized again how to create this bunny.
This is the layout of how my bunny will turn out.
Target User:
The user target is for users who keep up to fashion trends and may want a fashionable doll but may not have enough money to invest in an expensive high-end item. This will be a DIY kit that keeps up to trends in patterns and design that can be made at home! The colors, patterns, and shape will be updated to the upcoming trend. The paisley print is up to date on fashion trends now and so are pearls. The colors used is for stress relieving color which is blue but classic blue is also 2020 Pantone color. Anyone who desires a fashionable item may feel trendy and also easy for the eye to see with the color that brings relief. This doll can be for younger kids or of any age that are trendy and may want a fashionable object that is affordable.
Parts:
These are the parts before the light was inserted and stitched together.
Here is the circuit board that I created. This took pliers, wires, soldering materials, LEDs, battery pack, and AAA batteries.
Journey:
I would say the challenges of this journey was to make this product as fashionable as possible but easy to follow along. The bear in the beginning after trial and error seemed not balanced enough to be presented. After a lot of thinking and changing the design of the animal and only using the paisly pattern on the ears and the clothes it felt more complete. What surprised me was that it turned out way more complete than I thought so changing up my design and strategy was a good idea. That is the beauty of prototyping. The challenge was to finding the circuit board however the product is too small and the battery pack was too big so there was nothing that could be done unless I tape the battery pack to the back but I did not want to do that.
This will be a blue paisley printed bear-shaped doll with pearl eyes. The function will be a plush night light doll that includes a yellow LED in ribbon. The main idea is an aesthetic stress relief object. Across the neck of the bear, the LEDs will be the main source of being the night light function. The LED will be used to be lit up as a circuit board.
These are my early sketches of the prototype.
Targeted User:
My targeted user is for users who need stress-relief. The main source of color that is used is blue which research shows that blue is a color of the sky that makes humans feel relaxed and calm. Just like the calm sea has a sense of relief when looking at it yellow is also a relaxing color which will represent the night light in this doll. This doll will have a yellow LED ribbon across the neck which will be in the room. I got inspired from the idea of a stress-ball that is used to squeeze but what about a nice trendy object that is used for décor that gives targeted users a sense of relief to the eye.
These are the materials that will used including: paisly patterns and pearl eyes.
The pattern of the print will be paisley which has been in trend in the fashion industry and the process will start with sewing of the bear’s head with the ears, then the body and arms and legs. Before, Lastly, everything will be used to sew it all together. The eyes will then come and nose will be sewn on with black thread.
These are the patterns and board that will be used to help shape the bear.Here is the circuit board I will be using for the night light.
Parts and Materials:
I plan on using 1 LED yellow light and 1 LED blue light. I will be using a 4.5V battery pack with a switch that contains 3 AAA batteries. There will be heat shrinking tubes to cover the soldering. For the fabric will be cotton with blue paisley print, the eyes of the bear will be pearls, and I will use black and blue thread for the nose and overall body.