Artificial Snake Pet Night-light

IMG_0077

IMG_0081

IMG_0082

IMG_3813

I got the idea to create an artificial snake night-light because I was born in the year of the snake, and in China snakes represent mystery and delight, which hold a special meaning for me. Furthermore, with its interactive light-up function, the snake can light-up when I go dancing!

I began my project by using what we learned in class.  I based my project on the “skirt” Arduino code. I adjusted the sensitivity of the sensor to recognize movement more quickly and light up in a random pattern.

Once I was sure that the lights worked, I began soldering solid wires to my flora board and connecting them to eight pixel LED lights. This was a challenge because at times I did not know which were positive and negative. When I finally got the pixels working I placed rubber shrink wrap around each of the wires to hold the connection.

IMG_1953

Next I went through the scraps in the VFL and found a nice shiny fabric.  I sewed the pieces together by hand to resemble the body and head of a snake. This took me fifteen hours in total to get the stitching correct!  But the body was too loose and I wanted it to coil like a snake.  Next I found several thick wires and pushed them through the body of the snake and then by hand shaped the snake body into several coils.

IMG_1954

IMG_1964

Once I had the shape correct, I began to sew the flora board to the inside coils of the body of the snake using conductive thread. Then I began to individually solder the wires to each of the eight pixels.  This was a messy process and I got frustrated by all of the wires. Once I finished soldering all of the wires to each of the eight pixels, I began to layer them against the body of the snake. As I wrapped the wires around the snake I sewed each of the pixels to the body of the snake.  The pixels are held in place with the stitching techniques that we learned in class.

IMG_2145

IMG_2152

The last step was to sew in the motion sensor. The snake is designed to be worn as a bracelet.  Once the battery pack is plugged in and you wave your arm the snake will light up!

Enjoy the video!

Light-up Neopixel Jockstrap

The Light-up LED Jockstrap is an exploration of fetish wear meets NYC party life.  Its sure to make you stand out in a crowd of sweaty half naked men and grab the attention of whoever is going to grab you.

2013-08-13-ModusVivendiFurJockstrap06 +WEB%20IMG_3361_0=

Final

Its Construction:

The light-up LED Jockstrap is made of a hand sewn elastic and lycra jock strap that was then fitted with an Adafruit Flora board and an an accelerometer that controls the two neopixel strips that either light up continuously  or fire off random bursts of pixels.

Jock Strap materials

Process3

Process4

Process 2

The Codes:

#include <Wire.h>
#include <Adafruit_Sensor.h>
#include <Adafruit_LSM303.h>
#include <Adafruit_NeoPixel.h>

// Parameter 1 = number of pixels in strip
// Parameter 2 = pin number (most are valid)
// Parameter 3 = pixel type flags, add together as needed:
// NEO_RGB Pixels are wired for RGB bitstream
// NEO_GRB Pixels are wired for GRB bitstream
// NEO_KHZ400 400 KHz bitstream (e.g. FLORA pixels)
// NEO_KHZ800 800 KHz bitstream (e.g. High Density LED strip)
Adafruit_NeoPixel strip = Adafruit_NeoPixel(50, 6, NEO_GRB + NEO_KHZ800);
Adafruit_LSM303_Accel accel = Adafruit_LSM303_Accel(54321);

// Here is where you can put in your favorite colors that will appear!
// just add new {nnn, nnn, nnn}, lines. They will be picked out randomly
// R G B
uint8_t myFavoriteColors[][3] = {{0, 0, 200}, // purple
{200, 200, 200}, // red
{0, 200, 0}, // white
};
// don’t edit the line below
#define FAVCOLORS sizeof(myFavoriteColors) / 3

// mess with this number to adjust TWINklitude 🙂
// lower number = more sensitive
#define MOVE_THRESHOLD 3

void setup()
{
Serial.begin(9600);

// Try to initialise and warn if we couldn’t detect the chip
if (!accel.begin())
{
Serial.println(“Oops … unable to initialize the LSM303. Check your wiring!”);
while (1);
}
strip.begin();
strip.show(); // Initialize all pixels to ‘off’
}

void loop()
{
/* Get a new sensor event */
sensors_event_t event;
accel.getEvent(&event);
Serial.print(“Accel X: “); Serial.print(event.acceleration.x); Serial.print(” “);
Serial.print(“Y: “); Serial.print(event.acceleration.y); Serial.print(” “);
Serial.print(“Z: “); Serial.print(event.acceleration.z); Serial.print(” “);

// Get the magnitude (length) of the 3 axis vector
// http://en.wikipedia.org/wiki/Euclidean_vector#Length
double storedVector = event.acceleration.x*event.acceleration.x;
storedVector += event.acceleration.y*event.acceleration.y;
storedVector += event.acceleration.z*event.acceleration.z;
storedVector = sqrt(storedVector);
Serial.print(“Len: “); Serial.println(storedVector);

// wait a bit
delay(100);

// get new data!
accel.getEvent(&event);
double newVector = event.acceleration.x*event.acceleration.x;
newVector += event.acceleration.y*event.acceleration.y;
newVector += event.acceleration.z*event.acceleration.z;
newVector = sqrt(newVector);
Serial.print(“New Len: “); Serial.println(newVector);

// are we moving
if (abs(newVector – storedVector) > MOVE_THRESHOLD) {
Serial.println(“Twinkle!”);
flashRandom(7, 7); // first number is ‘wait’ delay, shorter num == shorter twinkle
flashRandom(5, 50); // second number is how many neopixels to simultaneously light up
flashRandom(1, 19);
}

}

void flashRandom(int wait, uint8_t howmany) {

for(uint16_t i=0; i<howmany; i++) {
// pick a random favorite color!
int c = random(FAVCOLORS);
int red = myFavoriteColors[c][0];
int green = myFavoriteColors[c][1];
int blue = myFavoriteColors[c][2];

// get a random pixel from the list
int j = random(strip.numPixels());
//Serial.print(“Lighting up “); Serial.println(j);

// now we will ‘fade’ it in 5 steps
for (int x=0; x < 5; x++) {
int r = red * (x+1); r /= 5;
int g = green * (x+1); g /= 5;
int b = blue * (x+1); b /= 5;

strip.setPixelColor(j, strip.Color(r, g, b));
strip.show();
delay(wait);
}
// & fade out in 5 steps
for (int x=5; x >= 0; x–) {
int r = red * x; r /= 5;
int g = green * x; g /= 5;
int b = blue * x; b /= 5;

strip.setPixelColor(j, strip.Color(r, g, b));
strip.show();
delay(wait);
}
}
// LEDs will be off when done (they are faded to 0)
}

The final product and video:

http://www.youtube.com/watch?v=39rctb7HE7w&feature=youtu.beDSC_0274DSC_0285DSC_0177 DSC_0184DSC_0287 

So take off all your clothes, and put on a Light-up Jockstrap and go dance all night!

The Power Bracelet

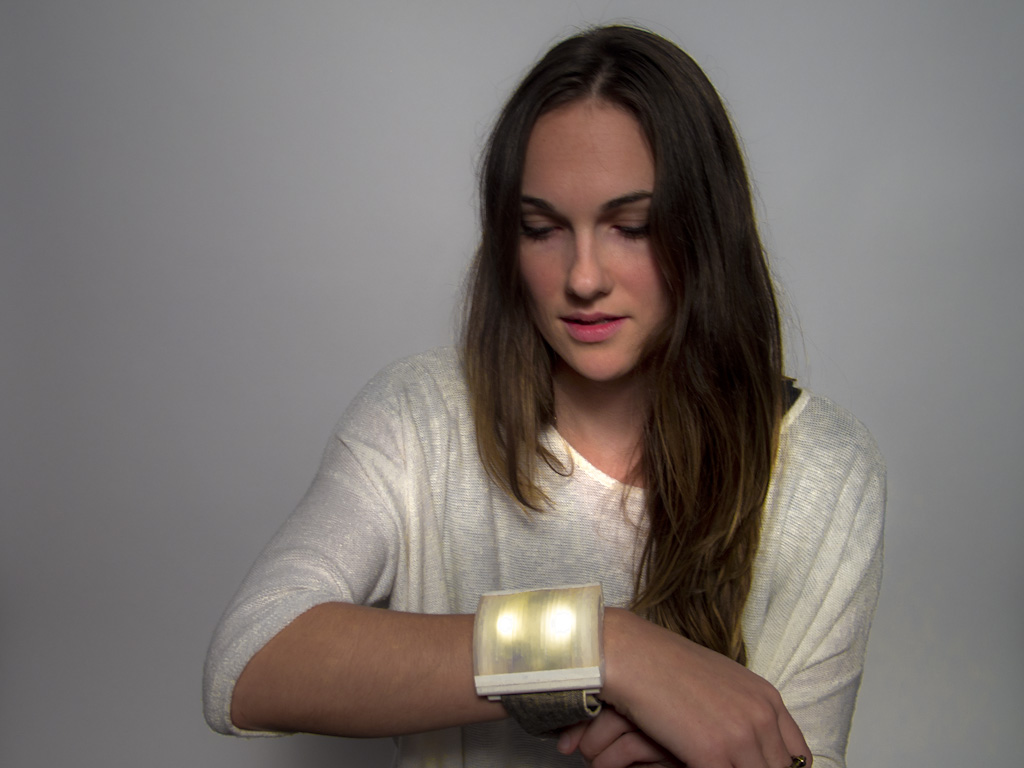
This wearable housing for the Adafruit Flora incorporates light, sound and a unique capacitive touch sensing interface to allow a range of potential low-fi functions. This prototype functions as a light-up musical keyboard on your wrist for spontaneous musical interludes to your daily life.

lucy brandon

Kahler_W_bracelet 2 (1024x768)

Kahler_W_bracelet1 (1024x768)

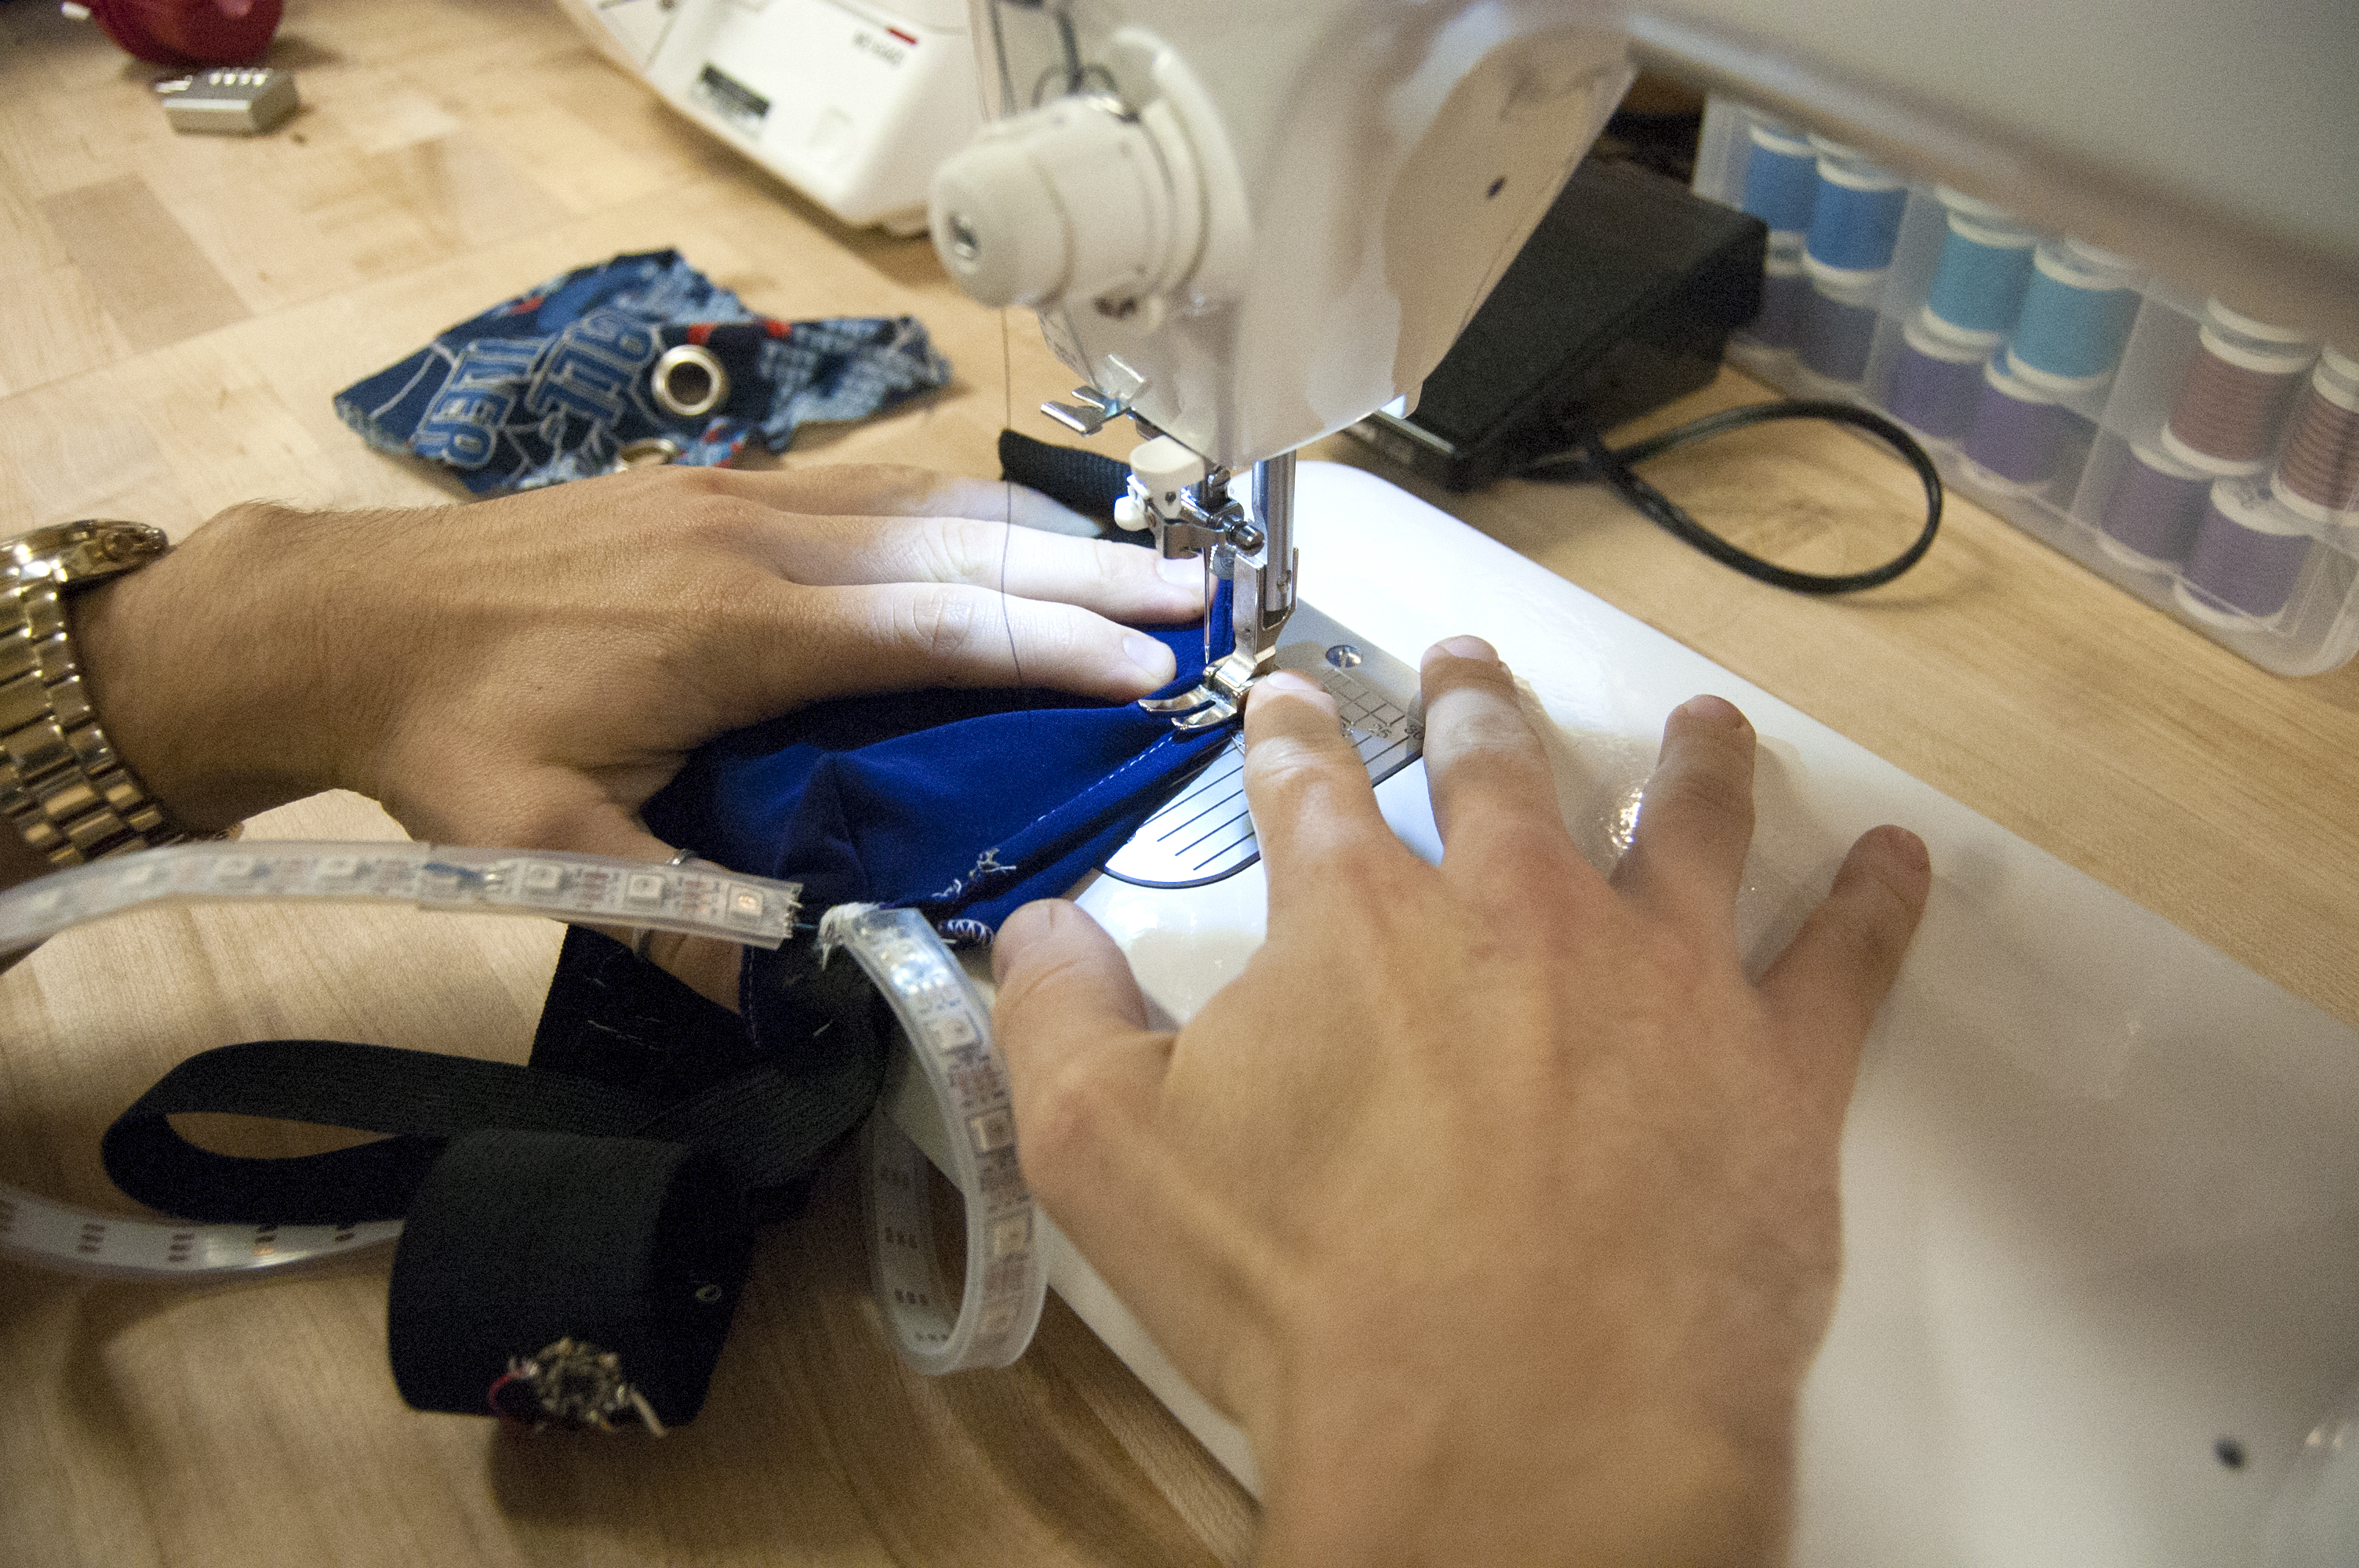
A 3D printed enclosure is capped with a translucent lid of laser-cut and laminated acrylic. The wristband is of muslin, with a Velcro clasp.

Kahler_W_bracelet 4 (1024x768)

These capacitive buttons are very low-cost can be incorporated into a flexible medium, such as the fabric of the wristband, without adding bulk or rigidity. The consist of conductive fabric, with a machine-embroidered border and are connected to the micro-controller via conductive thread.

piezo2

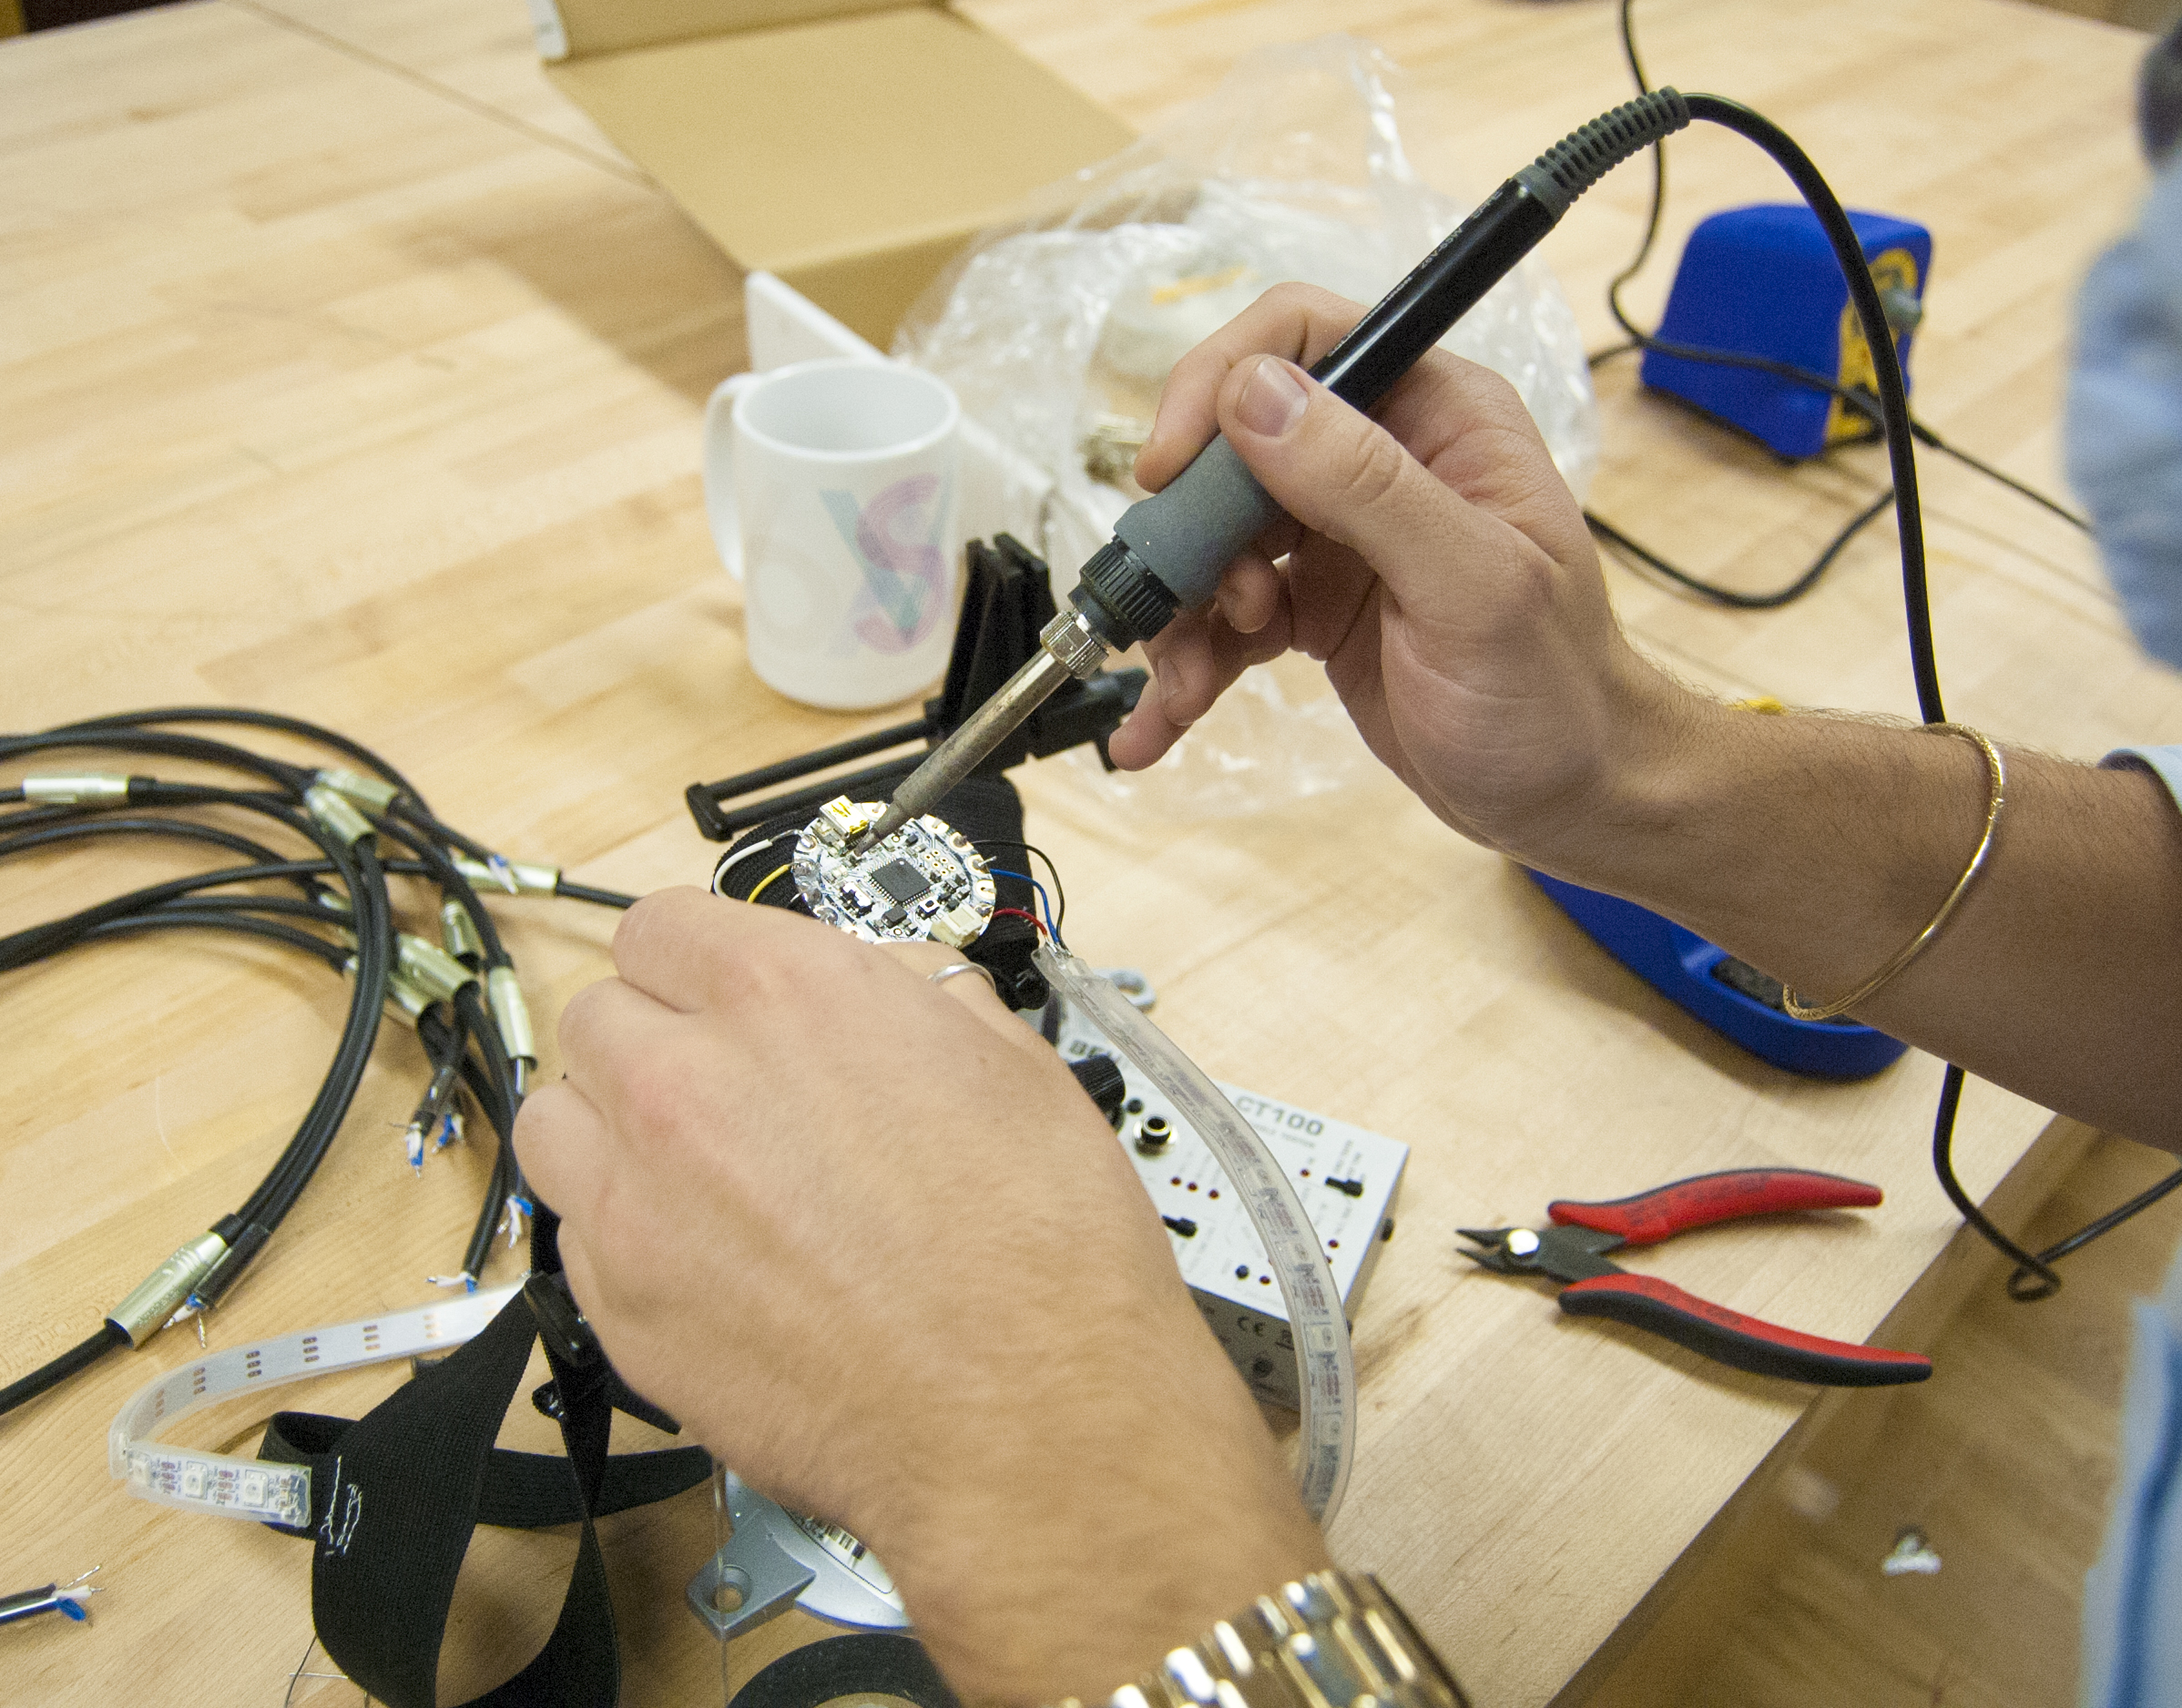
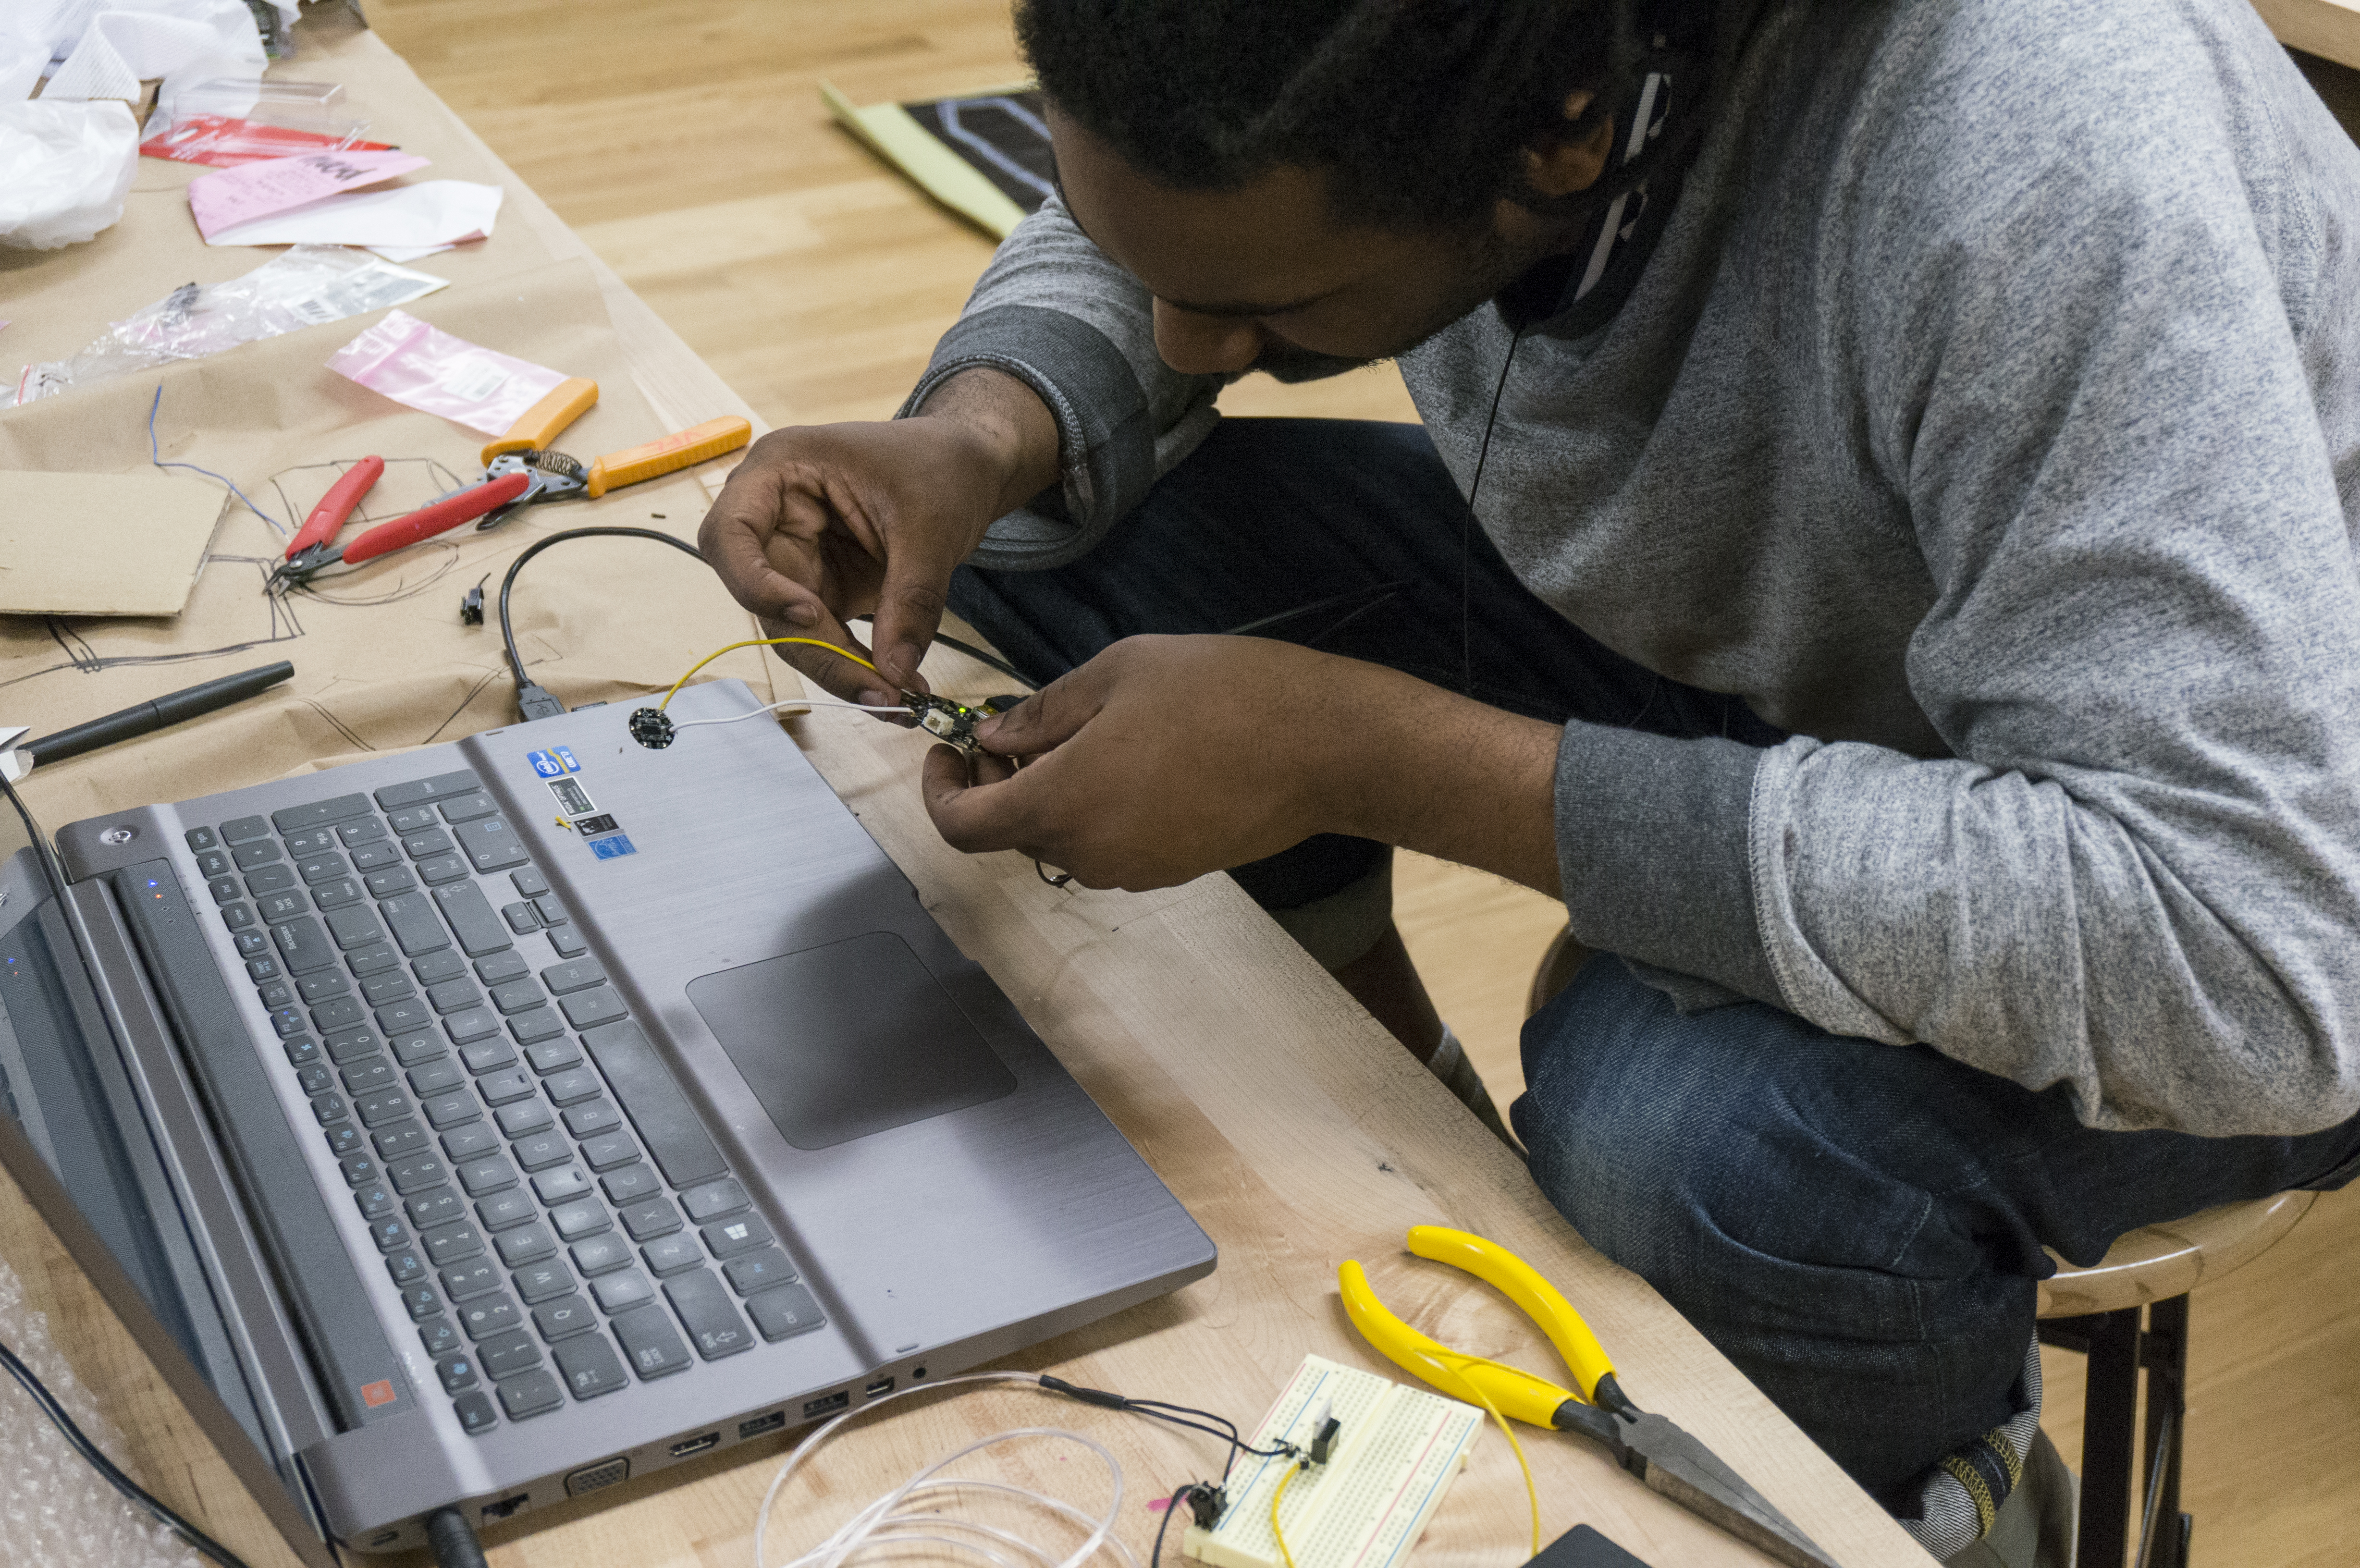
The Flora board is outfitted with two neopixels soldered directly to the board, a small rechargeable battery, and a piezo buzzer (shown unsoldered).

The computer models of the housing:

body lid

The bracelet is programmed to play four different arpeggiated chords in the key of G and flash a different color for each colors for each.

Watch the Video: http://www.youtube.com/watch?v=ey87flPV0ts&feature=youtu.be
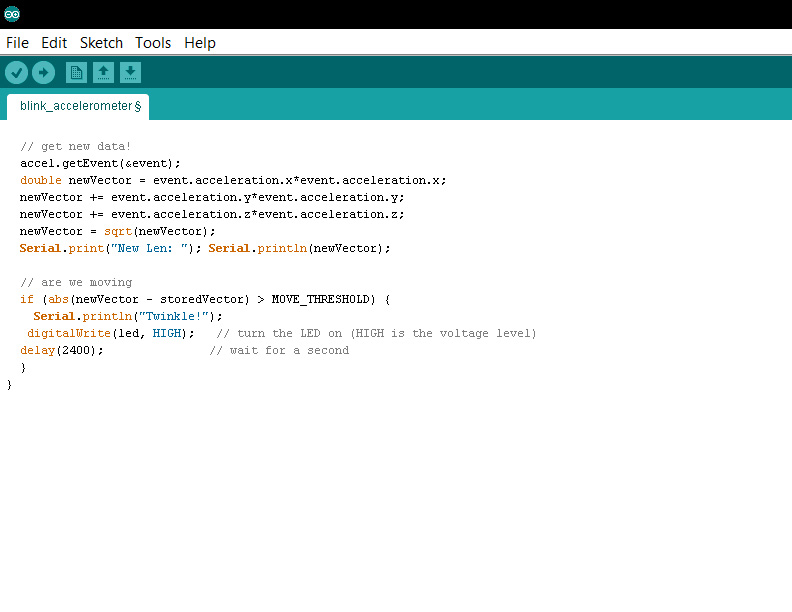
Here’s the code:

#include <CapPin.h>

/* CapPin
* Capacitive Library CapPin Demo Sketch
* Paul Badger 2011
* This class uses the bullt-in pullup resistors read the capacitance on a pin
* The pin is set to input and then the pullup is set,
* A loop times how long the pin takes to go HIGH.
* The readPin method is fast and can be read 1000 times in under 10 mS.
* By reading the pin repeated you can sense “hand pressure”
* at close range with a small sensor. A larger sensor (piece of foil/metal) will yield
* larger return values and be able to sense at more distance. For
* a more senstive method of sensing pins see CapTouch
* Hook up a wire with or without a piece of foil attached to the pin.
* I suggest covering the sensor with mylar, packing tape, paper or other insulator
* to avoid having users directly touch the pin.
*/

CapPin cPin_2 = CapPin(2); // read pin 5
CapPin cPin_3 = CapPin(3);
CapPin cPin_4 = CapPin(9);
CapPin cPin_5 = CapPin(10);

#include <Adafruit_NeoPixel.h>

#define PIN 12

// Parameter 1 = number of pixels in strip
// Parameter 2 = pin number (most are valid)
// Parameter 3 = pixel type flags, add together as needed:
// NEO_KHZ800 800 KHz bitstream (most NeoPixel products w/WS2812 LEDs)
// NEO_KHZ400 400 KHz (classic ‘v1’ (not v2) FLORA pixels, WS2811 drivers)
// NEO_GRB Pixels are wired for GRB bitstream (most NeoPixel products)
// NEO_RGB Pixels are wired for RGB bitstream (v1 FLORA pixels, not v2)
Adafruit_NeoPixel strip = Adafruit_NeoPixel(2, PIN, NEO_GRB + NEO_KHZ800);

float smoothed;
float smoothed2;
float smoothed3;
float smoothed4;
#define NOTE_B0 31
#define NOTE_C1 33
#define NOTE_CS1 35
#define NOTE_D1 37
#define NOTE_DS1 39
#define NOTE_E1 41
#define NOTE_F1 44
#define NOTE_FS1 46
#define NOTE_G1 49
#define NOTE_GS1 52
#define NOTE_A1 55
#define NOTE_AS1 58
#define NOTE_B1 62
#define NOTE_C2 65
#define NOTE_CS2 69
#define NOTE_D2 73
#define NOTE_DS2 78
#define NOTE_E2 82
#define NOTE_F2 87
#define NOTE_FS2 93
#define NOTE_G2 98
#define NOTE_GS2 104
#define NOTE_A2 110
#define NOTE_AS2 117
#define NOTE_B2 123
#define NOTE_C3 131
#define NOTE_CS3 139
#define NOTE_D3 147
#define NOTE_DS3 156
#define NOTE_E3 165
#define NOTE_F3 175
#define NOTE_FS3 185
#define NOTE_G3 196
#define NOTE_GS3 208
#define NOTE_A3 220
#define NOTE_AS3 233
#define NOTE_B3 247
#define NOTE_C4 262
#define NOTE_CS4 277
#define NOTE_D4 294
#define NOTE_DS4 311
#define NOTE_E4 330
#define NOTE_F4 349
#define NOTE_FS4 370
#define NOTE_G4 392
#define NOTE_GS4 415
#define NOTE_A4 440
#define NOTE_AS4 466
#define NOTE_B4 494
#define NOTE_C5 523
#define NOTE_CS5 554
#define NOTE_D5 587
#define NOTE_DS5 622
#define NOTE_E5 659
#define NOTE_F5 698
#define NOTE_FS5 740
#define NOTE_G5 784
#define NOTE_GS5 831
#define NOTE_A5 880
#define NOTE_AS5 932
#define NOTE_B5 988
#define NOTE_C6 1047
#define NOTE_CS6 1109
#define NOTE_D6 1175
#define NOTE_DS6 1245
#define NOTE_E6 1319
#define NOTE_F6 1397
#define NOTE_FS6 1480
#define NOTE_G6 1568
#define NOTE_GS6 1661
#define NOTE_A6 1760
#define NOTE_AS6 1865
#define NOTE_B6 1976
#define NOTE_C7 2093
#define NOTE_CS7 2217
#define NOTE_D7 2349
#define NOTE_DS7 2489
#define NOTE_E7 2637
#define NOTE_F7 2794
#define NOTE_FS7 2960
#define NOTE_G7 3136
#define NOTE_GS7 3322
#define NOTE_A7 3520
#define NOTE_AS7 3729
#define NOTE_B7 3951
#define NOTE_C8 4186
#define NOTE_CS8 4435
#define NOTE_D8 4699
#define NOTE_DS8 4978

void setup()
{

Serial.begin(115200);
Serial.println(“start”);
strip.begin();
strip.show(); // Initialize all pixels to ‘off’
// slider_2_7.calibrateSlider();

}

void loop()
{
delay(1);
long total1 = 0;
long start = millis();
long total = cPin_2.readPin(2000);
long total2 = cPin_3.readPin(2000);
long total3 = cPin_4.readPin(2000);
long total4 = cPin_5.readPin(2000);
// simple lowpass filter to take out some of the jitter
// change parameter (0 is min, .99 is max) or eliminate to suit
smoothed = smooth(total, .1, smoothed);
smoothed2 = smooth(total2, .1, smoothed2);
smoothed3 = smooth(total3, .1, smoothed3);
smoothed4 = smooth(total4, .1, smoothed4);

//Serial.print( millis() – start); // time to execute in mS
//Serial.print(“\t”);
//Serial.print(total); // raw total
//Serial.print(“\t”);
//Serial.println((int) smoothed); // smoothed
//delay(2);
//Serial.print(“\t”);
//Serial.println((int) smoothed2); // smoothed
//delay(2);
//Serial.print(“\t”);
//Serial.println((int) smoothed3); // smoothed
//delay(2);
//Serial.print(“\t”);
//Serial.println((int) smoothed4); // smoothed
//delay(2);

if (smoothed>100 and smoothed2<100 and smoothed3<100 and smoothed4<100){
G_5 ();
}
if (smoothed<100 and smoothed2>100 and smoothed3<100 and smoothed4<100){
D_6 ();
}
if (smoothed<100 and smoothed2<100 and smoothed3>100 and smoothed4<100){
G_5 ();
}
if (smoothed<100 and smoothed2<100 and smoothed3<100 and smoothed4>100){
C_5 ();
}
if (smoothed<100 and smoothed2<100 and smoothed3<100 and smoothed4<100){
noTone(1);
}
}
void C_5(){
colorWipe(strip.Color(50, 50, 0), 0);
tone(1, NOTE_C5);
delay(100);
colorWipe(strip.Color(150, 150, 0), 0);
tone (1, NOTE_E5);
delay(100);
colorWipe(strip.Color(250, 250, 0), 0);
tone(1, NOTE_G5);
delay(100);
//tone (1, NOTE_C4);
//delay(30);
colorWipe(strip.Color(0, 0, 0), 0);
}
void G_5(){
colorWipe(strip.Color(50, 50, 50), 0);
tone(1, NOTE_G5);
delay(100);
colorWipe(strip.Color(150, 150, 150), 0);
tone (1, NOTE_B5);
delay(100);
colorWipe(strip.Color(250, 250, 250), 0);
tone(1, NOTE_D6);
delay(100);
//tone (1, NOTE_C4);
//delay(30);
colorWipe(strip.Color(0, 0, 0), 0);
}
void D_6(){
colorWipe(strip.Color(50, 0, 50), 0);
tone(1, NOTE_D6);
delay(100);
colorWipe(strip.Color(150, 0, 150), 0);
tone (1, NOTE_A5);
delay(100);
colorWipe(strip.Color(250, 0, 250), 0);
tone(1, NOTE_FS5);
delay(100);
colorWipe(strip.Color(0, 0, 0), 0);
}
void colorWipe(uint32_t c, uint8_t wait) {
for(uint16_t i=0; i<strip.numPixels(); i++) {
strip.setPixelColor(i, c);
strip.show();
delay(wait);
}
}
// simple lowpass filter
// requires recycling the output in the “smoothedVal” param
int smooth(int data, float filterVal, float smoothedVal){

if (filterVal > 1){ // check to make sure param’s are within range
filterVal = .999999;
}
else if (filterVal <= 0){
filterVal = 0;
}

smoothedVal = (data * (1 – filterVal)) + (smoothedVal * filterVal);

return (int)smoothedVal;
}

Galactic Apartment Bowling

My original two words were ‘fuzzy’ and ‘terrarium’.  My initial plan was to move forward with the word terrarium and create a terrarium mobile.  After exploring wiring possibilities, I realized that I would not be able to execute the mobile quite the way I was envisioning.  I decided to move forward with the word ‘fuzzy’ and the result was Galactic Apartment Bowling!

GalacticBowling-1030630

I set out to create a fuzzy game that people can enjoy from inside their cramped apartments. The game consists of a small bowing ball and a single pin.  The pin is wired with a string of LEDs and a FLORA accelerometer.  When the pin is struck, the accelerometer reads the variation in movement and lights up the LEDs.  To make the one pin bowling game more difficult and engaging the bowling ball is weighted to give it a wonky roll.  This project allows the user to experience the fun and excitement of galactic bowling in limited small spaces.

I began my making process by creating a sewing pattern for the bowling pin and ball:

untitled-7232

untitled-7242

I sewed two complete layers for the pin, an inner layer out of muslin and an exterior sleeve out of felt.  I made the inner layer as a structure where I could sew on the electronic components. This allowed me to hide the components and keep the outer layer nice and clean. The white felt turned out to be too sheer so I ironed on a layer of fusible interfacing as a backing.  I weighted the bowing ball with an interior pouch of rice to give it a wobbly roll.

untitled-7240

untitled-7264

untitled-7249

untitled-7263

I then set out to create my circuit and write the code. This is where I came into the most difficulty.  I successfully used conductive thread to attach the accelerometer to the Flora board. Initially, I had planned to sew individual NeoPixels throughout the bowing pin with conductive thread.  I planned on using the Sparkle Skirt code to create a variation of color and sparkle delay when the pin is struck with the ball.  After much frustration and no success trying to lay out a circuit and get my code up and running with the NeoPixels, I made the decision to use traditional LEDs.  I soldered together a strand of LEDs and altered the Blink and Sparkle Skirt code to have the accelerometer read the movement and then flash the LEDs.

untitled-7255

untitled-7260

The result was not as dazzling as I had originally hoped it would be, but the circuit works and Galactic Bowling is a success.

Bright Bag

camouflage luggage tags

My two words I chose at the beginning of this class was camouflage & luggage tags. I am choosing to go with luggage, dropping the tags, and create a glowing bag. That can be used an accessible light when in the dark.


I wanted to make sure my code and cir-cut board was to my liking before sewing my bag. This was probably the hardest part, I used a bread board to prototype my connections and manipulated the blink and sparkle code to make the lights come on when shook.

1

code

IMG_4787

When the flora board and codes were to my liking I started sewing, and I learned how to make a bag with a toggle.

IMG_4789

Automatic Fuzzy Pillow Light

Automatic Light Pillow

A travel size pillow that contain two LED lights for reading.

I observed that most people that own a travel pillow like to read. Often these people are in transit and don’t have good reading light. This pillow is intended for those that like to read in the dark.

Sketches

2013-10-08 12.17.482013-10-07 11.06.17

I began the project by creating two sketches.  The first is a concept sketch where I tinkered with a form factor design and I figured out what electronic components I would need to bring this idea to life.  The second sketch was why electronic component sketch.  I outlined how I wanted the circuits to flow and designed a template for how I would fit the cables into the housing.

Wiring and Testing

Next I bought several types of LED light, a breadboard to test proof of concept2013-10-07 12.37.58 2013-10-07 13.29.05

Sewing

2013-10-08 12.03.45 2013-10-08 12.03.56

Then I went to Mood Designer Fabrics in the Garment District with an actual travel pillow.  I matched the fleece and spandex material and bought 1 yard of each. Then I created an outline of the pillow, cut out the material and then sewed them together.  Finally I stuffed the pillow and added all of the electronic components.

Next Steps

Given more time, I would like to use a laser cutter to cut out the material precisely and them take the materials to a seamstress to sew the seams together properly.  I would also like to create an enclosed housing fixture for my flora board and battery pack so that I can swap out the components as need be.

I’d also like to explore using proximity sensors that automatically recognize gesture behaviors like the opening of a book or the turning of pages as a trigger for the LED lights

Thanks!

George

Ripe Banana


Using the selected word “Breakfast” from my original project (see image below), I set out to make a light-up banana that is off when closed and turns on when open.

By peeling back the outer layer, the inner banana is exposed and the light turns on.

bananaclosed

to get the banana to glow when it is open I created a circuit using conductive thread and a zipper pull. When the zipper crosses over the path of the conductive thread it send a signal to ground which then turns on the neo-pixel strip.

bananaopen

bananaon

bananaprocessbananaglow

This is the type of glow that I was going for, unfortunately, once the banana was stuffed and the neopixel strip was pushed to the top surface the individual pixels became more visible. I tried diffusing the light by turning down the brightness of the pixels as well as adding additional layers of fabric in between but neither seemed to do the trick.

I had a lot of difficulty figuring out the code to turn the strip on and off. Those neopixels are smart and then need to be told what to do in a very specific way. Thanks to Richard for all your help.

I would like to animate the strip to do more than just turn on and off, I tried used bits and pieces from the strandtest code to add to my code but I couldn’t quite figure out how to declare these new functions in the scope.

breakfastmotel

Midnight Candelabra Chandelier

For my plush night light, I used my previous word “chandelier” to come up with a night light that can both act as a hanging light and a portable light source for trips to the bathroom during the night. When I wake up at night, it is too dark to traverse the hallways safely to the bathroom without a light source.  As a result, I often bring my phone with me to use as a guiding light.  Interestingly, I found that I am not alone, and many people experience this inconvenience too. I decided to solve this problem with my plush candelabra chandelier. When you wake up in the middle of the night, you can pull down on the hanging candelabra, detach it, and use it as a light source while walking around in your home at night.  I named it the “Midnight Candelabra” since it is used in the late hours of the evening.

chandelier candelabra

Although it was not a smooth ride to the finish line, I was able to get my candelabra to light up in a different way than I initially set out to.  My initial plan was to be able to squeeze the handle to activate the LEDs using a conductive steel fiber.  I felted the fiber to create a conductive sensor that is activated by squeezing it.  However, I could not get the piece to consistently activate the code so I had to brainstorm other solutions to light my LEDs.

IMG_4051

In the meantime, I hooked up my board and wires to a potentiometer to help determine that my code was working properly. I decided another good option would be to use a button switch which could be activated by squeezing the handle of the candelabra.  Once I soldered all my wires and LED’s together, the push button would not activate.  Although all my connections, code, and soldering were correct, the button still would not budge.  I tried 2 different types of buttons which still would not activate the LEDs.  As a result, I had to let go of my idea of activating it by squeezing the handle and use the battery pack as a switch instead.  If I were to move forward with this project, I would explore other sensor options that would allow me to keep the electronic guts inside the plush candelabra.

IMG_4053  IMG_4050

Here is my final code:

const int button = 10; // Analog input pin that the potentiometer is attached to
int sensorValue; // value read from the sensor

const int ledPin = 6;
void setup() {
Serial.begin(9600);
pinMode(button, INPUT);
//pinMode(9, INPUT_PULLUP);
pinMode(ledPin, OUTPUT);

}

void loop() {

sensorValue = digitalRead(button);
Serial.print(“sensor = “);
Serial.println(sensorValue);
digitalWrite(ledPin, LOW);

if (sensorValue == 1)
{ //change the value depending on the sensor’s read in serial monitor
Serial.println(“leds triggered”);
digitalWrite(ledPin, HIGH);
delay(5000);

}
delay(100);
}

The Fortress of Studitude (Plushy Night Light by Steve Hamilton)

The Fortress of Studitude is named after Superman’s “Secret Citadel” up in the Arctic where he would escape from his day to day life as a Superhero (The Fortress of Solitude).  My Fortress of Studitude provides a lighted “reading chamber” attached to a plushy backrest where I can study late into the night without bright light keeping my sleeping wife Jocelyn awake.

The “Fortress” includes a switch which allows you to switch the reading light on, a dimmer to adjust the lighting (providing restful and respiteful mood lighting during the occasional movie viewing “energy reset”), and most importantly the ability to switch on the “disco party light mode” for when you’ve run out of X and you still want to “study like you just don’t care!”

Image
I started with this plushy black velveteen backrest on sale at Bed, Bath and Beyond. Starting with the Bed, taking it way Beyond!

I created the hoops for the hood out of some plastic strips used for porch screens that Lowe’s had marked down from 3.97 to only 25 cents each (way better than the 9 dollar pieces of steel that I spent about 30 minutes unsuccessfully trying to drill a hole into).

IMG_0905
I used T Bolts to connect the ribs to the wooden dowel I’d cut for support but the pressure exerted by the bent plastic strips caused them to pop out.
Another trip to Home Depot yielded these spiny screw end caps that take a threaded 1/4" bolt.
Another trip to Home Depot yielded these spiny screw end caps that take a threaded 1/4″ bolt.

I’m pretty sure there’s some sort of geometry that would have told me exactly how large to make the panels and also what the arc of the cut fabric should be to get it to make the perfect shroud but I think I was out sick that day and I missed the lesson.  I used one of my plastic ribs to eyeball and trace the arc.

IMG_0913

It's important to maintain a positive attitude despite the slowly budding realization that you've bitten off a sewing project of epic proportions that's far beyond your capabilities.
It’s important to maintain a positive attitude despite the slowly budding realization that you’ve bitten off a sewing project of epic proportions that’s far beyond your capabilities.
I needed sleeves for the ribs to slide into.  These were tricky and made of a slippery fabric that came from Jocelyn's scrap bin.  I finished sewing the first wo panels together and installed the first sleeve around Midnight.  It worked!  The rib slid in with only minor difficulty.
I needed sleeves for the ribs to slide into. These were tricky and made of a slippery fabric that came from Jocelyn’s scrap bin. I finished sewing the first two panels together and completed the first sleeve around Midnight. It worked! The rib slid in with only minor difficulty.

After sewing most of the night I cut the last panel early Monday morning.  I’ve mapped out my circuit with a physical switch and a little laser cut plexiglass panel.  Now it’s time to get started on the electronics.  Yikes!  Running out of time.


Although a little bit of "seamstress exposure" can be nice, "Tailor's Crack" is an eyesore that should be avoided at all costs.  My stretch blue Ex Officio boxer briefs hold steady at the hips despite my jeans slipping down a bit.  Close call!
Although a little flash from my seamstress wife can be nice on occasion, “Tailor’s Crack” is an eyesore that should be avoided at all costs. My stretchy blue Ex Officio boxer briefs hold steady at the hips despite my jeans slipping down a bit. Close call!

Worked on the electronics this afternoon and am considering some modifications.  After IDEO class I got back on the textile tip and put the final touches on the infrastructure.  As of 11pm Monday night the base of “The Fortress” is complete.

Jocelyn takes the fortress for a test drive.  There's a bit of a gap at the bottom because I ran out of fabric.  I'm going to add a black "skirt" to fill the gap.
Jocelyn takes the fortress for a test drive. There’s a bit of a gap at the bottom because I ran out of fabric. I’m going to add a black “skirt” to fill the gap.

The last bit was to hand stitch the structure onto the plushy backrest.  I was planning to trim the sides to the length of the curved braces but I actually liked the way the fabric bunched adding to the “Victorianly decadent” feeling overall.

IMG_0935