“Plush” Phone Case

Hi all!

I managed to delete my entire post earlier today, however, here is the process for my phone case!

wallet4 copy

I started with a concept sketch of the pattern I wanted to create. These are the materials I ended up using:

-Gray wool, leather, 1 Piezo electric disc, 1 blue LED, Arduino UNO board.

DSC_0003

I started by testing out the pattern. I had never used to sewing machine and I knew it was going to be a challenge even though the pattern I drew up seemed simple enough. Getting straight lines in that machine was hard! I will continue to practice this skill for sure.

IMG_2683  IMG_2696

IMG_2699  IMG_2704

Screen Shot 2013-10-07 at 10.05.39 PM

I used the code from the “Knock” example as a base. I changed the “threshold” and the “delay” in hopes that the Piezo sensor would become sensitive enough to detect the cel phone’s vibration. Regardless of the code ( that works) it seemed that the vibrations of the phone alone wouldn’t trigger the threshold to go above 1.

DSC_0010

DSC_0011

DSC_0022

Go to my instagram to see a video of me tapping the cel phone-case like a crazy man.

http://instagram.com/minuscoco

Thank you : )

Light Up “Superhero” Yoga Mat

medemonstrating

Before I set out to make my yoga superhero mat, I did some research and found a burgeoning yogi/superhero movement. Check it out here! There’s a pose in yoga called “Superman” and yoga helps people find their superhero within.

yogamatinprogress

So first I had to write some code to make a yoga mat with velostat sensors that lights up. I took inspiration from these Firewalker LED sneakers and then made some adjustments so that the different pins corresponded to different velostat pads. You can see the prototype here.

Next, I started to build the mat. I soldered the LED strip on the flora board and used conductive thread to sew from the sensors to the flora board. The code I wrote is for three sensors, but I used two so that things wouldn’t get too messy.

I used conductive thread so that the mat could still easily be rolled up and transported.

closeup

Now when I do yoga, the mat changes colors when I move around. I could see that this would make yoga more fun for kids and might propose the idea to Headstand. I also think that this would make for a rad yoga dance party! MC Yogi would LOVE it.

Screen Shot 2013-10-07 at 9.37.33 PM

Check out the code and make your own light up superhero yoga mat!

#include <Adafruit_NeoPixel.h>

const int analogInPin = A9; // Analog input pin that the potentiometer is attached to
Adafruit_NeoPixel strip = Adafruit_NeoPixel(60, 6, NEO_GRB + NEO_KHZ800);
int sensorValueR = 0; // value read from the pot

int sensorValueG = 0; // value read from the pot
int sensorValueB = 0; // value read from the pot

const int ledPin = 7;
void setup() {
Serial.begin(9600);
pinMode(9, INPUT);
digitalWrite(9, HIGH);
pinMode(12, INPUT);
digitalWrite(12, HIGH);
pinMode(10, INPUT);
digitalWrite(10, HIGH);
strip.begin();
strip.show();

}

void loop() {
sensorValueR = analogRead(analogInPin);
Serial.print(“sensorR = “);
Serial.print(sensorValueR);
sensorValueG = analogRead(11);
Serial.print(“sensorG = “);
Serial.print(sensorValueG);
sensorValueB = analogRead(10);
Serial.print(“sensorB = “);
Serial.println(sensorValueB);

int r=0, g=0, b=0;
if (sensorValueR > 55) {
r=20;
}

if (sensorValueG > 352){
g=20;
}
if (sensorValueB > 65) {
b=20;
}

colorWipe(strip.Color(r, g, b), 25);

}

void colorWipe(uint32_t c, uint8_t wait) {
for(uint16_t i=0; i<strip.numPixels(); i++) {
strip.setPixelColor(i, c);
strip.show();
//delay(wait);
}
}

Flash Fire Night Light

Hi! This my final project!

The materials I used are as follows:

1.Arduino UNO board

2.color strip

3. wool felt fabric

4.9V battery

At first, when I put the pixel light strip to computer, I find that my whole light strip just

lights six lights which make me crazy. And my computer often pop-ups the warning:

Image

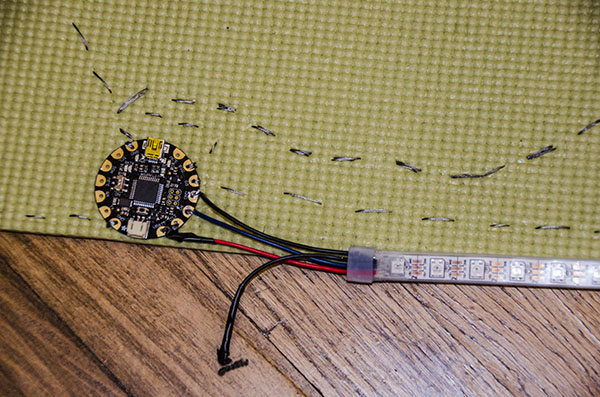
Finally, Becky and Tak help me to solve that problem, the reason why there is only six lights light is that the 60 pixels at full brightness draws a lot if power, and Tak helps me to change Arduino UNO board from the flora board.

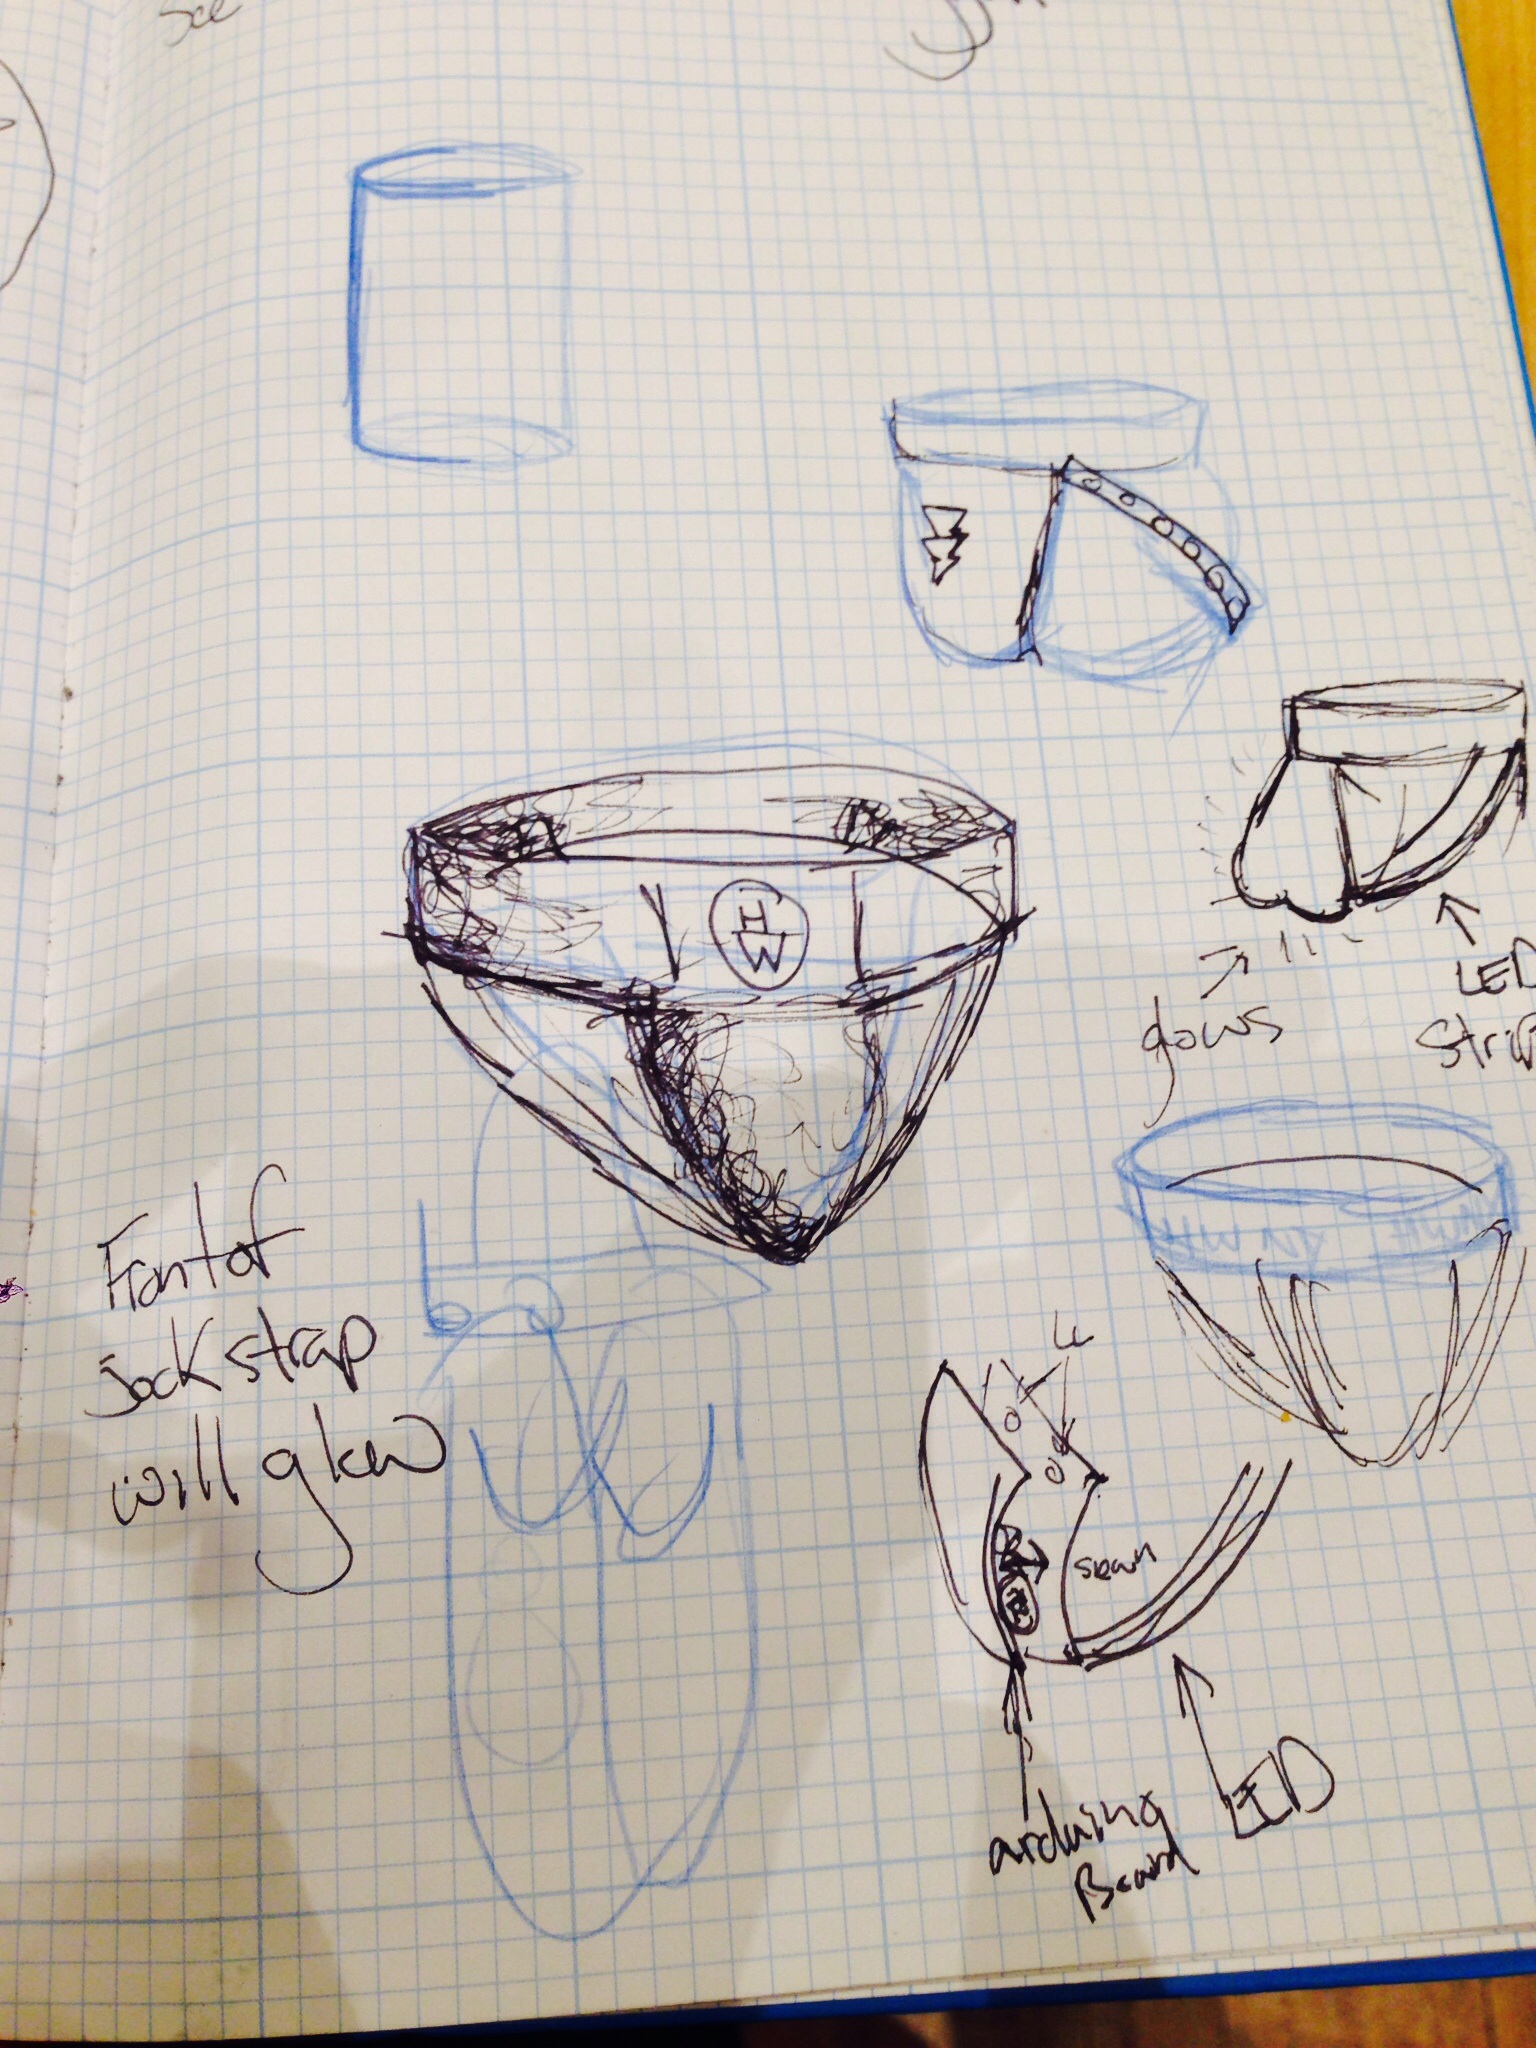
As my conception, I need to use the match to ignite the fire. However, I realized that the motion sensor need to move like change the X/Y/Z axis constantly. But my fire can`t move! After that, I figure out  to use the resistant to turn on the fire. I make a code which I just touch sightly to the resistant, and than the fire can be ignited!

QQ截图20131008003117

IMG_0776 IMG_0780 IMG_0783

Image

ImageImage

Image

I use the embroidery machine to make a fire logo on the surface of my matchbox.

This is the code:

#include <Adafruit_NeoPixel.h>

#define PIN 6

// Parameter 1 = number of pixels in strip
// Parameter 2 = pin number (most are valid)
// Parameter 3 = pixel type flags, add together as needed:
// NEO_KHZ800 800 KHz bitstream (most NeoPixel products w/WS2812 LEDs)
// NEO_KHZ400 400 KHz (classic ‘v1’ (not v2) FLORA pixels, WS2811 drivers)
// NEO_GRB Pixels are wired for GRB bitstream (most NeoPixel products)
// NEO_RGB Pixels are wired for RGB bitstream (v1 FLORA pixels, not v2)
Adafruit_NeoPixel strip = Adafruit_NeoPixel(60, PIN, NEO_GRB + NEO_KHZ800);

void setup() {
strip.begin();
strip.show(); // Initialize all pixels to ‘off’
}

void loop() {
int n=analogRead(A0); //读取模拟口数据
if(n>0) //如果人体触摸了N就不为零,触发
{
for(int a=0;a<50;a++) //循环50次,200毫秒X50次=10秒 亮灭亮灭持续10秒效果
{
colorWipe(strip.Color(255, 0, 0), 0); // Red 亮
delay(100);//延迟100毫秒
colorWipe(strip.Color(0, 0, 0), 0); // noLight 灭
delay(100);//延迟100毫秒
}
}
colorWipe(strip.Color(0, 0, 0), 0); // noLight
}

// Fill the dots one after the other with a color
void colorWipe(uint32_t c, uint8_t wait) {
for(uint16_t i=0; i<strip.numPixels(); i++) {
strip.setPixelColor(i, c);
strip.show();
delay(wait);
}
}

void rainbow(uint8_t wait) {
uint16_t i, j;

for(j=0; j<256; j++) {
for(i=0; i<strip.numPixels(); i++) {
strip.setPixelColor(i, Wheel((i+j) & 255));
}
strip.show();
delay(wait);
}
}

// Slightly different, this makes the rainbow equally distributed throughout
void rainbowCycle(uint8_t wait) {
uint16_t i, j;

for(j=0; j<256*5; j++) { // 5 cycles of all colors on wheel
for(i=0; i< strip.numPixels(); i++) {
strip.setPixelColor(i, Wheel(((i * 256 / strip.numPixels()) + j) & 255));
}
strip.show();
delay(wait);
}
}

// Input a value 0 to 255 to get a color value.
// The colours are a transition r – g – b – back to r.
uint32_t Wheel(byte WheelPos) {
//if(WheelPos < 85) {
return strip.Color(WheelPos * 3, 255 – WheelPos * 3, 0);
//} else if(WheelPos < 170) {
// WheelPos -= 85;
// return strip.Color(255 – WheelPos * 3, 0, WheelPos * 3);
//} else {
// WheelPos -= 170;
// return strip.Color(0, WheelPos * 3, 255 – WheelPos * 3);
// }
}

Please enjoy the amazing video!!!

http://www.youtube.com/watch?v=IPZyzRi0vVY&list=HL1381207377

Illuminadrum

DSC_0626

Drum

Sourced a drum after 4 hours of roaming Manhattan. This one was loud, meant to be played kids, was open from the bottom to give me space to fit electronics.

Started out playing with different codes http://www.arduino.cc/en/Tutorial/Knock after making a temporary circuit on Arduino Uno. It was fun to play with the piezo sensor. I wanted to ambitiously change the brightness with the impact on the sensor. I was almost there but the light wouldn’t go out in static position. Learnt about Mapping, countdown etc in coding.

Untitled-1

DSC_0630 (2)

DSC_0634

Soldered the LEDs in a parallel circuit

Finally used a Digital interaction instead of Analog one. Code:
// these constants won’t change:
const int ledPin = 11; // led connected to digital pin 13
const int knockSensor = A0; // the piezo is connected to analog pin 0
const int threshold = 1; // threshold value to decide when the detected sound is a knock or not
// these variables will change:
int sensorReading = 0; // variable to store the value read from the sensor pin
int ledState = 0; // variable used to store the last LED status, to toggle the light
int mapFade= 0;
int brightnessLED = 0;
int countDown = 0;
int fadeDown = 0;

void setup() {
pinMode(ledPin, OUTPUT); // declare the ledPin as as OUTPUT
Serial.begin(9600); // use the serial port
}

void loop() {
// read the sensor and store it in the variable sensorReading:
sensorReading = digitalRead(knockSensor);
// if the sensor reading is greater than the threshold:
if (sensorReading >= threshold) {

// send the string “Knock!” back to the computer, followed by newline
int cSensorReading = constrain(sensorReading, 0, 50);
mapFade = map(cSensorReading, 0, 50, 0, 255);
brightnessLED = brightnessLED + mapFade;

digitalWrite(ledPin, HIGH);

Serial.print(“knock!”);
Serial.println(sensorReading);
Serial.print(“constrain”);
Serial.println(constrain(sensorReading, 0, 10));

} else{digitalWrite(ledPin, LOW);}

delay(10); // delay to avoid overloading the serial port buffer
}

DSC_0010

Ad_blue man group

SEE THE VIDEO 🙂

http://www.youtube.com/watch?v=PQ_t-vmfd3I&feature=youtu.be

Thank you

Flashlight! – updated

DSC02359

My object is a flashlight that lights up when you squeeze (more you squeeze, brighter it gets). I decided to hack a flashlight and use the structure, led, and its lens inside.

DSC02324     DSC02325Battery pack cable soldered to the battery connection structure of flashlight.

DSC02327     DSC02333Arduino connected with led, and placed on a piece of laser-cut acrylic. LED/lens glued as well.

DSC02335     Parts of the flashlight.

DSC02340     DSC02341Top cover laser-cut and sowed on to the whole structure.

DSC02348

DSC02350      DSC02354

And here’s the sketch:

#include <Adafruit_NeoPixel.h>
const int analogInPin = A9; // Analog input pin that the potentiometer is attached to
Adafruit_NeoPixel strip = Adafruit_NeoPixel(10, 6, NEO_GRB + NEO_KHZ800);
int sensorValue = 0; // value read from the pot

const int analogOutPin = 6;

int outputValue = 0;

void setup() {
Serial.begin(9600);
pinMode(9, INPUT_PULLUP); 
strip.begin();
strip.show();
}

void loop() {
sensorValue = analogRead(analogInPin);

if (sensorValue > 101){
analogWrite(analogOutPin, 0);
}
if (sensorValue < 100){
analogWrite(analogOutPin, 10);
}
if (sensorValue < 95){
analogWrite(analogOutPin, 20);
}
if (sensorValue < 90){
analogWrite(analogOutPin, 30);
}
if (sensorValue < 85){
analogWrite(analogOutPin, 50);
}
if (sensorValue < 80){
analogWrite(analogOutPin, 75);
}

if (sensorValue < 75){

analogWrite(analogOutPin, 100);
}
if (sensorValue < 70){
analogWrite(analogOutPin, 125);
}
if (sensorValue < 65){
analogWrite(analogOutPin, 150);
}
if (sensorValue < 60){
analogWrite(analogOutPin, 180);
}
if (sensorValue < 55){
analogWrite(analogOutPin, 200);
}
if (sensorValue < 50){
analogWrite(analogOutPin, 220);
}
if (sensorValue < 45){
analogWrite(analogOutPin, 240);
}
if (sensorValue < 40){
analogWrite(analogOutPin, 255);
}

Serial.print(“sensor = “);
Serial.print(sensorValue);
Serial.print(“\t output = “);
Serial.println(outputValue);
delay(2);
}

void colorWipe(uint32_t c, uint8_t wait) {
for(uint16_t i=0; i<strip.numPixels(); i++) {
strip.setPixelColor(i, c);
strip.show();
delay(wait);
}
}

Turn on: Plushie “Big Head” project

My interest for this project began with exploring how touch can bring so many emotions and physical reactions. I see my Plushie in a child abuse center, were this might be a prop to mediate a conversation about abuse. I also see this plushie as a prop for sex education and seeing how touch can cause arousal in the sex organs, which can include the brain. This plushie is activated by pressing on the right hand, which activates a LED light near its “private parts”. Ideally I would like to place LED lights in its head, and/or heart that would light up when you hold its hand. Another idea was to have it activate it’s heart, when you kissed it.

I began with a reference plushie that I have been working for some years.

CIMG4714

I continued with the firewalker code and with the help of my colleague Jung I was able to get this code to work. After I tested the prototype circuit, I was ready to make my plushie. The plushie is made out of Green and blue knit, Flora board, Velostat, LED, and wire.

DSC_0604 DSC_0606 DSC_0687 DSC_0688 DSC_0692 DSC_0696 DSC_0697 DSC_0707

After several attempts, I was unable to get the plushie to work with the battery pack. The only way it would stay on and activate the LED would be if I had it plugged into my computer. I decided to continue the plushie and tested on a male and a female volunteer.

DSC_0708 DSC_0715DSC_0714DSC_0716 DSC_0718

In these two cases I had the volunteers touched the plushie on its right hand, in order to activate the LED.

I had different responses, the most interesting coming from the female which asked “why it light up there?” Her expression was of distaste or hesitance, however she was a great volunteer and continued with the process.

What I learned is that touch and how it’s given is very significant in generating emotions. The location of the light was deliberate but I did not expect the various reactions to its placement. They ranged from humor to discuss of the location of the light. I also learned that placement of the “squeeze” is very important, and that my placement of it didn’t correlate my message.

I would like to experiment with different locations of the LED and there intensity. I would also like to place the activation point in different locations and see how individuals reacted.

TSHIRT + NIGHTLIGHT

TSHIRT + NIGHTLIGHT, I began to think about what the ideal lighting element would be for a constant, all-night glow—something a person could sleep to. I looked to traditional table lighting for inspiration, a recognizable silhouette. Intersecting acrylic and hand-sewn materials resulted in a unique take on traditional night-lighting.

materials: cloth from two t-shirts, six flora pixels, flora board, battery pack and acrylic plastic

processes: sewing, soldering, coding, and lasercutting

Image

Image

Image

Soldered 6 flora pixels together for coding.

Image

Image

The original shirt was too dark to allow the LEDs to shine through, chose white.

Image

Lamp in action. The flora pixels (6) are located in the white shade while the battery runs from the brown base to the flora board.

Image

Image

The battery pack is sewn into the base, I extended the original battery wire so that it would reach the lamp shade.

Image

Artificial Pet + Flash Night Light

Hi, everyone,

IMG_1204
I have changed my words to artificial pet, so my object name is artificial pet flash night light.  My idea is a monkey shape toy that can seat on your shoulder and hang on to your neck.  The details of the monkey are simplified.  The light will be inside of the body, It will light up when a person walks with it on their shoulder.  I will use the code we have learned “sparkle dress” for my toy.
I would like to make the toy so the monkey’s head can turn. I will figure out this part.
Thank you!

Laser-cut Light-up Jockstrap

Sorry this is really late…..

This is a product for all those bois that have ever dared to go to an underwear party or a circuit party, and want to be the center of attention.

g5-circuit-party-taipei-2013-1                                   Look thats him on top!

I picked this because I think its a fun idea that hasn’t been done.  I also picked it because I am fairly confident that I can construct a jockstrap

These are my materials:

image

Lycra, Elastic, Arduino board, motion sensor, pixels, and pixel strip.

imageThe front pouch is made of two pieces of fabric and will house the Flora board and the battery pack.  The Pixel strips will be on the sides of the jockstrap and the waist band will have a laser cut logo.