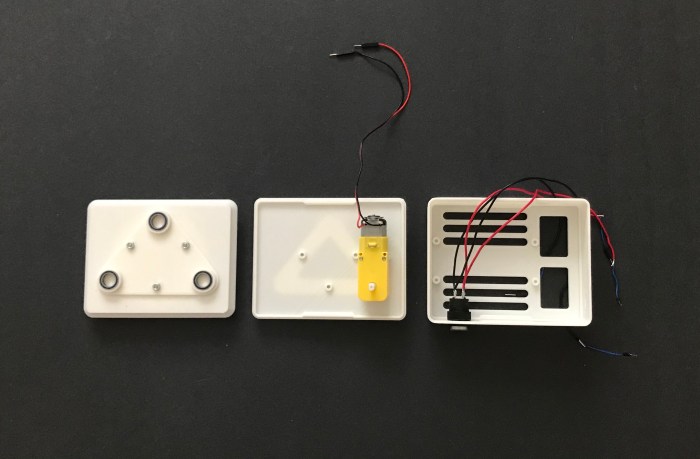
For my final project I chose to create a small box that would contain a Feather Huzzah soldered to a breadboard along with a PIR motion sensor and NeoPixel. Check out the video to see what happened.
Here is the list of materials and link to the Instructables website:
This is an abstract weather ball that shows temperature by changing as many as lights to dark blue/pink. The user could get a generous understanding of what the weather is like without reading the measurement or checking their phones, but tell from how bright the sphere light is. You can use it as an indoor/outdoor decoration and hang aside your window, or simply place it on your desk. It could assist you to choose your outfit for the day.
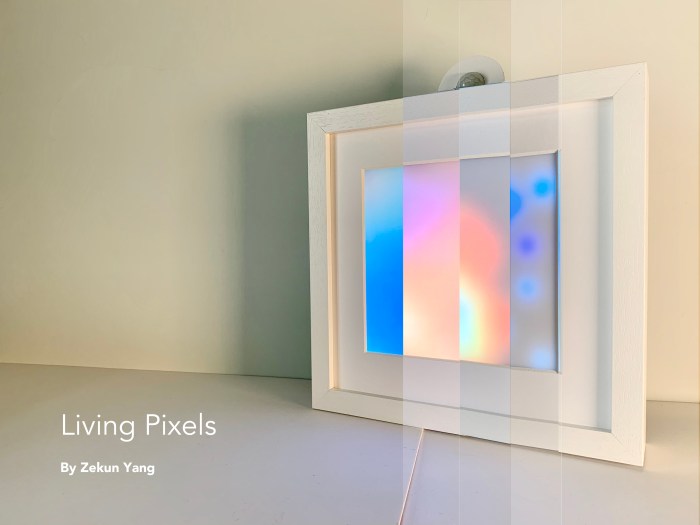
Seeing smart home products being more common in our lives, I’ve started to think about the relationship between people and these products. If one day, smart home products become an indispensable part of everyone’s life, what attitudes should we take to coexist with them? How are we going to treat them?
We like to call smart home products with a human name, like Alexa. It seems that we are trying to see them as individuals with intelligence. But are we treating them that way? If electrical appliances really have life, will we treat them differently?
So I made this LED matrix that comes to life when people leave the room.
For future iteration, I would like to imagine more ways for a person to interact with Living Pixels, for example, what if it can recognize a person’s facial expression and react to people’s mood or being influenced by how a person is treating it. I also would like to think of different ways for Living Pixels to express it’s emotion than animation.
This is a combination weather station and reminder. We can all check the weather on our phones, but sometimes and especially when one is trying to get out the door all that is needed is a quick way to the weather conditions. This weather station supplies a quick visual of current conditions: sunny, cloudy, rainy or snowing, the temperature and a brief note. Additionally, a motion-activated sensor triggers a scrolling display that offers up a helpful message: “mask + keys”
circuit on breadboard and tripler (in progress and showing only 2 of 3 alphanumeric displays)
Early Sketch
Circuit Diagram
The PIR at the top toggles the “mask + keys” text. The neopixels light based on weather conditions from Weather Underground. The 7 segment displays forecasted high temperature for the day. The small OLED displays a short message from Remember the Milk.
Next Steps
Currently, the alphanumeric display shows just one message embedded in the code. Creating an IoT feed for this would allow the end user to change that message. Also, the current temperature reading is sent once a day by Weather Underground and is the forecast high for the day. Locating an IoT feed that could update the temperature every three hours would be more useful.
I wanted to make this project because I love to bake and my favorite thing to make are chocolate chip cookies. I have made them so many times, that I can do it without thinking and since quarantine started, I have been baking so much more often. I thought that it would be a fun project to be able to combine what I love but also track that bad habit. I have the biggest sweet tooth, that I literally ate an entire package of Oreos in the 2 days that I had before shooting the video.
As for the form, it is totally dependant on the cookie jar that you use. I thought about getting one from a thrift store, but ultimately decided against it because I wanted a clean look. I chose this metal cookie jar because it has a recessed lid in which I was able to hid the electronics. It was the biggest one that I could find at a reasonable price, and it was still a tight fit. I was also interested in having a tracker on the jar itself, but I went with an email alert because I liked that way of collecting data more.
So for future improvements, I would love to solder the parts together instead of using a solderless breadboard. Also, it was the first time that I shot video, but in the future I would like to add a narrative and maybe some branding to the product.
This project was influenced by the increase in people working from home due to the pandemic. It is meant to signal that the workday is over and that you can now relax and unwind. With this tutorial, I will be taking you through the steps so that you can also make your own personal cocktail shaker that will turn on exactly at 5 pm, using a nodemcu. This project was inspired by the Crickit Shaker and utilizes the stl files from the Ruiz Brothers.
Through this project, I learned that an important step of any project is thorough planning. During the final assembly, I had to make many adjustments such as making a new button hole and using the previous hole for the power cord. Being able to fit the top on was also another challenge since I had not anticipated the new circuit assembly, I finally able to fit it on by clipping off some parts. I also learned how to video editing through shooting the video that promoted the product.
In the future, I would like to incorporate more color into the project. Since I didn’t have the facilities to spray paint this project, I didn’t want to risk the uneven paint job that would result with acrylic paints.
This is a remote interactive device. Two people each own a device. When your device senses your presence, the other party’s device will light up. In this way we want people to connect with each other. It consists of an ESP8266 board/two LED lights/an infrared ranging module. In the future, it can make some changes in shape and color. At the same time, you can also change the effect of the light to make the light move.
The Bookminder is a meeting countdown bookend that shows you how many minutes you have until your next meeting. The bookend displays the meeting time using data from If This Then That applets that connect your Google calendar to your Adafruit.io feeds. The Bookminder is an alternative to constantly monitoring your screens in your apartment when you are on a break from zoom meetings. Not looking at your screens allows you an actual break and the minute timers are specifically customized to your schedule.
Process:
The materials I used to make the project and the form and circuit construction below.
The form of the bookend was inspired by other bookends I saw on the market that were layered pieces to create a solid form. I designed these layers to include a space for the circuit and the breadboard. Originally, I thought that I would be able to stack the display on the breadboard so I created the bookend with those dimensions in mind, but it ended up not working out that way. Since this is an interesting year, I designed the files and sent them over to the VFL to construct, which they did by cutting out MDF, laser cutting it to include the sections for my board, and attaching it together. I then hand painted it when I brought it home.
For the circuitry, I based my code and my wiring on Becky’s WIFI weather display and got her help on making adjustments to read the countdown on the display as well as got her help with the wiring.
In the future, I will adjust my bookend’s dimensions to include space for the whole breadboard and also include the depth measurements of the wires. Additionally, I would love to be able to construct the bookend myself in the future so I could get the learning experience of building. Also, for a more even paint texture, I would spray paint each layer first, let it dry, and then attach it. I didn’t do that this time since my building isn’t spray paint friendly. Also, now that I’m using the alphanumeric display I could also include additional text as well in the display in the future.
Description and/or storyboard for your project video
My video script:
After finishing the online zoom class and some homework, I got really tired and decided to go to sleep. My cat sneaks into my room and pees on my bed again.
I saw the pee and I looked so upset, this is not the first time she does it. I checked the poop box and food bowl, everything was fine but the kitty just kept peeing on my bed.
I decided to make something to help her adjust her behavior. Then I figured that she only pee in a specific area on my bed.
I started to test the input sensors: smell sensor and the humid sensor won’t work, cuz they only detect after she peed, the motion sensor is too sensitive, the ultrasonic distance sensor is my final pick of the input in my device. Then the output, my kitty doesn’t like the strong smell and weird noise, so I decide to make something either press the air-fresher button or make some noise. Piezo is a good choice because it is easy to test in this situation so far.
When I built the circuit, I wanted to make a cover to make my device look more like a real product.
Work is done. Function presenting. How the lights reflect the status of the device, how it works with different distances, how it triggers the piezo, and what message I receive from it.